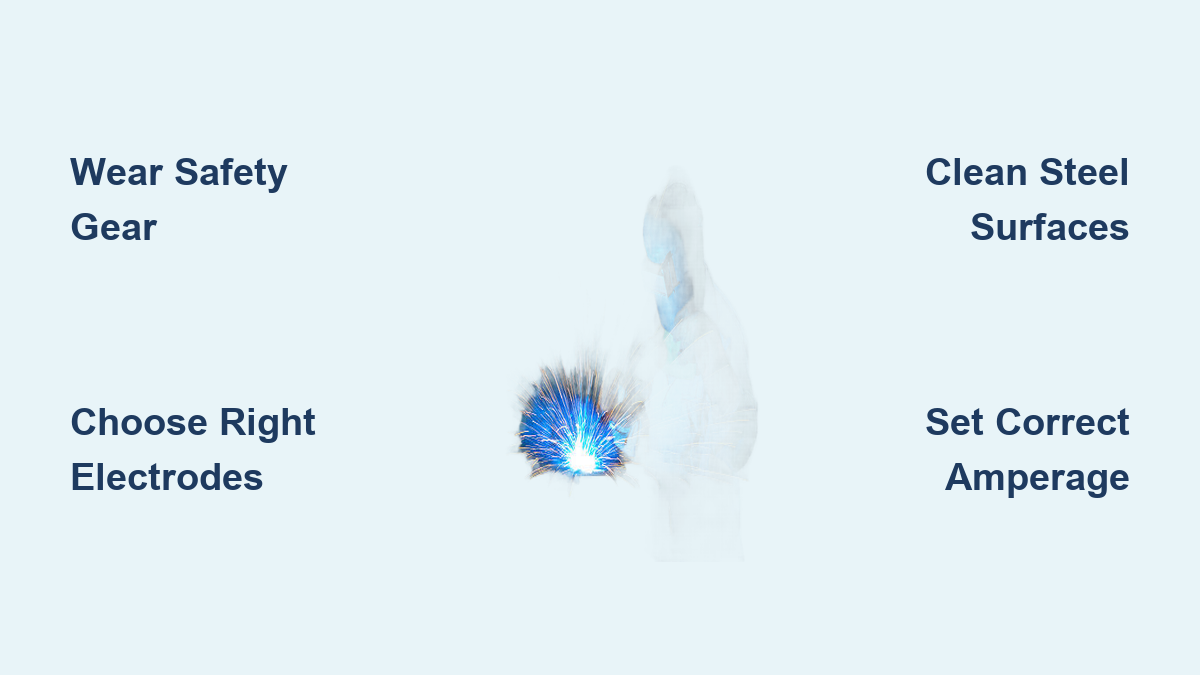
Watching sparks fly as molten metal fuses two steel pieces together creates an almost magical experience for beginners. Arc welding steel remains the backbone of metal fabrication across industries, offering unmatched versatility for projects ranging from repairing farm equipment to building structural frameworks. This process uses electrical current to create an arc exceeding 6,000 degrees Fahrenheit between a consumable electrode and steel base metal, melting both components to form a strong joint as they cool. Learning proper arc welding techniques transforms frustrating sparks into reliable, penetration-rich welds that meet professional standards. By the end of this guide, you’ll understand precisely how to prepare your steel, select the right electrodes, set optimal amperage, and execute clean welds regardless of position.
Critical Safety Measures Before Striking Your First Arc

Skipping proper safety precautions while arc welding steel risks permanent injury from intense ultraviolet radiation, flying spatter, and electrical hazards. Your auto-darkening welding helmet serves as your primary defense, automatically darkening within milliseconds when the arc strikes. Select a helmet with adjustable shade settings between DIN 9-13 to accommodate different amperage levels and electrode types. Fixed-shade helmets force you to lift your head between welds, wasting time and increasing exposure to harmful radiation.
Essential protective gear you must wear:
- Heavy-duty leather welding gloves specifically designed for stick welding (not thinner MIG gloves)
- Flame-resistant cotton or leather welding jacket covering all exposed skin
- Steel-toed boots with leather uppers to protect against falling metal and sparks
- Respiratory protection when welding galvanized steel or painted surfaces
Remove all synthetic clothing that could melt onto your skin from spatter. Clear your work area of flammable materials within a 10-foot radius, and ensure adequate ventilation to prevent accumulation of toxic fumes. Never attempt arc welding without this complete safety ensemble—permanent eye damage can occur from a single unprotected arc strike.
Choosing the Right Electrodes for Your Steel Project
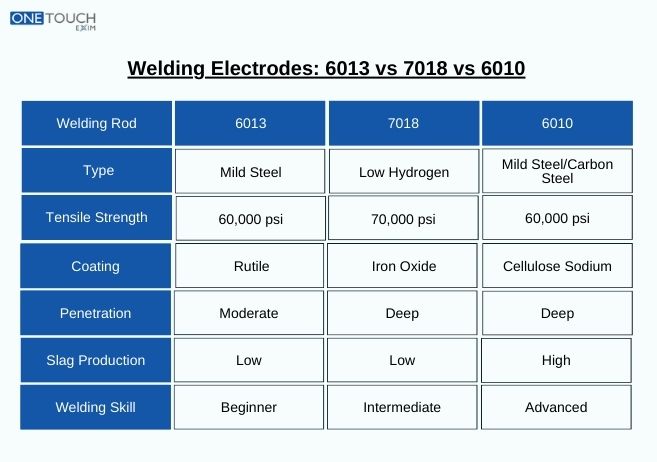
E6013 and E7018 electrodes handle most steel welding applications, but selecting the wrong type creates weak, porous welds that fail under stress. E6013 electrodes feature a high-titania coating that produces a soft, stable arc ideal for beginners and thin steel up to 1/8 inch thick. These electrodes forgive minor technique errors while creating smooth, visually appealing welds perfect for automotive body work and light fabrication.
E7018 low-hydrogen rods deliver superior strength for structural applications and thicker steel. The iron powder in their coating increases deposition rate while the low-hydrogen formula prevents cracking in critical joints. Store E7018 electrodes in a heated oven at 250°F until use—moisture absorption causes hydrogen embrittlement that leads to delayed cracking. For most DIY projects on mild steel, start with 1/8-inch E6013 rods that work well on a 140-amp machine.
Preparing Steel Surfaces for Maximum Weld Penetration
Contaminants like rust, oil, paint, and mill scale create porosity that weakens welds by up to 50%. Proper preparation separates professional results from amateur attempts. Remove all surface contaminants from at least two inches on either side of the joint using an angle grinder with a clean grinding wheel—wire brushes alone can’t eliminate stubborn mill scale.
For steel thicker than 1/4 inch, bevel the edges to a 30-degree angle to create a 60-degree V-groove. This preparation allows the electrode to reach the joint root for complete penetration. Clean the beveled edges thoroughly to remove grinding residue that could introduce impurities into the weld pool. Check for gaps between pieces—clamp them tightly together to prevent burn-through and ensure proper fusion along the entire joint length.
Setting Precise Amperage for Your Electrode and Steel Thickness
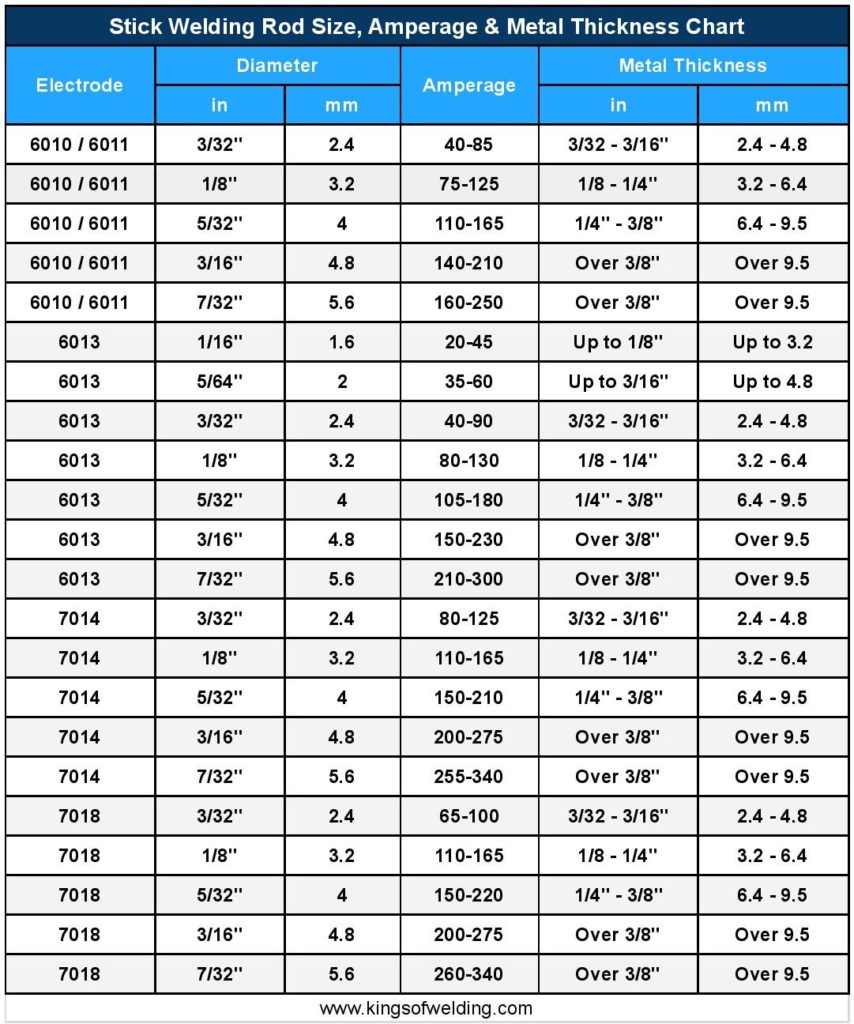
Amperage directly controls penetration depth and weld bead appearance, with incorrect settings causing weak joints or burned-through metal. Calculate your starting amperage by multiplying electrode diameter by 40—110-130 amps for 1/8-inch rods. Adjust based on these visual indicators:
- Insufficient amperage: Erratic popping arc, difficult arc starting, weak penetration
- Excessive amperage: Excessive spatter, electrode overheating, wide uneven beads
- Correct amperage: Smooth humming sound, consistent spatter pattern, even bead shape
Reduce amperage by 10-15% when welding vertically or overhead. For E7018 electrodes on thick steel, increase amperage slightly to properly melt the low-hydrogen coating. Test your settings on scrap metal of the same thickness as your project before starting critical welds.
Executing Proper Arc Welding Technique in Flat Position
Master flat position welding before attempting vertical or overhead joints—it produces the strongest welds with minimal technique adjustments. Position your work at waist height with the joint running horizontally. Hold the electrode at a 70-80 degree angle in the direction of travel and strike the arc with a quick scratching motion like lighting a match.
Maintain an arc length equal to the electrode diameter—approximately 1/8 inch for 1/8-inch rods. Too long creates excessive spatter and poor penetration; too short causes the electrode to stick. Move steadily along the joint at a speed producing a bead 1/3 to 1/2 the electrode diameter wide. Watch the weld pool—it should flow smoothly behind the arc with visible fusion lines at the edges. Listen for a consistent humming sound indicating proper technique.
Troubleshooting Common Welding Defects on Steel
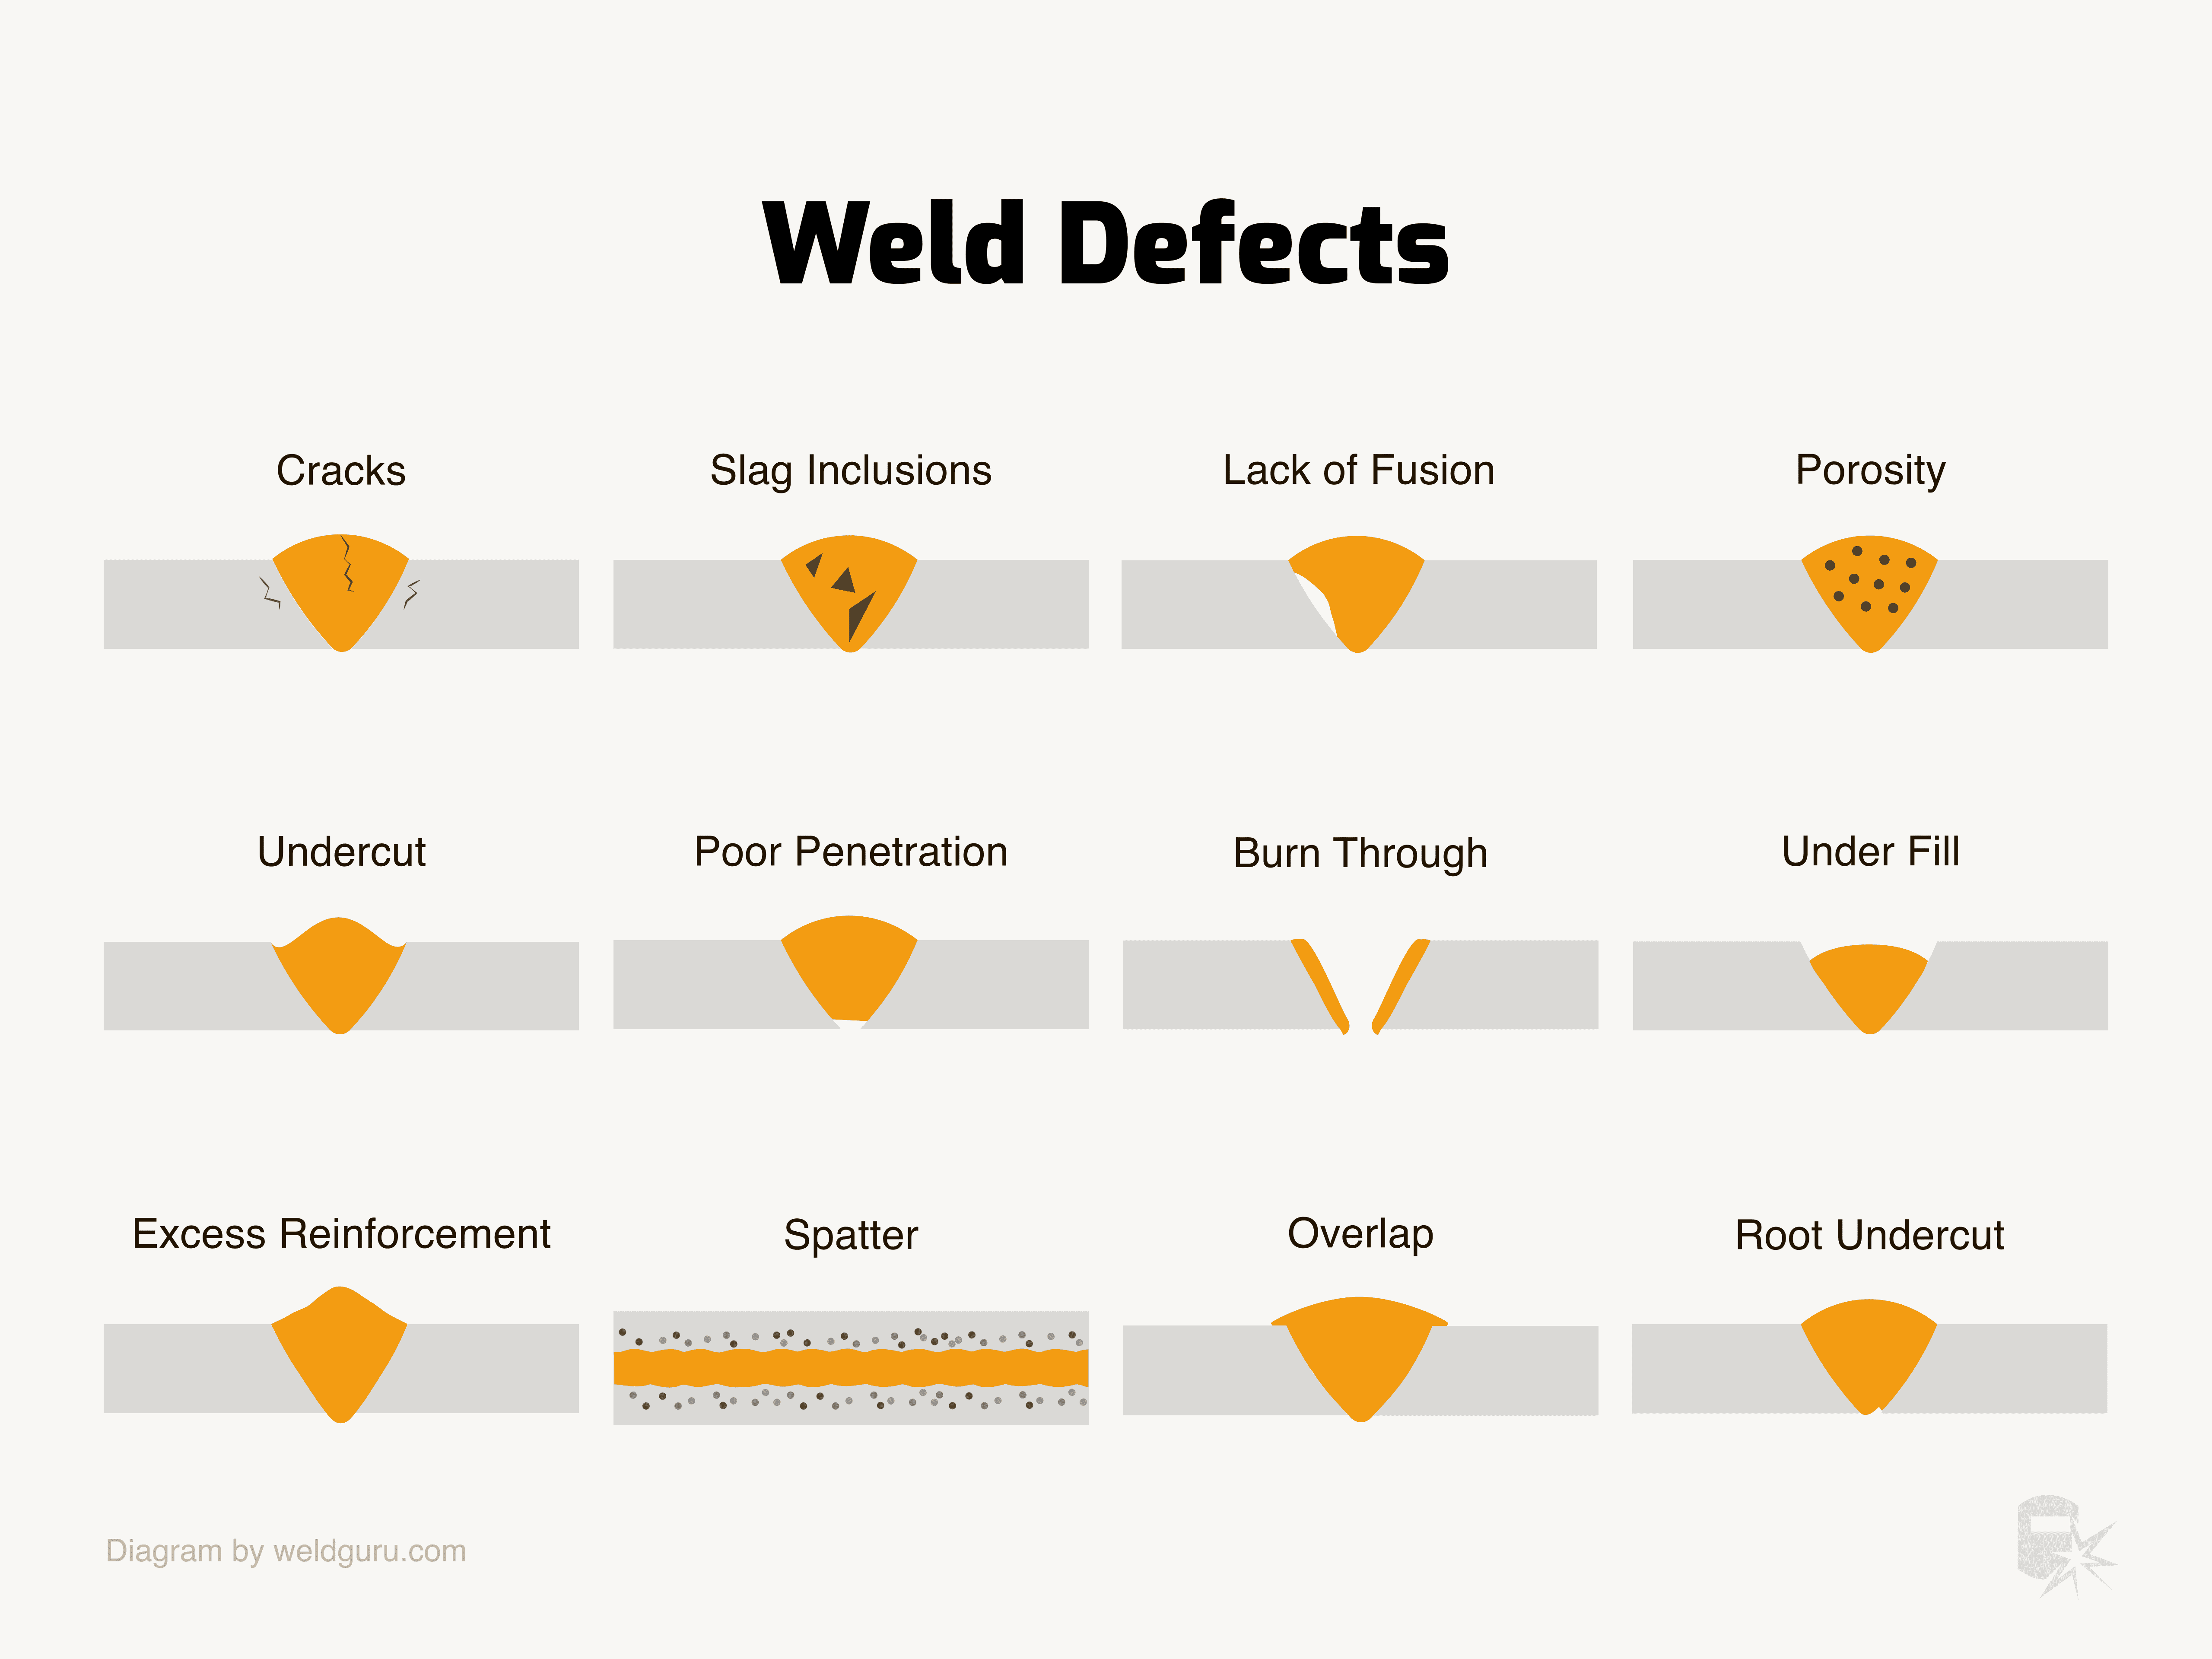
Porosity appears as tiny holes throughout the weld bead and severely weakens the joint. This defect typically results from contaminated base metal, moisture-damaged electrodes, or excessive arc length. Prevent porosity by thoroughly cleaning steel surfaces, storing electrodes properly, and maintaining consistent arc length during welding.
Lack of fusion occurs when weld metal fails to bond properly with the base steel, creating a dangerous weak point. This defect shows as dark lines along the weld edges where metal didn’t melt together. Causes include insufficient heat input, excessive travel speed, or incorrect electrode angle. Fix by slowing travel speed, increasing amperage slightly, and directing the electrode toward the joint edge rather than the center of the weld pool.
Cracks form due to hydrogen contamination, high restraint, or rapid cooling. Prevent cracks by using low-hydrogen E7018 electrodes for critical applications, preheating thick steel sections, and allowing welds to cool slowly by burying in dry sand or covering with insulating ceramic blankets.
Welding Steel in Vertical and Overhead Positions
Vertical welding requires technique adjustments to counteract gravity pulling the molten pool downward. For uphill vertical welds, reduce amperage by 10-15% compared to flat position and use a slight weaving motion with brief pauses at each step to allow solidification. Keep a shorter arc length than in flat position and maintain a travel angle of 45 degrees upward.
Overhead welding demands precise control to prevent the weld pool from falling. Reduce amperage another 5-10% below vertical settings and use the shortest possible arc length. Move steadily but quickly along the joint, keeping the electrode slightly ahead of the molten pool. E6013 electrodes generally perform better overhead than E7018 due to their more controllable slag system. Practice overhead technique on scrap metal before attempting critical welds.
Essential Post-Weld Cleaning and Inspection Process
Slag removal separates professional welds from amateur attempts—leaving slag between passes creates dangerous inclusions that weaken the joint. Chip away slag immediately after welding using a chipping hammer with controlled, precise strikes. Work from the edge inward to avoid gouging the weld metal itself. Follow with a wire brush to remove residual particles before applying additional passes.
Inspect completed welds for these critical quality indicators:
– Uniform ripple pattern across the entire bead length
– Smooth transitions between weld metal and base steel
– Complete fusion at both edges with no visible gaps
– Absence of cracks, porosity, or excessive undercut
For critical structural applications, supplement visual inspection with dye penetrant testing to reveal surface-breaking defects invisible to the naked eye. Address any defects immediately by grinding out the faulty section and rewelding.
Equipment Maintenance Practices That Extend Welding Machine Life
Loose electrical connections cause inconsistent arc performance that beginners often mistake for technique problems. Inspect all cable connections before each use, tightening any that show signs of arcing or overheating. Replace frayed or damaged cables immediately—temporary repairs create dangerous shock hazards.
Store electrodes properly to maintain performance. E7018 rods require a heated storage oven at 250°F; E6013 tolerate room temperature storage but still benefit from sealed containers in humid environments. Never use electrodes with damaged or cracked coatings—these produce poor quality welds regardless of technique.
Clean your welding machine regularly by blowing out internal components with compressed air. Dust accumulation causes overheating and premature component failure. Keep the machine covered when not in use to prevent contamination from workshop debris.
Mastering how to arc weld steel requires deliberate practice focused on one technique element at a time. Start with simple butt joints on scrap metal, progressively advancing to more complex joints as your skills develop. Proper safety preparation, electrode selection, and surface cleaning separate functional welds from truly professional results. Remember that even experienced welders encounter challenges—each project presents new opportunities to refine your arc welding technique. With consistent practice applying these fundamentals, you’ll develop the muscle memory and visual cues needed to produce strong, reliable welds on any steel project.
Leave a Reply