Ever struggled with pre-fabricated metal building kits that limit your design flexibility or leave you with costly connection issues? Weld-up metal buildings offer a superior alternative, giving you complete control over your structure’s dimensions, layout, and quality. Unlike bolt-together systems that rely on pre-punched holes, weld-up construction creates seamless, stronger connections while often reducing overall material costs. This guide reveals exactly how to build a weld-up metal building from foundation to finished structure, whether you’re creating a 30×40 workshop or a custom agricultural facility. You’ll learn the critical planning steps most DIYers skip, proper steel selection techniques, and professional welding practices that ensure decades of reliable service.
When you choose weld-up construction, you’re investing in a structure that adapts precisely to your property’s unique requirements rather than forcing you to conform to a manufacturer’s standard dimensions. The initial planning phase determines 80% of your project’s success—get this wrong and you’ll face costly modifications mid-construction. Most builders underestimate the importance of soil testing and local code requirements, leading to foundation failures or rejected permits. By following this systematic approach, you’ll avoid these pitfalls and create a building that withstands your region’s specific wind and snow loads while meeting all regulatory requirements.
How to Plan Your Metal Building Project Correctly
Before you purchase steel or touch a welding torch, thorough planning prevents expensive mistakes that could compromise your entire structure. Most DIY metal building failures stem from inadequate planning rather than construction errors.
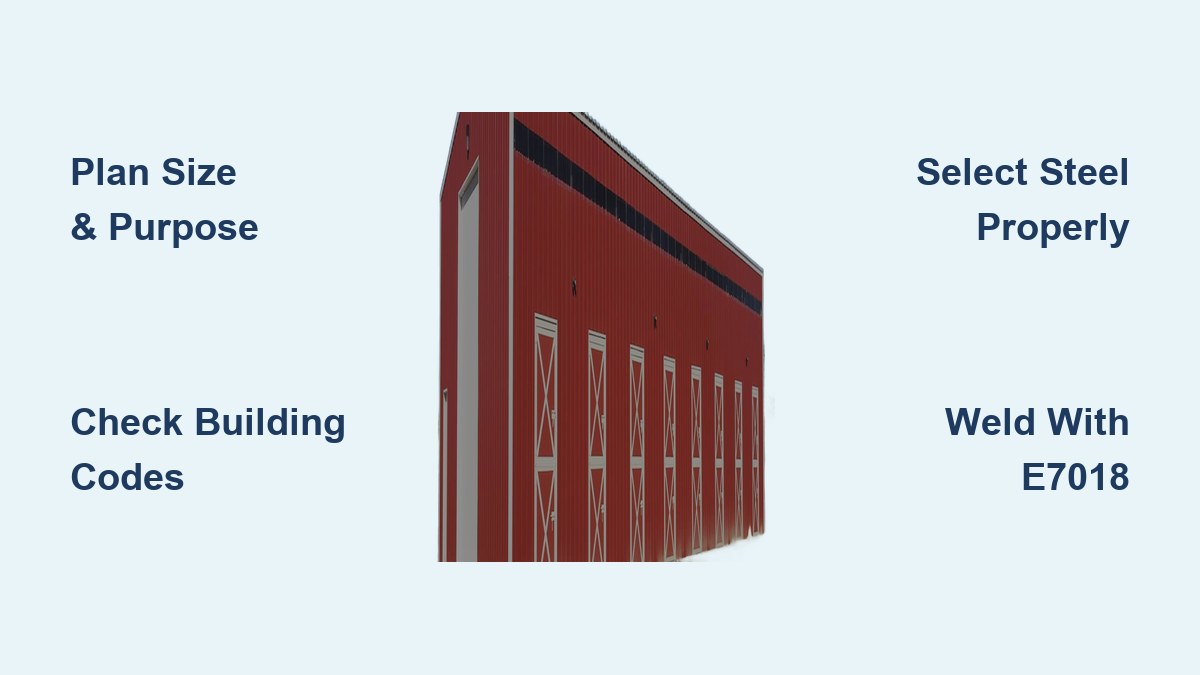
Determine Your Building Size and Purpose Before Cutting Steel
Your building’s intended use dictates every subsequent decision in the construction process. A simple equipment storage shed requires different specifications than a heated workshop where you’ll spend hours working. Consider not just your immediate needs but how your requirements might evolve over the next twenty years—adding capacity later typically costs more than building it into the original design.
For most applications, standard bay spacing of 20-25 feet provides adequate structural support while keeping material sizes manageable. Clear span designs (structures without interior columns) offer maximum usable interior space but require larger framing members. For buildings under 40 feet wide, clear span construction remains practical; wider structures typically benefit from interior support columns despite the loss of open floor space.
Verify Local Building Codes Before Pouring Concrete
Contact your local building department early to understand specific requirements. Most areas require permits for metal buildings exceeding 200 square feet and inspections at various construction stages. Snow load specifications vary dramatically—from 20 pounds per square foot in mild climates to 70+ pounds in northern regions. Wind load requirements similarly increase in hurricane-prone coastal areas.
Critical mistake to avoid: Assuming your local requirements match national standards. Many regions have adopted the International Building Code with local amendments that significantly impact your design. Your initial plans must account for these factors—retrofitting for higher load requirements proves far more expensive than building to correct specifications from the start.
Selecting the Right Steel for Your Weld-Up Building
Material selection directly impacts both initial project cost and long-term structural performance. Understanding steel specifications ensures your building stands the test of time without unnecessary expense.
Choose Proper Steel Types for Structural Integrity
For primary structural members, hot-rolled wide-flange beams (designated W8x18, etc.) provide excellent strength-to-weight ratios. For columns and lightweight framing, ASTM A500 Grade B square or rectangular tubing offers versatility with yield strengths around 42,000-46,000 psi. Mill scale—the bluish oxide layer from hot rolling—requires removal before painting but doesn’t affect structural performance.
When comparing steel options:
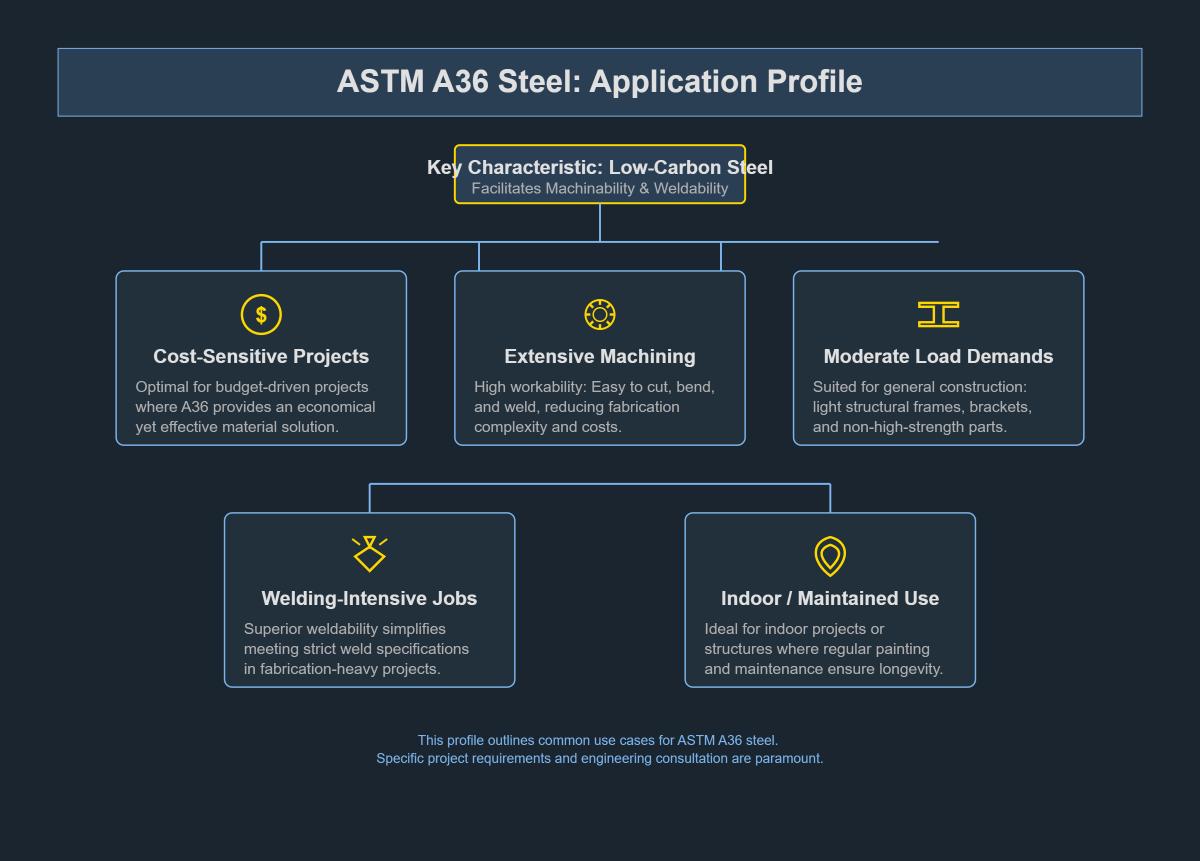
– ASTM A36: Standard structural steel (36,000 psi yield strength)
– ASTM A572 Grade 50: Higher strength option (50,000 psi yield strength)
– Primer-coated steel: Offers corrosion protection but may interfere with welding quality
Calculate Material Quantities to Avoid Costly Delays
Accurate material takeoffs prevent project stoppages. List every structural member by size, length, and quantity, adding 10-15% for waste and cutting errors. For reference, a typical 30×40 building with 14-foot walls requires approximately 8-12 tons of structural steel.
Weight estimates help with delivery planning—knowing total steel tonnage allows you to arrange appropriate handling equipment. A W8x18 beam weighs 18 pounds per linear foot; a 20-foot piece weighs 360 pounds. Reputable suppliers provide mill test reports documenting mechanical properties—never skip this verification step.
Foundation Requirements That Prevent Structural Failure

The foundation system transfers building loads to the underlying soil, providing stability against movement. Proper foundation design accounts for soil conditions, building loads, and frost depth requirements.
Soil Assessment Methods Every Builder Must Know
Soil bearing capacity determines required foundation size. Typical clay soils support 2,000-4,000 pounds per square foot, while sandy soils may support 1,500-3,000 pounds. Weak or variable soils require larger footings or soil improvement measures.
For most weld-up buildings, continuous perimeter footings work well, distributing loads along the building perimeter. Frost footings—extending below the local frost line—prevent heaving cycles in cold climates. In warm regions without frost concerns, shallow footings may suffice, though minimum depths of 12 inches provide stability against wind uplift.
Anchor Bolt Installation That Secures Your Structure
Anchor bolts secure the steel structure to the foundation, resisting uplift forces from wind. Common practice embeds anchor bolts 6-8 inches into concrete, with 4-6 inches of exposed thread. Bolt diameter typically matches column base plate thickness—five-eighths to three-quarter inch for most buildings.
Pro tip: Use template boards to position bolts before concrete placement, ensuring correct spacing and alignment. Most templates use the same bolt circle pattern as column base plates, with slotted holes providing adjustment for minor positioning errors.
Welding Techniques That Create Structural Strength
Welding transforms separate steel pieces into continuous structural members, creating connections that often exceed the strength of the base metal. Understanding welding processes ensures your building performs safely under load.
Select the Right Welding Process for Field Conditions
Shielded Metal Arc Welding (SMAW)—stick welding—remains the most common process for field construction. It works well outdoors and in windy conditions, handles contaminated surfaces better than other processes, and requires relatively inexpensive equipment.
For production welding, Gas Metal Arc Welding (GMAW or MIG) offers higher productivity but requires shielding gas that wind disrupts. Flux-cored wire (FCAW) addresses wind sensitivity by incorporating flux within the wire, making it more suitable for field conditions. Most weld-up building construction relies on stick or flux-cored welding for primary structural connections.
Essential Welding Practices for Structural Integrity
Quality structural welding requires consistent technique and proper electrode selection. Strike the arc cleanly, maintaining a consistent arc length approximately equal to the electrode diameter. For flat-position fillet welds, a 45-degree torch angle with 10-15 degrees of tilt toward travel produces optimal bead shape.
E7018 low-hydrogen electrodes work well for most structural steel applications, producing strong, crack-resistant welds. Keep electrodes dry—moist electrodes produce porosity and reduced strength. Multi-pass welding builds up weld size through successive layers, with each pass cleaned before applying the next.
Erection Sequence That Prevents Collapse During Construction
With materials prepared and welding skills ready, erection transforms a collection of steel pieces into a complete structural system. Organized erection follows a logical sequence to create stable assembly progressively.
Column Installation That Ensures Building Squareness
Begin by checking foundation elevations and anchor bolt positions. Position columns over anchor bolts, using temporary bracing to hold them plumb and stable. Install corner columns first, establishing reference lines for remaining work.
Check plumbness with a spirit level or plumb bob, adjusting temporary supports until columns stand within tolerance—typically one-quarter inch in 10 feet. Tighten anchor bolt nuts snug-tight before final alignment checks. For critical applications, specified torque values ensure consistent preload in anchor bolts.
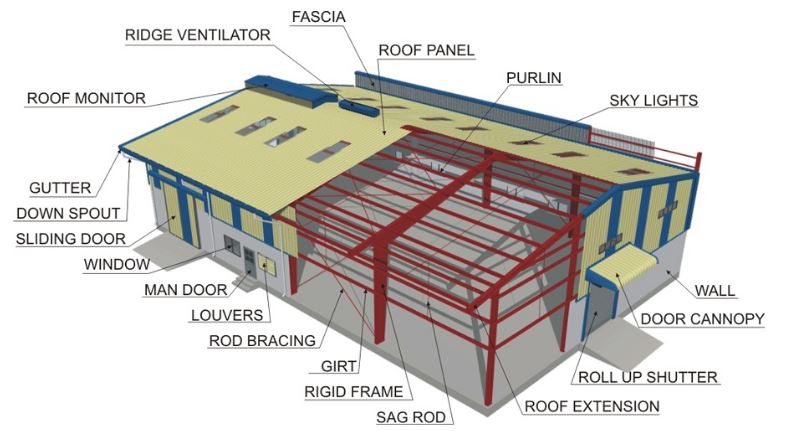
Roof System Installation That Handles Weather Loads
Rafters span between columns, creating the roof structure that distributes snow and wind loads. Install rafters systematically, beginning at one end and working toward the opposite. Connect rafter ends to column top plates using specified connections.
Temporary bracing maintains rafter alignment during erection—permanent bracing connections should be completed as erection progresses to create a stable structural system. Check ridge alignment and eave elevations as work proceeds, correcting deviations before they compound.
Panel Installation That Creates Weather-Tight Protection
With the structural frame complete, panel installation creates the weather-tight envelope that protects contents and completes the building’s appearance.
Roof Panel Installation That Prevents Leaks
Begin roof installation at one eave, working toward the opposite side. Position the first panel with proper overhang beyond the eave strut—typically 1-2 inches for water runoff. Secure panels using self-drilling screws with washers and sealing gaskets.
Overlap adjacent panels according to profile requirements—ribbed panels overlap one full rib with sealant tape applied in the overlap. Ridge caps and eave trim complete the roof system, with appropriate sealant ensuring weather-tight transitions. Install insulation beneath roof panels for temperature control and condensation management.
Wall Panel Installation That Maintains Structural Integrity
Wall panel installation follows similar principles, beginning at corners and working across the wall. Maintain panel alignment vertically and horizontally, checking frequently to catch errors. Panels should align with girt locations, with fasteners penetrating girt flanges for secure attachment.
Inside and outside corner trim, jamb trim around openings, and base trim at the foundation create finished appearance while covering panel edges. Sealant applied behind trim pieces prevents water infiltration at transition points.
Final Note: Building a weld-up metal structure requires careful planning, quality materials, and skilled execution. By following this systematic approach—from verifying local codes to proper welding techniques—you’ll create a durable building that adapts precisely to your needs. Remember that thorough planning prevents 80% of construction problems, and quality welding creates connections stronger than bolted alternatives. With proper execution, your weld-up metal building will provide decades of reliable service with minimal maintenance requirements.
Leave a Reply