Welding on a fuel tank represents one of the most hazardous tasks in automotive repair and metal fabrication. Even minuscule amounts of residual gasoline or diesel can transform a routine repair into a catastrophic explosion when exposed to welding temperatures. The invisible vapors trapped within tank walls and seams pose the greatest danger—they can ignite instantly when heated, causing violent explosions that result in severe burns, equipment destruction, and potentially fatal injuries. This comprehensive guide provides the exact steps professional welders follow to safely prepare fuel tanks for welding, ensuring you eliminate every trace of flammable material before striking your first arc. By following these procedures meticulously, you’ll protect yourself while creating strong, clean welds that will last.
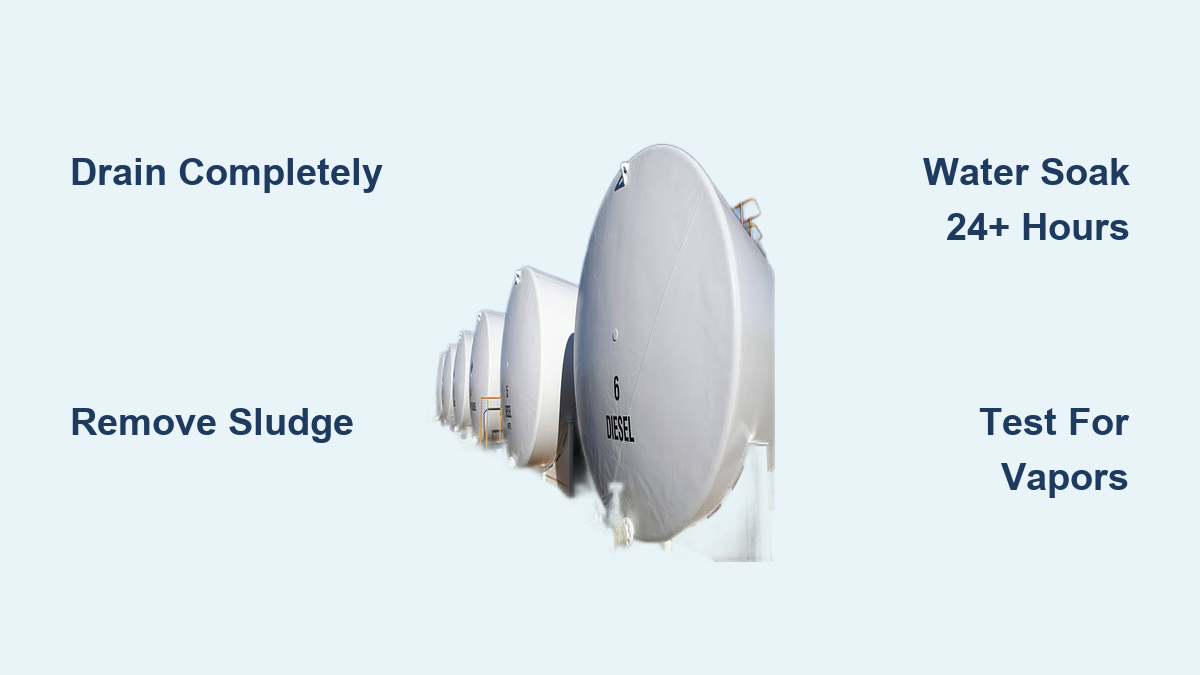
Drain All Liquid Fuel Completely
Begin your cleaning process by removing every drop of visible fuel from the tank. Disconnect the vehicle battery to eliminate potential ignition sources and work in a well-ventilated outdoor area away from sparks, flames, or electrical equipment. Position the vehicle on level ground and locate the fuel tank’s drain plug. For tanks without drain plugs—which is common on modern vehicles—you’ll need to siphon the fuel using an approved electric transfer pump designed for flammable liquids.
Place a certified fuel container beneath the drain point and open the plug slowly, allowing the fuel to drain completely over 15-20 minutes to ensure all sediment settles out. If siphoning, insert the pump tube through the filler neck and operate according to the manufacturer’s instructions. Never use mouth suction for siphoning—fuel exposure can cause chemical pneumonia and serious health complications. After draining, tilt the tank in multiple directions to remove fuel trapped in low spots and seams.
How to Verify Complete Drainage
Confirm the tank is fully drained by inserting a clean, dry shop rag through the filler neck and wiping the bottom interior. Examine the rag for any fuel residue or odor. Repeat the wiping process from multiple angles, paying special attention to corners and seams where fuel commonly pools. If you detect any fuel on the rag, repeat the draining process. Proper drainage typically takes 30-45 minutes to ensure no liquid remains before proceeding to the next cleaning stage.
Remove Residual Sludge and Varnish Buildup

Even after complete draining, fuel tanks retain dangerous sludge deposits and varnish-like residues that continue releasing flammable vapors. These residues accumulate in tank corners and along seams where liquid fuel pools during normal operation. To eliminate them, add one quart of fresh gasoline to the empty tank, secure the filler cap tightly, and shake the tank vigorously for 5-7 minutes. This agitation loosens stubborn deposits from all interior surfaces.
Pour the contaminated fuel into your approved container and repeat the process with fresh fuel two additional times. The final rinse should come out significantly cleaner than the first. During this process, rotate the tank to ensure the cleaning fuel contacts every interior surface, especially the bottom seams where sludge accumulates most heavily. Proper sludge removal typically requires 20-30 minutes of active cleaning time.
What to Look for During Residue Removal
Check each rinse cycle for decreasing levels of contamination. The first rinse will appear dark with heavy sediment, while the final rinse should show only slight discoloration. If your final rinse remains heavily contaminated after three cycles, the tank likely contains excessive sludge that requires more aggressive cleaning methods. Never proceed to welding if visible residue remains after the final rinse—this indicates dangerous fuel deposits still present in the tank.
Eliminate Fuel Vapors with Water Soaking
The most critical yet often overlooked step is complete vapor elimination. Fuel molecules embed in tank walls and continue releasing vapors long after liquid removal. Fill the tank completely with water until it overflows from the filler neck. Water’s density displaces vapors from all interior surfaces and dissolves residual fuel molecules from the metal.
Seal all openings except the filler neck and let the tank soak for a minimum of 24 hours. During this time, water penetrates microscopic pores in the metal where vapors hide. For maximum safety, repeat this water soak process a second time. This double-soaking technique used by professional shops ensures virtually complete vapor removal. Adding one cup of baking soda per five gallons of water creates a mild alkaline solution that neutralizes acidic residues and helps break down stubborn fuel deposits.
How Long to Soak Different Tank Types
Gasoline tanks typically require 24 hours of soaking per cycle, while diesel tanks—known for heavier residue buildup—need 36-48 hours per soak. Plastic fuel tanks absorb fuel vapors more readily than metal tanks and require extended soaking times. Aluminum tanks benefit from the baking soda solution as it helps prevent corrosion during the soaking process. Always err on the side of longer soaking times when working with tanks that previously contained diesel or ethanol-blended fuels.
Dry the Tank Thoroughly Before Welding
Any moisture remaining inside the tank will instantly convert to steam during welding, creating dangerous pressure buildup that can rupture your welds or cause explosive steam bursts. After draining the soaking water, position the tank with the filler neck facing downward to allow complete drainage. Use compressed air at 40-60 PSI to blow through all openings for 30-45 minutes, focusing on seams and corners where water collects.
For absolute dryness, place the tank in a warm, dry area with circulating air for 48 hours. Direct sunlight accelerates drying but avoid extreme heat that might warp plastic components. Before welding, insert a dry paper towel through the filler neck and wipe all accessible interior surfaces—any moisture will leave a visible damp spot. Complete drying typically takes 24-72 hours depending on ambient conditions and tank material.
Accelerated Drying Techniques
When time is limited, professional shops use several safe drying methods. A heat gun on low setting (below 150°F) directed at tank walls speeds evaporation without creating ignition risks. Some fabricators place tanks in temperature-controlled ovens set to 120-140°F for 4-6 hours. Never use open flames, propane heaters, or high-heat sources for drying—these create immediate ignition hazards near any residual vapors.
Verify Tank Safety with Vapor Testing
Never assume your cleaning process was successful—always verify with proper testing. A combustible gas indicator (CGI) is the only reliable method to confirm vapor-free conditions. Seal all tank openings except one, insert the CGI probe, and monitor readings for at least two minutes. A reading of 0% LEL (Lower Explosive Limit) indicates safe conditions.
If you don’t have access to professional testing equipment, perform a cautious “sniff test” by carefully smelling near the filler neck from a safe distance. Any detectable fuel odor means dangerous vapors remain. However, remember that human smell cannot detect all hazardous vapor concentrations—this test alone is insufficient for safety verification.
Interpreting Vapor Test Results
CGI readings above 10% LEL require repeating the cleaning process. Readings between 0-10% indicate trace vapors that might ignite under welding heat. If your test shows any positive reading, perform another complete water soak cycle followed by thorough drying. Professional standards require two consecutive zero readings before welding proceeds. Document your test results as part of your safety protocol.
Prepare Your Welding Environment
With a verified-clean tank, focus on creating a safe welding environment. Clear a 10-foot radius around your work area of all flammable materials including rags, solvents, and wood products. Position a Class B fire extinguisher within immediate reach—never more than arm’s length from your welding position.
Ensure proper grounding by attaching your welding ground clamp directly to the tank body, not to a separate workbench. Check all cable connections for damage and ensure they’re free of grease or fuel contamination. Wear full protective gear including flame-resistant clothing, welding helmet with appropriate shade, and safety glasses underneath your helmet.
Critical Pre-Weld Safety Checks
Run through this essential checklist before striking your first arc: Is the tank completely odor-free? Have you verified with a combustible gas indicator? Is your work area free of flammables? Is your fire extinguisher fully charged and accessible? Are all electrical connections secure and clean? Is your protective gear properly worn? If you answer “no” to any question, stop immediately and address the issue.
When to Seek Professional Help
Certain fuel tank conditions warrant professional intervention. Tanks that previously contained diesel fuel, jet fuel, or specialized racing fuels require industrial-strength cleaning methods beyond typical DIY capabilities. Severely corroded tanks or those with internal baffles present additional cleaning challenges that increase risk. Large commercial tanks or those with complex geometries demand specialized equipment and expertise.
If you’re uncertain about any step in the cleaning process, if vapor tests show inconsistent results, or if you lack proper safety equipment, contact a certified welding shop. The modest cost of professional service pales in comparison to potential medical bills or equipment damage from a fuel tank explosion.
Cleaning a fuel tank before welding demands patience, precision, and unwavering attention to safety protocols. Rushing through these steps has caused countless preventable accidents in workshops worldwide. By methodically following this guide—from complete drainage through vapor verification—you transform a potentially deadly task into a safe, successful repair. Remember that proper fuel tank preparation protects not only your physical safety but also ensures high-quality, durable welds that will withstand the test of time. When working with fuel systems, thoroughness isn’t just recommended—it’s absolutely essential for survival.
Leave a Reply