Your MIG welder’s wire liner is the unsung hero of every weld you make. This small component guides filler metal from the drive rolls through the entire length of your welding gun, directly impacting arc stability, weld quality, and consumable costs. Yet it’s one of the most neglected parts in most welding shops. When the liner becomes clogged with metal shavings, dust, and spatter residue, wire feeding becomes inconsistent, burnbacks increase, and you may find yourself replacing contact tips far more often than necessary. Learning how to properly clean a MIG welder liner—and recognizing when cleaning isn’t enough—will save you money on consumables while delivering more consistent weld results.
The good news is that liner maintenance doesn’t require expensive equipment or specialized skills. With basic tools, proper technique, and consistent practices, you can dramatically extend your liner’s service life and improve your overall welding performance. This guide walks you through everything you need to know, from recognizing when cleaning is needed to implementing preventive practices that keep your liner functioning optimally for months rather than weeks.
Why Liner Cleaning Affects Weld Quality
The wire liner creates the pathway your filler metal travels on its journey from the spool to the arc. Every inch of that journey depends on a smooth, unobstructed bore for consistent wire feed speed and proper electrical contact. When contamination enters this pathway, the consequences cascade throughout your entire welding operation.
Metal shavings from wire-on-liner contact accumulate progressively within the liner bore. Each pass of the wire pushes more particles deeper into the liner, where they compress against the walls and progressively restrict the available space. As the restriction grows, your drive motor works harder to push wire through, increasing the tension on the filler metal and creating feeding inconsistencies that translate directly to unstable arcs and irregular weld beads.
Contamination also disrupts the electrical continuity that your weld depends on. The current that creates your arc travels through the wire itself, but it requires consistent contact with surrounding components to maintain stable flow. When debris accumulates between the wire and liner walls, micro-discharges occur—tiny sparks that damage both the wire coating and the liner surface while creating the conditions for burnback incidents. These burnbacks melt wire at the contact tip, creating obstructions that require torch disassembly to clear.
Beyond the immediate feeding problems, a neglected liner accelerates wear on every other component in your torch system. The increased feeding force required to push wire through a clogged liner accelerates drive roll wear, while the inconsistent wire path causes irregular contact tip orifice wear. Your diffuser experiences more frequent burnbacks, and even your power pin connections suffer from the increased electrical resistance that contaminated systems create.
Recognizing Liner Problems Before They Escalate

Identifying liner issues early prevents the cascading failures that turn simple maintenance into emergency repairs. Learning to recognize the warning signs allows you to address problems while cleaning is still effective rather than waiting until replacement becomes your only option.
Inconsistent wire feed represents the most obvious indicator of liner problems. When your previously reliable feeder suddenly produces hesitation, stuttering, or variable feed speed, the liner is often the culprit. You might notice the wire feeding normally at first but slowing or stopping after a few seconds of welding. Alternatively, the feeder motor might appear to be working harder than normal, drawing more current or making more noise as it struggles to push wire through a restricted path.
Burnback incidents—where wire sticks to and melts at the contact tip—frequently indicate liner problems. While occasional burnbacks can result from improper parameter settings or worn contact tips, frequent burnbacks that occur even with proper settings often trace back to feeding inconsistencies caused by liner restrictions. The wire slows or hesitates within the liner, arriving at the contact tip irregularly, and the inconsistent stick-out distance creates the conditions for the wire to melt back into the orifice.
Visual inspection during torch disassembly reveals obvious contamination. When you remove the contact tip for replacement or inspection, look directly into the liner bore. You should see a clean, smooth interior surface. If you notice dark discoloration, visible debris accumulation, or any narrowing of the bore compared to a new liner, cleaning is needed. Metal shavings from wire shaving appear as fine metallic dust, while accumulated spatter and contaminants show as dark, sometimes sticky residue.
The pull test provides objective diagnostic data about liner condition. Attach a tension scale or fish scale to the wire and pull steadily through the entire feed system. A healthy system with a clean liner typically requires 8 to 20 pounds of force depending on wire size and gun length. If you cannot pull the wire through easily by hand, or if the required force has increased significantly since your last measurement, the liner likely needs attention.
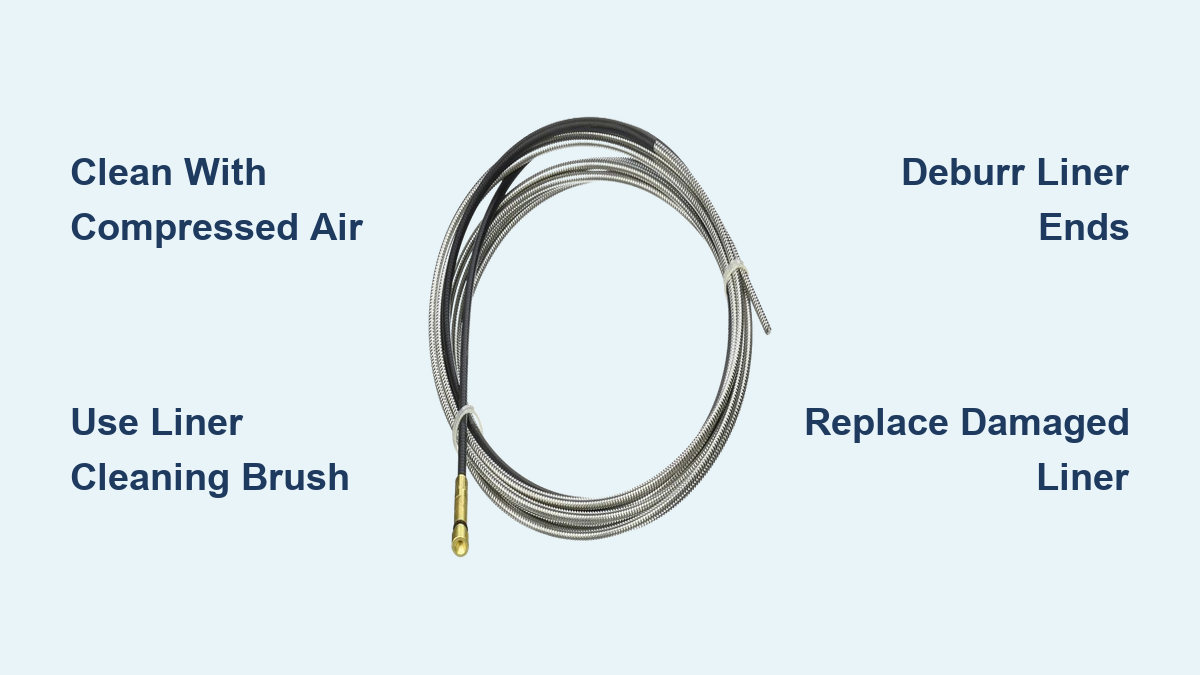
Gathering Your Cleaning Supplies

Proper preparation makes liner cleaning quicker and more effective. Before you begin, gather the essential tools and materials that enable thorough cleaning without damaging your equipment.
Compressed air is the primary cleaning medium for MIG liner maintenance. A clean, dry air supply with reasonable pressure—typically 80 to 120 PSI—effectively dislodges loose debris from within the liner bore. Ensure your air supply is filtered and moisture-free, as blowing wet or oily air through a liner introduces new contamination. If your shop air system lacks filtration, use a dedicated portable compressor with a clean tank or connect a filter-dryer to your air line.
A proper liner cleaning brush removes stubborn residue that compressed air alone cannot dislodge. These brushes are specifically designed with bristles that match liner bore diameters, allowing you to scrub the interior surfaces without scratching or damaging the liner material. Brushes designed for standard steel liners differ from those made for aluminum-compatible liners, so select the appropriate type for your application. Having brushes in multiple sizes accommodates different liner diameters across your equipment.
Deburring tools and fine-grit sandpaper prepare freshly cut liner ends for installation. After any trimming operation, burrs and sharp edges remain on the cut surfaces. These imperfections catch on passing wire, causing the very shaving and feeding problems you’re trying to prevent. A deburring tool removes these burrs cleanly, while 400-grit or finer sandpaper smooths any remaining roughness. Always verify smoothness by running your finger carefully around both the interior and exterior of the cut end.
Cleaning solvents address stubborn contamination that neither air nor brushing can remove. Isopropyl alcohol works well for general residue removal and evaporates quickly without leaving films. For heavy contamination, mild industrial solvents designed for welding equipment may be appropriate. Always verify solvent compatibility with your liner material—some solvents that are safe for steel liners can damage Teflon or composite liners used for aluminum applications.
Personal protective equipment protects you during the cleaning process. Safety glasses shield your eyes from debris that compressed air may dislodge. Work gloves protect your hands from sharp liner edges and metal shavings. Depending on your shop’s ventilation and the solvents you use, respiratory protection may also be appropriate.
Preparing the System for Cleaning
Safety preparation and proper system disassembly ensure effective cleaning without equipment damage or personal injury. Taking time to prepare correctly prevents the rushed errors that create new problems while addressing existing ones.
Disconnect your welder from all power sources before beginning any maintenance. This means unplugging from electrical service, disconnecting from cylinder regulators, and allowing any capacitors to discharge if your machine features stored energy systems. Lockout-tagout procedures may be required in some workplace environments. The goal is absolute confidence that the system cannot activate during maintenance.
Relieve any residual pressure in your gas supply system, even though gas doesn’t flow through the liner itself. Closing cylinder valves and bleeding pressure from downstream regulators prevents accidental gas discharge during maintenance and eliminates the risk of gas flow if someone else activates the system while you’re working. This step takes seconds but prevents potential hazards.
Allow the welding torch to cool completely before handling. While liner maintenance doesn’t directly involve hot components, working near recently-used equipment risks burns and creates discomfort that leads to rushed work. A cooled torch also makes handling more precise and reduces the risk of damaging components through thermal shock during cleaning.
Disassemble the torch systematically, keeping track of component order and orientation. Begin by removing the contact tip, noting whether it threads into a diffuser or connects through some other interface. Set the contact tip aside for inspection—you may find it needs replacement coincident with liner cleaning. If your system uses a neck liner or jump liner, note how these components interface with the main liner and document their arrangement with photos if helpful.
Extract the liner carefully, noting how it was positioned within the system. Floating liners simply pull out of the cable assembly, while fixed liners may require loosening a set screw before removal. As you remove the liner, observe its condition visually and note any obvious problems—kinks, crushing, visible wear, or contamination buildup that will guide your cleaning approach.
The Compressed Air Cleaning Process
With the liner removed and your supplies ready, the actual cleaning process begins. Compressed air cleaning removes loose debris and prepares the liner for more thorough attention if needed.
Support the liner during cleaning to prevent damage from handling. Lay it on a clean, flat surface where it can lie straight without kinking or bending sharply. Holding the liner in loops or coils during cleaning creates the very sharp bends that damage liner bores, so work with the liner fully extended whenever possible.
Blow compressed air through the liner in short, controlled bursts rather than continuous streams. Short bursts of 2 to 3 seconds each dislodge debris effectively while minimizing the heat buildup that can occur with continuous high-pressure air. Work from both ends if possible, blowing toward a collection point where debris can be captured or swept away. Repeat the blowing process multiple times, with brief pauses between bursts to allow dislodged material to exit.
If compressed air alone doesn’t clear the liner, introduce the appropriate cleaning brush. Feed the brush through the liner bore slowly and steadily, rotating it as you push to ensure the bristles contact all interior surfaces. Multiple passes with the brush, followed by additional compressed air bursts, remove accumulated residue that air alone cannot shift. For heavily contaminated liners, you may need to repeat the brush-air cycle several times.
Inspect the liner after cleaning by looking directly through the bore from both ends. You should see a clean, uniform surface with no visible debris or discoloration. Run your gloved finger carefully around the interior surface near each end to detect any remaining roughness or residue that visual inspection might miss. If contamination remains, repeat the cleaning process until the liner is genuinely clean.
Wipe the exterior of the liner clean with a rag dampened with isopropyl alcohol or appropriate solvent. This step removes contamination from the outside surface that could re-enter the bore during handling or migrate into connection points during reassembly. A clean exterior also makes it easier to spot problems during future inspections.
Trimming and Deburring Liner Ends
After cleaning, any liner that has been cut or shows burrs at its ends requires proper finishing before reinstallation. This step prevents the feeding problems that sharp edges and rough surfaces create.
Examine both ends of the liner carefully under good lighting. Even liners that haven’t been intentionally trimmed during this maintenance cycle may have developed burrs, raised edges, or deformation from previous handling. These imperfections, if not addressed, will catch on passing wire and cause the shaving and feeding problems you’re trying to prevent.
Use a sharp cutting tool designed for the liner material to make any necessary trim cuts. A rotary tubing cutter or sharp utility knife works for steel liners, while composite liners for aluminum applications may require specialized cutting tools. Always make clean, perpendicular cuts—angled cuts create wire path irregularities that cause feeding problems. Support the liner on a solid surface during cutting to prevent deformation.
Remove all burrs from freshly cut ends using a deburring tool appropriate for the liner material. The deburring tool removes the raised material at the cut edge while maintaining a smooth transition between the cut surface and the original liner surface. Work carefully around the entire circumference, checking frequently to ensure you’ve removed all raised material.
Smooth any remaining roughness with fine-grit sandpaper, typically 400-grit or higher. Wrap the sandpaper around the cut end and rotate it evenly to avoid creating flat spots or uneven surfaces. The goal is a perfectly smooth edge both inside and outside the liner—no sharp points, no rough patches, nothing that could catch on wire or damage passing filler metal.
Verify your work by running your finger carefully around both the interior and exterior of each liner end. You should feel no catches, roughness, or irregularities. If you find any, continue deburring and smoothing until the surface is genuinely smooth. This attention to detail prevents the very problems you’re trying to avoid.
When Cleaning Isn’t Sufficient

Sometimes liner problems exceed what cleaning can address, and recognizing when replacement is necessary prevents wasted effort and equipment damage. Understanding the limits of cleaning helps you make the right decision.
Physical damage to the liner requires immediate replacement. Kinks, crushing, or deformation create restrictions and irregularities that cleaning cannot fix. The wire path through a kinked liner follows an S-curve that causes constant feeding problems and accelerated wear on every component downstream. A crushed liner has a narrowed bore that progressively worsens as the damage propagates. Neither condition is repairable—replace the liner rather than attempting to clean a damaged component.
Excessive bore wear shows as visible enlargement when you compare the used liner to a new one. As wire rubs against liner walls over months of service, the bore gradually enlarges beyond its original dimensions. This enlargement allows the wire to wander within the liner, losing the column strength needed for consistent feeding. If you can clearly see more space around the wire than in a new liner, or if the wire visibly shifts side-to-side within the bore, cleaning won’t restore proper function.
Embedded contamination that cleaning cannot remove indicates advanced liner degradation. If debris has become compressed and fused to the liner walls, or if residue has chemically bonded to the surface, scrubbing won’t restore a clean bore. These liners have reached the end of their service life and continued use will only cause accelerating problems.
Consistently high pull test readings despite thorough cleaning indicate liner wear that cleaning cannot address. The accumulated wear on liner walls creates friction that compressed air and brushes cannot reduce. If your pull test readings remain elevated after cleaning, the liner needs replacement.
Burnback damage at either end of the liner often requires replacement. While minor burnback residue can sometimes be cleaned from contact tip interfaces, severe burnback that has deformed the liner end or created pitting in the liner surface cannot be repaired. The damage creates irregular surfaces that will cause ongoing feeding problems.
Implementing Preventive Liner Care
The most effective liner maintenance strategy prevents problems before they start. Implementing consistent practices extends liner service life and reduces the frequency of both cleaning and replacement.
Establish regular cleaning intervals based on your usage patterns. Production welding environments may benefit from weekly or even daily liner inspections and cleaning, while occasional hobbyist use might only require attention before each project. Track how quickly your liners accumulate contamination and adjust your schedule accordingly. Preventive cleaning during planned maintenance periods produces better results than emergency cleaning during production disruptions.
Keep your wire sources clean and protected between uses. Spool covers, drum lids, and storage cabinets prevent dust and debris from settling on wire that will later be pushed into your liner. In particularly dirty environments, pulling spools off the machine at day’s end and storing them in closed containers provides superior protection. Any contamination that reaches the wire before it enters your feeder will eventually reach your liner.
Handle wire with clean hands and appropriate techniques. Oils, grease, and hand lotions transfer from your skin to the wire surface, creating contamination that accumulates in the liner. Gloves during wire handling prevent this transfer while also protecting your hands from sharp wire ends and spool edges. The same cleanliness standards that apply to base material preparation apply to wire handling.
Maintain the entire wire feed system, not just the liner. Drive roll condition, guide tube cleanliness, and proper tension all affect how much contamination enters the liner and how hard the liner must work to enable proper feeding. A well-maintained feeder system puts less stress on liners, extending their service life while improving overall welding performance.
Monitor liner condition through regular pull testing and comparison to baseline measurements. Track the progressive increase in pull force that indicates accumulating wear, and replace liners before they degrade enough to affect weld quality. This data-driven approach to liner replacement eliminates both premature replacement of serviceable liners and the weld quality problems that come from pushing liners past their effective service life.
Extending Overall Liner Service Life
Beyond cleaning and preventive maintenance, several operational practices significantly impact how long your liners last. Implementing these practices alongside your cleaning routine maximizes the return on your liner investment.
Match your liner to your wire type and application. Steel liners work well with standard steel wire, but aluminum applications require Teflon-based or specially coated liners to prevent wire fragmentation. Using the wrong liner type for your application accelerates wear dramatically. Similarly, match liner size to wire diameter—using a small wire in a large liner allows the filler metal to wander and rub excessively against liner walls.
Ensure proper liner length during installation. A too-short liner creates gaps where wire deflects from its path, while a too-long liner may not seat properly in the torch neck. Both conditions accelerate wear and cause feeding problems. When installing a new liner, trim it to the correct length for your specific gun configuration, and always deburr the cut ends before installation.
Control wire cast and helix through proper straightening. Wire that comes off a spool with its natural curve tries to return to that curved configuration as it travels through the liner, rubbing against walls and accelerating wear. A wire straightener installed before the drive rolls removes this curvature, producing straighter wire that feeds more smoothly and causes less liner wear.
Address feeding problems promptly rather than pushing through them. When you notice inconsistent feed, birdnesting, or frequent burnbacks, investigate and resolve the cause rather than simply continuing to weld. The longer feeding problems persist, the more damage they cause to your liner and other torch components. Prompt attention limits the extent of damage and extends component service life.
Keep your welding environment as clean as practical. While you can’t control every contaminant in every shop, minimizing dust, spatter accumulation, and debris around your welding station reduces the contamination load on your entire system, including the liner. A cleaner shop means cleaner wire, cleaner liners, and better weld quality.
By combining proper cleaning technique with these preventive and operational practices, you maximize liner service life while maintaining the consistent wire feeding that produces quality welds. The investment in liner maintenance pays dividends through reduced consumable costs, less unplanned downtime, and more reliable welding performance across all your projects.
Leave a Reply