Spatter buildup on your welding lens isn’t just annoying—it’s dangerous. When residue and scratches cloud your vision, you lose critical sight of the weld pool, increasing the risk of defects and eye damage from harmful radiation. Knowing exactly how to clean a welding lens properly preserves your safety while extending the life of this essential protective gear. Most welders don’t realize that improper cleaning techniques can cause more harm than good, permanently damaging delicate coatings that protect your eyes. This guide delivers the precise methods professional welders use to maintain crystal-clear vision without compromising their equipment, ensuring every weld gets the attention it deserves.
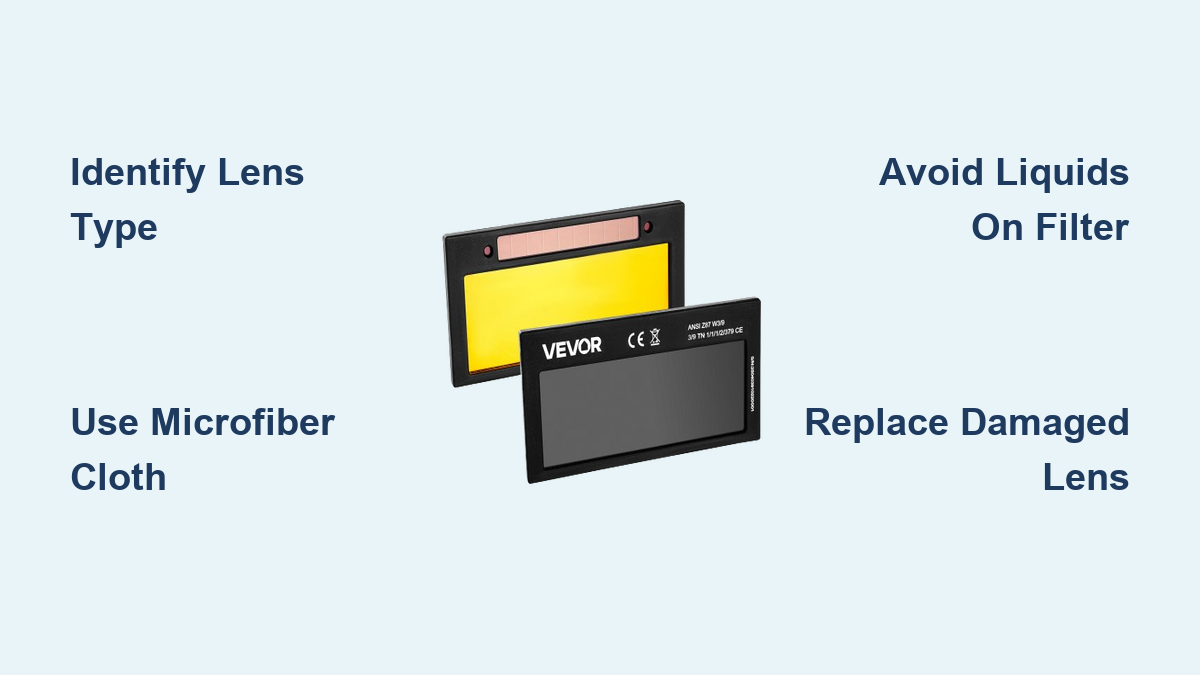
Identify Your Lens Type Before Cleaning
Plastic versus glass lenses require completely different cleaning approaches that directly impact your results. Plastic lenses dominate modern welding helmets due to their lighter weight and impact resistance, but they scratch easily when cleaned improperly. Glass lenses offer superior optical clarity and scratch resistance at the cost of added weight, making them less common but still preferred by some professionals for critical applications. Before you touch that lens, determine your specific type—mistaking plastic for glass during cleaning can ruin your protective gear in seconds.
Why Auto-Darkening Filters Demand Extreme Care
The auto-darkening filter contains sensitive electronics and microscopically thin radiation-blocking coatings that conventional cleaners destroy. Many welders accidentally damage these expensive components by using the same technique for all lens layers. Never apply liquid directly to the auto-darkening filter—moisture seepage can short-circuit the electronics. Instead, use only dry microfiber cloths for smudges, or compressed air for dust removal. If you must address stubborn residue, apply cleaner to the cloth first, never the lens surface itself.
Recognize Which Lens You’re Actually Cleaning
Your welding helmet contains multiple protective layers that serve different purposes. The outermost cover plate takes the brunt of spatter and is designed as a replaceable consumable. The middle protective lens shields the expensive auto-darkening filter underneath. Understanding which component you’re cleaning prevents costly mistakes—what works for a $5 cover plate could ruin a $200 auto-darkening filter. Always remove and inspect each layer separately before beginning your cleaning process.
Assemble Proper Cleaning Materials for Your Lens Type

Using inappropriate cleaning supplies ranks as the #1 cause of preventable lens damage among welders. Paper towels and shop rags create microscopic scratches that accumulate over time, gradually reducing visibility until replacement becomes necessary. Professional welders keep dedicated microfiber cloths specifically for lens maintenance—never for general workshop use. These specialized cloths lift contaminants without scratching, and they should be washed without fabric softener to maintain their effectiveness.
Essential Cleaning Solutions by Lens Material
| Lens Type | Safe Cleaning Solutions | Avoid At All Costs |
|---|---|---|
| Plastic Cover Plates | Distilled water, eyeglass cleaner, 99% isopropyl alcohol | Ammonia-based cleaners, acetone, window cleaners |
| Auto-Darkening Filters | Compressed air only (preferred), microfiber cloth dry | All liquids, abrasive compounds, direct spraying |
| Glass Lenses | Mild soap solution, glass cleaner (applied to cloth) | Abrasive polishes, high-pressure water |
For plastic cover lenses that have accumulated stubborn spatter, many experienced welders swear by Novus Plastic Polish #2. A tiny amount applied with a cotton pad using gentle circular motions can restore clarity to moderately scratched surfaces. Some professionals report success with Meguires headlight restoration compound for severe cases, but these aggressive treatments should only be used on replaceable cover plates—not the actual auto-darkening filter.
Execute the Correct Cleaning Procedure for Your Situation
The precise sequence of cleaning steps determines whether you restore clarity or cause permanent damage. Start with the least aggressive method and progress only as needed—most lenses require only basic cleaning to maintain optimal performance. Always remove loose debris first using compressed air from a safe distance (6-8 inches) to avoid forcing particles into the surface. Never wipe a dry lens—that’s the fastest way to create fine scratches that scatter light and reduce visibility.
Step-by-Step Plastic Lens Cleaning Protocol
- Blow loose debris from surface using short bursts of compressed air
- Apply 2-3 drops of lens cleaner to a clean microfiber cloth (never directly to lens)
- Wipe gently in circular motions from center outward using minimal pressure
- For stubborn spots, let cleaner dwell for 10 seconds before wiping
- Dry with a second clean microfiber cloth using light blotting motions
This five-step process takes less than two minutes but preserves your lens for maximum service life. Many welders skip the crucial step of using two separate cloths—one for cleaning, one for drying—which leaves residue that attracts more dust. For heavy spatter buildup, apply anti-spatter solution directly to the cover plate, wait 30 seconds, then wipe with a dedicated cloth.
When and How to Clean Auto-Darkening Filters
Auto-darkening filters require radically different treatment than cover lenses. If you can see your fingerprint on the auto-darkening filter surface, your helmet needs professional service—not DIY cleaning. Most manufacturers explicitly void warranties when liquids contact the electronic components. For minor dust accumulation, use only low-pressure compressed air while holding the helmet vertically to allow particles to fall away naturally. If absolutely necessary, a high-quality eyeglass microfiber cloth used with zero pressure might remove a fresh fingerprint, but this should be a last resort.
Eliminate Stubborn Spatter Without Damaging Your Lens

Baked-on spatter requires special techniques that balance effectiveness with lens protection. For plastic cover lenses, some welders successfully use a diluted dish soap solution (1 part soap to 10 parts water) applied with a soft sponge. The soap lifts particles from the surface rather than grinding them in during wiping. After application, rinse thoroughly with clean water and air dry—never rub a wet lens surface. This method works particularly well for stainless steel spatter that bonds strongly to lens surfaces.
Safe Scratch Removal Techniques for Cover Plates
Minor scratches on replaceable cover lenses can sometimes be improved using these professional methods:
- Polywatch crystal polish: Apply small amount, rub gently for 3 minutes, then clean with standard procedure
- Whitening toothpaste: Surprisingly effective on light scratches when applied with soft cloth
- Novus Plastic Polish #2: The industry standard for restoring clarity to scratched plastic lenses
Never attempt scratch removal on auto-darkening filters—the risk of permanent damage outweighs any potential benefit. Deep scratches that impair vision require immediate lens replacement regardless of cost considerations. Safety should always trump attempts to extend lens life beyond its functional limits.
Prevent Damage Before It Happens With Smart Habits
Strategic helmet placement during grinding operations prevents the most common cause of permanent lens damage. Grinding dust contains extremely hard particles that pit lens surfaces, creating damage that cleaning cannot repair. Position your helmet behind you or in a protective case during grinding to avoid this irreversible damage. Many professional shops install dedicated helmet storage hooks away from grinding stations specifically to protect their investment.
Establish a Proactive Lens Maintenance Schedule
Heavy users should replace cover lenses weekly, while moderate users can typically get 2-4 weeks of service. Occasional welders might stretch cover lens life to 2-3 months with proper care. Track your usage and replace lenses before visibility degrades—your eyes won’t reliably tell you when clarity has fallen below safe levels. Keep spare lenses in your welding kit so you never compromise safety to finish a job.
Avoid These Costly Cleaning Mistakes Immediately
Wiping a dry lens ranks as the most common error that creates permanent damage. Without proper lubrication from cleaning solution, you’re essentially sanding the surface with embedded particles. Always apply cleaner to your cloth first—never wipe a dry lens surface. Another critical mistake: using shirt sleeves for quick cleanings. The outer surfaces of work clothing contain abrasive particles that quickly scratch plastic lenses.
Recognize When Replacement Beats Cleaning
Deep scratches that scatter light, pitting from grinding dust, or any damage that affects your ability to see the weld pool clearly require immediate replacement. No amount of polishing can restore optical clarity once the surface integrity is compromised. The cost of a replacement lens ($5-$20 for covers, $100-$300 for auto-darkening filters) pales in comparison to potential eye damage from compromised protection.
Knowing how to clean a welding lens properly extends equipment life while maintaining the visibility essential for quality work. By identifying your specific lens type, using appropriate materials, and following the correct procedures, you’ll preserve optimal vision throughout each lens’s service life. Remember that cover lenses are consumables—don’t waste time trying to restore badly damaged ones when replacement ensures consistent clarity. Keep multiple cover lenses on hand and develop the habit of inspecting your vision before each welding session. When in doubt about lens condition, replace it—your eyesight is worth far more than any lens. Implement these techniques today and experience the difference crystal-clear vision makes in your welding precision and safety.
Leave a Reply