Aluminum welds develop stubborn oxidation and discoloration within minutes of cooling, creating weak points that invite corrosion. Unlike steel, aluminum’s soft surface gets permanently scarred by improper cleaning tools—yet most DIYers reach for steel wire brushes that embed iron particles and accelerate rust. When your marine-grade aluminum trailer frame or custom motorcycle fuel tank shows cloudy weld seams, you need techniques that remove heat tint without compromising structural integrity. This guide delivers field-tested methods used by aerospace fabricators and marine welders, including chemical baths that dissolve oxidation in 15 minutes and electro-cleaning tricks that prevent future corrosion. You’ll learn precisely which abrasives won’t contaminate aluminum, how to identify dangerous residual oxides, and why skipping passivation guarantees premature failure.
Why Steel Brushes Destroy Aluminum Weld Integrity
Aluminum’s soft surface acts like a magnet for steel contaminants during cleaning. When you use standard wire brushes, microscopic steel particles embed into the weld zone, creating galvanic corrosion cells where dissimilar metals meet. These embedded particles trigger rust spots that spread beneath the surface, weakening joints from the inside out. I’ve seen freshly welded aluminum boat fittings fail within weeks because a steel brush left invisible iron residue that turned the entire weld zone into a corrosion highway.
How Embedded Steel Particles Accelerate Aluminum Failure
Steel particles in aluminum create electrolytic reactions when exposed to moisture. Saltwater environments make this worse—the steel becomes an anode that sacrifices itself while corroding the surrounding aluminum 10x faster. In marine applications, this hidden damage often appears as “pitting” months after welding, with rust bleeding from seemingly clean welds. Always use dedicated aluminum brushes marked with blue bristles or handles to prevent cross-contamination.
Why Heat Tint Indicates Contamination Risk
That rainbow-colored oxidation on cooled aluminum welds (straw yellow to dark blue) isn’t just cosmetic—it’s a sign of oxygen intrusion during welding. Thicker oxide layers trap contaminants that block proper fusion. If heat tint covers more than 25% of the weld bead, mechanical cleaning alone won’t remove subsurface oxides. You’ll need chemical treatment before the part goes into service, especially for fuel or fluid-carrying components.
Essential Safety Gear That Prevents Chemical Burns

Aluminum cleaning requires handling aggressive acids that cause severe skin damage in seconds. Standard workshop gloves won’t cut it—nitrile is the minimum requirement since solvents like acetone eat through latex. I’ve treated welders with chemical burns from citric acid splashes because they skipped proper protection. Always layer safety: start with chemical-resistant nitrile gloves (8+ mil thickness), then add neoprene sleeves for arm protection during tank dipping.
Must-Have Respiratory Protection for Fume Control
Acid baths release invisible fumes that burn lung tissue. A basic dust mask won’t stop hydrochloric or nitric acid vapors. Use a half-face respirator with P100 and organic vapor cartridges rated for acids (check cartridge color codes—purple means acid gas protection). In enclosed spaces, add a battery-powered fan blowing fumes away from your face. Never skip this—even “mild” vinegar solutions become dangerous when heated.
Mechanical Cleaning Without Surface Contamination
Wire wheels cause more aluminum weld failures than poor technique. Instead, use nylon brushes impregnated with non-metallic abrasives like crushed walnut shells. These remove light oxidation without embedding foreign particles. Hold the brush at 30 degrees to the weld surface with light pressure—aluminum scratches at half the force required for steel. For heavy spatter, start with 120-grit aluminum-specific flap discs on a variable-speed angle grinder set below 5,000 RPM.
Proper Brushing Technique to Avoid Micro-Gouging
Aluminum’s low melting point means excessive speed generates heat that smears metal instead of cutting it. Use back-and-forth motions along the weld seam—not circular patterns that create visible swirl marks. After each pass, wipe the area with acetone on a lint-free rag to check progress. Stop when the base metal shows uniform dull gray—shiny spots mean you’ve removed too much material. Never reuse abrasives between aluminum and steel projects.
Citric Acid Bath: The Non-Toxic Oxide Remover
Forget dangerous pickling acids—food-grade citric acid dissolves aluminum oxides safely. Mix 1 part citric acid powder to 10 parts warm water (140°F max) in a plastic container. Submerge welds for 8-15 minutes until bubbling stops. The solution turns cloudy as oxides dissolve, but won’t attack base metal like hydrochloric acid. For intricate parts, apply paste made from citric acid and water with a nylon brush, then rinse after 10 minutes.
Timing Critical for Perfect Results
Under-soaking leaves oxidation; over-soaking etches pits into soft aluminum. Check every 2 minutes after the 8-minute mark. When welds emerge bright silver with no rainbow hues, immediately transfer to a neutralizing bath (1 tbsp baking soda per quart of water). Rinse thoroughly with distilled water—tap water minerals cause flash oxidation. This method works for 6061 and 5052 alloys but avoid on cast aluminum.
Electrochemical Cleaning: Pro Results at Home
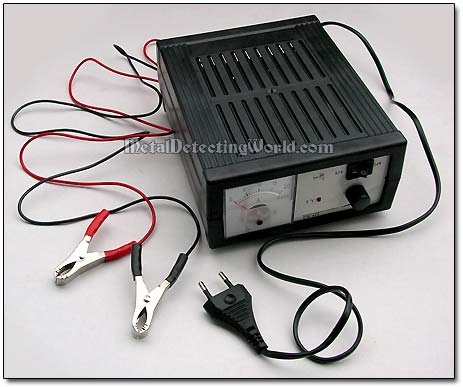
Aircraft fabricators use reverse-current electrocleaning to prep aluminum before anodizing. You can replicate this with a 12V battery charger: connect the POSITIVE clamp to the aluminum part and NEGATIVE to a stainless steel electrode (never steel—it contaminates). Submerge both in a 5% sodium carbonate solution. At 6 volts, bubbles should form only on the part within 30 seconds. Run for 2-3 minutes until welds turn uniformly matte gray.
Why Reverse Polarity Prevents Metal Loss
Standard electrocleaning (part as cathode) strips metal. Reverse polarity makes the aluminum anode, where oxygen bubbles lift oxides without dissolving base material. If you see hydrogen bubbles (part as cathode), you’re damaging the surface. Always test on scrap first—7075 aluminum requires lower voltage to avoid etching. This method removes oxides from crevices that brushes miss.
Removing Stubborn Spatter Without Grinding
Frozen aluminum droplets weld themselves to the base metal through metallurgical bonding—grinding often gouges the surface. Instead, heat spatter spots to 400°F with a propane torch until droplets soften (they’ll lose shiny appearance), then flick them off with a brass hammer. For cooled spatter, apply aluminum spatter remover gel, wait 5 minutes, then wipe with a copper pad. Never strike cold spatter—it cracks the heat-affected zone.
The Toothpaste Trick for Light Surface Residue
For minor discoloration on polished welds, make a paste of non-gel toothpaste and baking soda. Apply with a microfiber cloth using straight-line motions along the weld. The mild abrasives lift surface oxides without scratching. Rinse with isopropyl alcohol—water leaves spots on clean aluminum. This works best within 24 hours of welding before oxides harden.
Passivation: Your Final Defense Against Re-oxidation
Cleaning alone guarantees rapid re-oxidation. After final rinse, dip parts in 30% nitric acid for 30 seconds to form a protective oxide layer. For safer field use, apply commercial aluminum passivation gel, then bake at 150°F for 20 minutes. This seals microscopic pores where corrosion starts. Unpassivated aluminum welds in salt air develop visible oxidation within 48 hours—passivated welds stay bright for months.
The Critical 10-Minute Window
Aluminum begins oxidizing the moment it dries. Never let cleaned welds sit exposed before passivation. Set up your rinse tank, neutralizing bath, and passivation station in sequence. Use tongs to move parts directly from rinse to passivation—no air-drying. For large structures, wipe sections with passivation gel immediately after rinsing each area. Skipping this step wastes all your cleaning effort.
When to Stop Cleaning and Reweld
Not all weld defects are fixable by cleaning. If you see:
– Linear cracks along the weld toe
– Porosity clusters larger than 1/16 inch
– Incomplete fusion showing base metal gaps
Stop immediately. Mechanical cleaning won’t fix these structural flaws—it only hides them until failure. Grind out defective sections completely and reweld with proper heat control. I’ve seen “cleaned” cracked welds pass visual inspection but fail under load because surface treatment masked subsurface defects. Always perform dye penetrant testing on critical welds before final cleaning.
Final Note: Proper aluminum weld cleaning doubles component lifespan by eliminating corrosion initiators. Always dedicate separate tools for aluminum, never skip passivation, and prioritize chemical methods over aggressive grinding. For structural parts, combine citric acid baths with electrocleaning for aerospace-grade results. Remember that clean aluminum welds should show uniform dull gray—not mirror shine—which indicates you’ve preserved the critical heat-affected zone integrity. When in doubt, test methods on scrap pieces of the same alloy first.
Leave a Reply