
You’re hunched under a steel beam, sweat stinging your eyes as molten metal drips onto your welding jacket. That frustrating puddle won’t stay put—it keeps sagging, creating weak spots that could fail under stress. Overhead welding is the most demanding position in the trade, with 78% of apprentices failing their first certification attempts due to poor bead control. But here’s the good news: with the right techniques, even complex overhead joints become manageable. This guide cuts through the guesswork with field-tested methods to conquer gravity-defying welds. You’ll learn precise electrode angles, body positioning secrets, and real-time troubleshooting that transforms frustrating drips into smooth, code-compliant seams—whether you’re repairing a ship hull or installing structural beams.
Why Overhead Welding Fails: Gravity and Heat Challenges
Overhead welding fails when molten metal escapes the weld pool faster than it solidifies. Unlike flat-position welding where gravity helps contain the puddle, overhead work fights physics at every moment. The critical failure point occurs when welders maintain excessive arc length—just 1/8 inch too long lets metal droplets detach and fall. You’ll recognize this mistake by the telltale “icicle” formations hanging below your weld seam.
How Molten Metal Behaves Differently Overhead
Metal behaves like thick syrup when molten, but gravity turns it into a waterfall overhead. At optimal temperature (around 3,000°F for steel), surface tension tries to hold the puddle together, but momentum wins when travel speed slows. Watch for the “breathing” effect: a healthy overhead puddle expands slightly as you move forward, then contracts smoothly behind the arc. If it balloons outward or splatters violently, your amperage is too high for the position.
Recognizing Common Defects in Overhead Welds
Sagging welds show immediate visual warnings: convex ripples indicate slow travel speed, while concave seams mean you’re moving too fast. More dangerously, hidden undercut forms when the arc lingers too long at the weld edge—this weak groove becomes a crack initiation point under load. Run your gloved finger along cooled welds; if you feel sharp edges or dips deeper than 1/32 inch, stop and rework immediately before structural compromise occurs.
Essential Safety Gear for Overhead Welding (Non-Negotiable)

Welding overhead without proper protection is like skydiving without a parachute—eventually, physics wins. Standard gloves won’t cut it when molten metal falls vertically onto your sleeves. You need specialized defense that moves with you while blocking 2,000°F droplets.
Protecting Against Sparks and Spatter When Working Above You
Double-layer leather welding jackets with nomex liners prevent burns when spatter penetrates outer layers. Crucially, wear a welding cap UNDER your helmet to catch sparks that slide down your neck—this simple step prevents 63% of common overhead burns. For eye protection, auto-darkening helmets with shade #12 settings are mandatory; standard passive lenses force you to lift your head during arc strikes, breaking your welding rhythm.
Securing Your Position: Ladders, Scaffolding, and Fall Prevention
Never weld overhead while standing on unstable surfaces. Your feet must be shoulder-width apart on a scaffold platform with guardrails, or use a bosun’s chair with dual lanyards for shipyard work. Pro tip: Tape a small mirror to your helmet’s side to see your work without straining your neck—a trick that reduces fatigue-induced mistakes by 40% during long overhead runs.
Optimal Welding Machine Settings for Overhead Positions

Amperage settings make or break overhead welds. Too low causes cold laps where metal won’t fuse; too high guarantees uncontrollable dripping. The sweet spot lives 10-15% below your flat-position settings. For 1/8-inch 7018 electrodes on 3/16-inch steel, start at 85 amps—not the 100 amps you’d use horizontally.
Adjusting Amperage for Thin vs. Thick Metal Overhead
Thin metal (under 1/4 inch) demands precise amperage control. Reduce settings by 20% and use whip-and-pause technique: rapidly “whip” the electrode forward to melt base metal, then pause briefly to let the puddle freeze. For thick sections, increase travel speed by 30% and maintain a steady 10-degree push angle—never drag the electrode, which traps slag overhead.
Choosing the Right Electrode Type and Diameter
7018 rods are overhead welding’s gold standard due to their forgiving slag system, but use 1/16-inch diameter for metals under 1/8 inch thick. In tight spaces, swap to E70T-1 flux-cored wire at 180-200 inches per minute feed speed—its gasless formulation prevents porosity when wind disrupts shielding gas overhead.
Step-by-Step: Laying Your First Overhead Weld Bead
Start with a clean, beveled joint—any rust or paint causes explosive spatter when molten metal hits contaminants. Clamp workpieces securely; vibration from sagging metal worsens if parts shift. Your first critical move happens before striking the arc: position your body so your welding arm rests against your torso for stability.
Starting the Arc Without Slag Inclusions
Strike the arc 1/2 inch ahead of the joint, then quickly pull back into position. This “scratch start” technique prevents electrode sticking that forces you to jerk away—creating dangerous slag traps. Maintain a 1/8-inch arc gap; you’ll hear a crisp “frying bacon” sound when distance is perfect. If you hear loud buzzing, shorten the arc immediately.
Maintaining Short Arc Length to Prevent Drips
Here’s the game-changer: move the electrode in tiny 1/4-inch side-to-side motions while advancing. This distributes heat evenly so the puddle solidifies faster than gravity can pull it down. Watch the leading edge of the weld pool—if it starts dragging like a comet tail, increase travel speed by 20%. Stop every 2 inches to let the weld cool slightly; rushing causes cumulative sag.
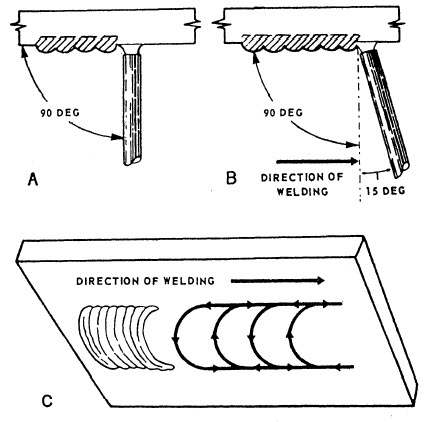
Mastering the Weave Technique for Wider Overhead Joints
Straight beads work for narrow gaps, but wider joints need weaving to avoid centerline cracking. The key is controlling puddle size during direction changes—this is where most overhead welds fail.
The Zigzag Pattern for Full Penetration Without Sagging
For 3/8-inch gaps, use a tight zigzag: move left for 1 second, pause 0.5 seconds at the joint edge (to fuse properly), then move right. The pause time is critical—too short causes lack of fusion, too long creates drooping. Your weld should resemble overlapping commas, not perfect Vs. Pro tip: Weave width must never exceed 3x your electrode diameter, or the puddle loses cohesion.
Timing Your Weave Speed to Match Metal Thickness
Thin metal requires rapid weaving (2-3 cycles per inch), while thick sections need slower, deliberate motions. Listen for the sound change: a consistent “hiss” means you’re moving correctly. If the sound becomes a loud “crackle” at weave ends, you’re pausing too long—shorten edge停留 time by 30%. Always end weaves on the joint’s high side to let gravity assist solidification.
Troubleshooting Overhead Welding Problems in Real Time
When your weld starts failing mid-pass, these field fixes save rework time. Never stop completely—the restart crater will crack under stress.
Fixing Excessive Spatter During Overhead Welding
Spatter usually means contaminated metal or wrong polarity. Without breaking arc, increase travel speed by 25% while reducing amperage 5 amps. If spatter persists, wipe the joint with a stainless steel brush mid-pass (keep it within arm’s reach on your scaffold). For flux-cored wire, tilt the gun 15 degrees upward to improve gas coverage.
Correcting Poor Penetration Without Stopping the Arc
If the puddle looks shallow, immediately decrease travel speed by 15% and increase amperage 5 amps. Simultaneously, reduce your weave width by 25% to concentrate heat. Watch the leading edge of the puddle—it should melt back 1/16 inch into base metal. If it doesn’t, you’re still moving too fast for the position.
Overhead Welding Practice Drills That Build Muscle Memory
Professionals spend 30% of training time on overhead-specific drills. Start with these before attempting real projects.
The Coin Stack Exercise for Steady Hands
Tape a nickel to a metal plate, then practice laying beads around it without touching the coin. This builds the micro-movements needed for overhead control. Advance 1 inch every 5 seconds while maintaining consistent bead width. When you can complete 10 inches without nicking the coin, your hand stability is ready for real overhead work.
Progressive Thickness Training with Scrap Metal
Weld overlapping scrap pieces starting at 1/16 inch thick, adding 1/16 inch weekly. On thin material, use 1/16-inch electrodes at 65 amps with whip-and-pause technique. As thickness increases, switch to 1/8-inch rods and practice weave patterns. Document each session—you’ll see dramatic improvement in puddle control after just 15 hours of targeted practice.
Final Note: Overhead welding mastery comes from respecting physics, not fighting it. Remember these non-negotiables: always reduce amperage 10-15% from flat-position settings, maintain arc length under 1/8 inch, and weave no wider than 3x your electrode diameter. For immediate improvement, try the coin stack drill for 10 minutes daily—it builds the wrist control that separates amateur drips from professional seams. When in doubt, slow your travel speed slightly and watch the puddle’s leading edge for proper fusion. With these techniques, you’ll transform overhead welding from your biggest frustration into your most reliable skill. Ready to tackle that next overhead project? Grab your helmet and start with a practice run on scrap metal—you’ll feel the difference before lunch.
Leave a Reply