Your welding machine suddenly stops working mid-project, leaving you with half-finished joints and mounting frustration. Whether you’re a professional fabricator or weekend DIYer, equipment failure brings production to a halt and costs valuable time. Knowing how to fix a welding machine properly can save hundreds in service fees while getting you back to work faster. This guide delivers actionable steps to diagnose and repair common welding equipment failures safely and effectively—no guesswork required.
Before attempting any repairs, recognize that welding machines contain potentially lethal electrical components. High-voltage capacitors retain dangerous charges even after unplugging, and transformer windings operate at extreme current levels. Always disconnect power completely, discharge capacitors using appropriate resistors, and verify zero voltage with a multimeter before touching internal components. Wear insulated gloves, safety glasses, and dielectric footwear throughout all diagnostic and repair procedures—your safety depends on these precautions.
Why Your Welding Machine Won’t Strike an Arc
Inconsistent arc behavior ranks among the most frequent welding equipment failures, causing sputtering, popping, or complete inability to maintain a stable arc. This frustrating problem often stems from damaged electrode holders, worn cables, loose connections, or contaminated gas supply in MIG applications. Rather than replacing expensive components immediately, perform these targeted diagnostic steps to pinpoint the exact cause.
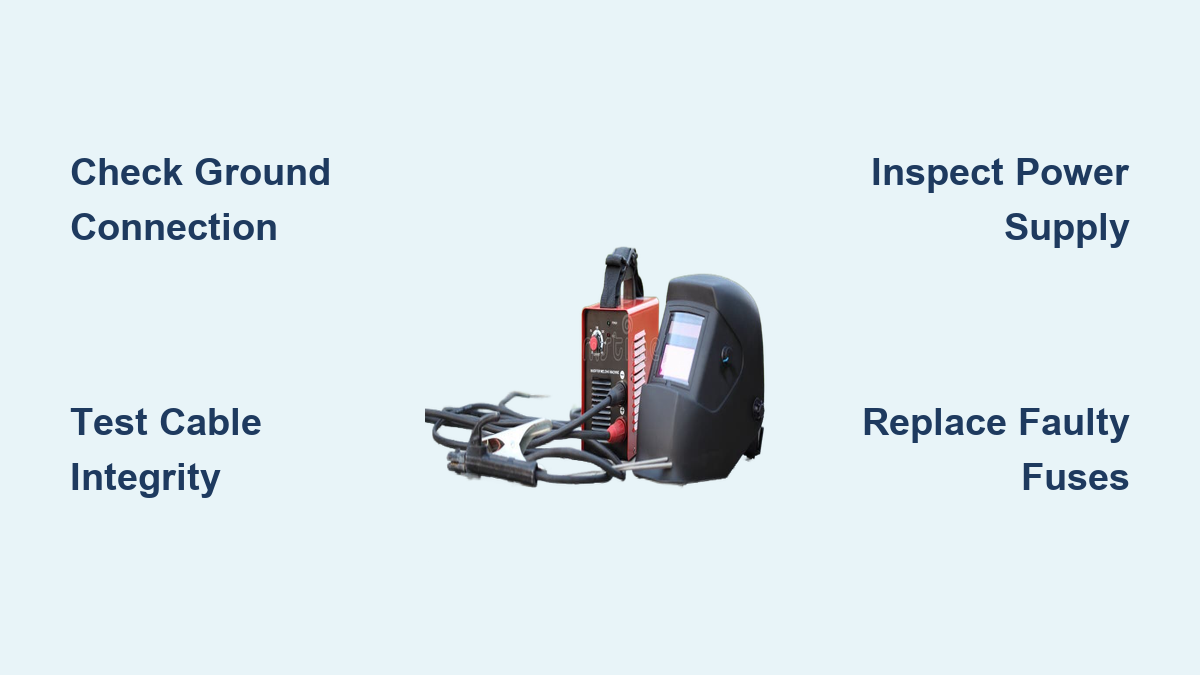
Check Your Ground Connection First
Loose or corroded ground connections cause 40% of all “no-arc” problems. Remove the ground clamp from your workpiece and inspect for:
– Burnt or pitted contact surfaces
– Corrosion buildup on clamp jaws
– Damaged insulation near connection points
Clean contact surfaces with fine emery cloth until bright metal appears, then reattach with firm pressure. A properly grounded system should show less than 0.5 ohms resistance when tested with a multimeter. If readings exceed this threshold, replace the ground cable completely—never attempt field repairs on compromised conductors.
Verify Proper Cable Integrity
Worn welding cables create high-resistance points that prevent proper arc striking. Examine both electrode and ground cables for:
– Cuts or fraying in the outer insulation
– Discoloration indicating internal overheating
– Stiff sections suggesting internal wire breakage
Perform a continuity test along the entire cable length using your multimeter. Any resistance above 1 ohm per 10 feet of cable indicates internal damage requiring replacement. Replace cables showing inconsistent readings that jump dramatically when flexed—these intermittent breaks cause frustrating on/off operation.
Fixing Power Supply Connection Failures

Power supply problems account for nearly half of reported “machine failure” cases that actually stem from external electrical issues. Before opening your welding machine chassis, verify your facility electrical system delivers correct voltage and current capacity.
Test Your Electrical Outlet Properly
A properly wired 240-volt receptacle should show:
– Full nominal voltage (220-240V) between hot conductors
– Zero voltage between neutral and ground
– Consistent readings under load conditions
Measure voltage while operating the machine at low output. If voltage drops more than 10% during operation, you likely have an undersized circuit, overloaded branch, or loose connection at the breaker panel. These external issues mimic internal machine failures but require facility electrical repairs rather than welding machine service.
Replace Faulty Power Switches Quickly
Internal power switch failure prevents machine operation entirely or causes intermittent starting issues. To test:
1. Disconnect all power sources
2. Remove switch wiring harnesses
3. Set multimeter to continuity mode
4. Test switch in both positions
A functional switch shows continuity only in the “on” position. Replace switches demonstrating open circuits when activated or showing intermittent readings as you toggle the switch. Always install switches meeting or exceeding original specifications for voltage and current ratings—using inferior components creates fire hazards.
Repairing Wire Feed Mechanism Problems
Wire feed welders introduce additional mechanical failure points that directly impact your welding quality. When wire feeding becomes inconsistent or stops completely, these targeted repairs will get you back in operation.
Fix Slipping Drive Rolls in 3 Steps
Worn drive rolls cause inconsistent wire feed rates that ruin weld quality. To diagnose and repair:
1. Open the wire drive housing and inspect roll grooves
2. Look for excessive wear matching your wire diameter
3. Check for rounded edges or flattened contact surfaces
Replace drive rolls showing visible wear patterns or reduced groove depth. When installing new rolls, verify proper alignment with the wire path and adjust tension to the minimum pressure required for consistent feeding. Over-tightening causes wire deformation and premature liner wear.
Clear Obstructed Torch Liners Effectively
Kinked or debris-filled torch liners create feeding resistance that stops wire movement. To clean or replace:
– Disconnect the wire spool and remove the contact tip
– Pull the liner completely from the torch assembly
– Inspect for kinks, crushed sections, or metal shavings buildup
Clean reusable liners with a stiff wire brush and compressed air. For severe blockages or damaged liners, measure the old liner and install an exact replacement—using incorrect lengths causes feeding problems. Reinstall with proper lubrication using manufacturer-specified wire feed lubricant applied sparingly.
Diagnosing Internal Electrical Failures
When external connections check out but your machine still won’t operate properly, internal electrical components may be failing. These diagnostic procedures help identify problematic components without unnecessary disassembly.
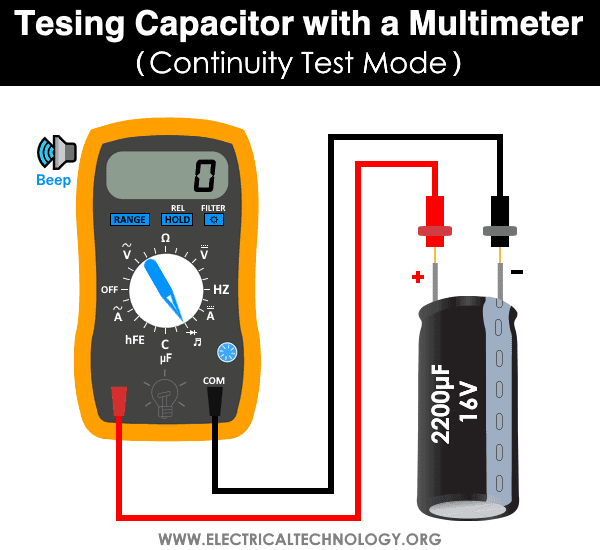
Test Capacitors Before Replacement
Start capacitors in transformer-based machines fail frequently, causing hard starting or reduced output. To test safely:
1. Discharge capacitors using a 10k ohm resistor
2. Disconnect both leads from circuit connections
3. Set multimeter to capacitance mode
4. Compare readings to capacitor rating
Replace capacitors showing readings more than 20% below rated value or demonstrating internal shorts. Never attempt to repair swollen or leaking capacitors—they must be replaced immediately due to fire risk.
Identify Blown Fuses Correctly
Blown fuses always indicate underlying problems requiring investigation. When replacing:
– Match exact amperage and voltage ratings
– Determine why the fuse blew before replacement
– Check for short circuits in associated components
If new fuses blow immediately, disconnect output leads and test machine without load. Persistent blowing indicates serious internal faults requiring professional diagnosis. Never install higher-rated fuses as temporary fixes—this defeats protection systems and creates fire hazards.
When to Call a Professional Repair Service
Certain welding machine problems require specialized knowledge and equipment beyond typical workshop capabilities. Recognizing these limitations prevents wasted time and potential safety hazards.
Identify Unrepairable Component Failures
Inverter power electronics, sealed transformers, and factory-calibrated components typically fall outside field service scope. Seek professional help when you encounter:
– Burnt circuit board traces requiring component-level repair
– Multiple failed semiconductors indicating cascading failures
– Error codes referencing internal calibration issues
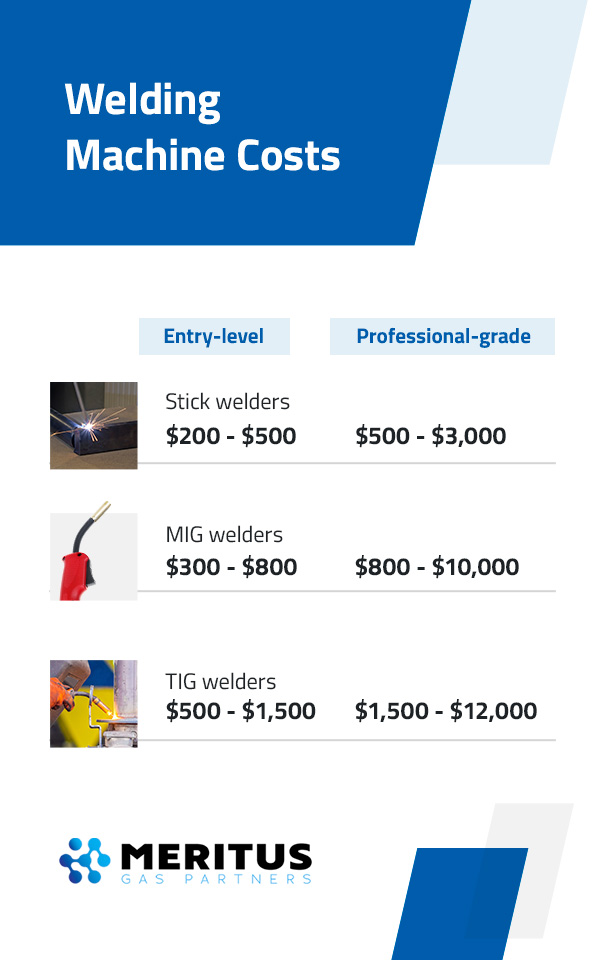
Professional service becomes economically justified when repair costs approach 50% of replacement value for comparable new equipment. Consider machine age, parts availability, and original purchase price when evaluating repair economics.
Prevent Future Welding Machine Failures
Proactive maintenance prevents most common welding equipment problems before they disrupt your work. Implement these critical practices to maximize machine uptime.
Perform Weekly Preventive Checks
Establish a simple maintenance routine that takes less than 10 minutes:
– Inspect cables for cuts, fraying, or insulation damage
– Clean electrode holders and ground clamps with emery cloth
– Verify secure connections at all terminal points
– Check wire feed components for wear indicators
Document each inspection in a maintenance log noting any developing issues. This historical record helps identify patterns before complete failures occur.
Ensure Proper Cooling and Ventilation
Overheating causes premature component failure in welding machines. To prevent thermal damage:
– Keep intake and exhaust vents completely clear of debris
– Allow at least 12 inches of clearance around all machine sides
– Operate within specified duty cycles for your machine model
– Clean internal dust buildup quarterly using compressed air
Replace cooling fans showing reduced airflow or unusual noises immediately—these small components protect your entire machine investment.
Addressing welding machine problems systematically saves time and money while building valuable troubleshooting skills. Always prioritize safety, work methodically through diagnostic procedures, and recognize when professional service offers the best solution. With regular maintenance and proper operation practices, your welding equipment will deliver reliable performance for years of productive service.
Leave a Reply