Pinch weld damage creates one of the most insidious problems for vehicle owners, especially when rust or collision damage causes the critical seam between your door and frame to separate. That telltale gap along your door jamb isn’t just an eyesore—it compromises your vehicle’s structural integrity, allows water intrusion, and accelerates corrosion throughout the affected area. Learning how to fix pinch welds properly can save you hundreds in body shop fees while preventing further deterioration that could eventually total your car.
Whether you’re battling rust from road salt exposure or repairing damage from a minor collision, understanding the specific techniques for pinch weld repair makes the difference between a temporary patch and a lasting solution. This guide delivers the exact steps professional body shops use, adapted for DIY mechanics with standard workshop tools, so you can restore your vehicle’s structural seams to factory condition.
Why Your Pinch Welds Are Failing and How to Identify the Problem
Pinch welds—the raised seams where your vehicle’s inner and outer panels join—fail for specific, diagnosable reasons. Recognizing exactly what’s wrong determines whether you need a simple reseal or complete panel replacement.
Corrosion and rust represent the most common pinch weld failure, particularly in salt-belt regions. Start your diagnosis by looking for bubbling paint along the seam, rust-colored stains bleeding from the joint, or flaking metal at the weld edges. Press gently along the seam with a flat screwdriver—if the metal crumbles or separates easily, you’ve got advanced corrosion requiring metal replacement rather than simple repair.
Collision damage creates distinct failure patterns. After any impact, check for misaligned panels, unexpected gaps between sections that should be joined, or ripple marks in nearby panels indicating force transfer. If your door no longer closes smoothly or creates wind noise when driving, damaged pinch welds likely contribute to the problem. Never attempt pinch weld repair until you’ve verified your vehicle’s frame alignment—welding while panels are under stress creates immediate failures.
Essential Tools for Pinch Weld Repair

You don’t need a professional body shop’s entire inventory to fix pinch welds properly, but specific tools make the difference between success and frustration.
Resistance spot welding equipment delivers factory-quality repairs when available. Look for a portable spot welder with adjustable current settings (1,500-10,000 amps) and copper electrodes sized for automotive work (typically 5-8mm diameter). While professional units cost $2,000+, entry-level DIY models start around $400 and produce acceptable results for home mechanics. Critical warning: Using improper electrode force creates weak welds that fail prematurely—always follow manufacturer pressure specifications.
MIG welding setup serves as the practical alternative when spot welding equipment isn’t available. You’ll need:
– MIG welder capable of 13-17V output
– 0.023-0.030 inch diameter wire (ER70S-6)
– 75% argon/25% CO₂ shielding gas
– Various clamps and positioning tools
– 40-120 grit flap discs for grinding
Test your settings on scrap metal first—thin automotive steel requires minimal heat input to avoid burn-through. Ideal MIG parameters for pinch weld repair produce small, consistent weld beads with minimal spatter.
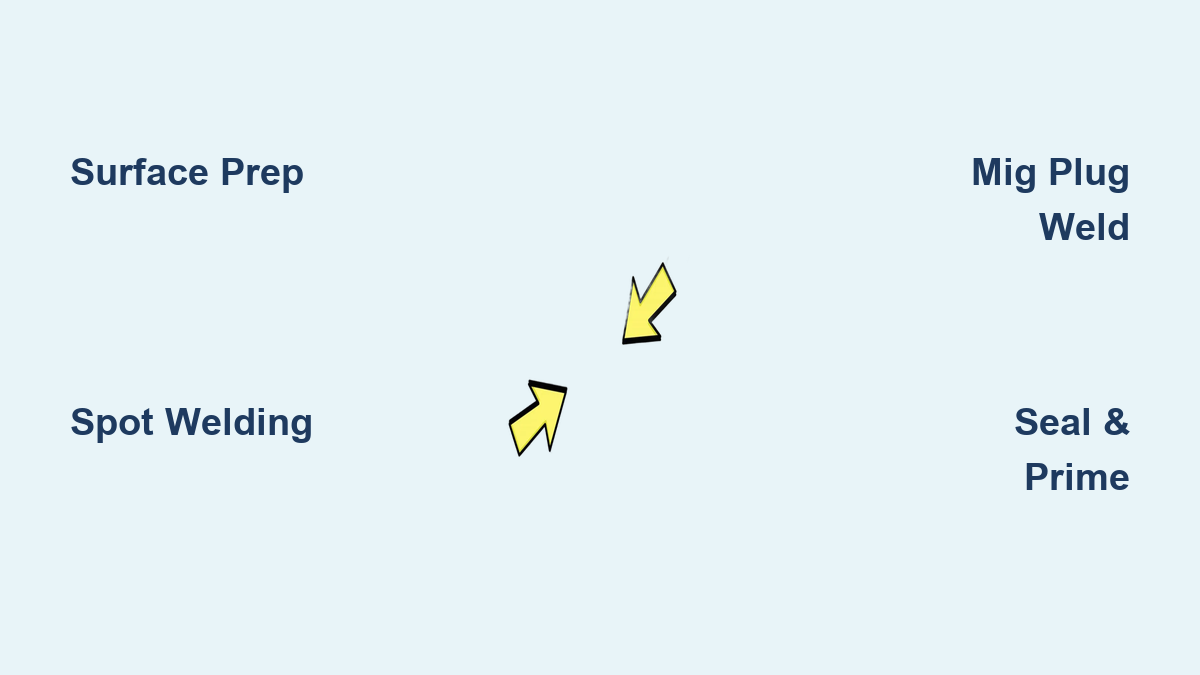
Step-by-Step Pinch Weld Repair Process
Following these precise steps ensures your repaired pinch welds withstand years of road stress and environmental exposure.
Preparing Damaged Surfaces for Proper Bonding
Surface preparation determines 80% of your repair’s success—skimping here guarantees premature failure. Start by stripping paint and primer 2-4 inches beyond the damaged area using 40-80 grit flap discs on an angle grinder. Remove all rust aggressively until you see bright, clean metal with no pits or discoloration. Any remaining corrosion creates active cells that destroy new welds within months.
Clean mating surfaces with wax and grease remover immediately before welding. Invisible contaminants prevent proper fusion, so work outward from the repair zone and avoid touching prepared surfaces with bare hands. Check panel alignment by measuring gaps every 6 inches along the seam—consistent 0.5-1.5mm spacing indicates proper positioning before welding begins.
Executing Spot Welds That Match Factory Quality
Flange width must measure 10-20mm for proper spot weld integrity. If your damaged area lacks sufficient flange, carefully bend the panel edge using a flange tool to create a clean 90-degree bend against the receiving panel. Position copper electrodes perpendicular to the flange surface and apply consistent pressure—uneven pressure creates weak welds even with correct current settings.
Space welds 25-50mm apart along the seam, placing them closer together (25mm) at high-stress areas like door hinges. Hold each weld for 5-15 cycles depending on your equipment, then verify quality by attempting to separate panels at weld points—proper welds won’t budge with reasonable manual force. Look for uniform nugget size (typically 4-6mm diameter) where visible.
MIG Plug Welding Technique for Home Mechanics
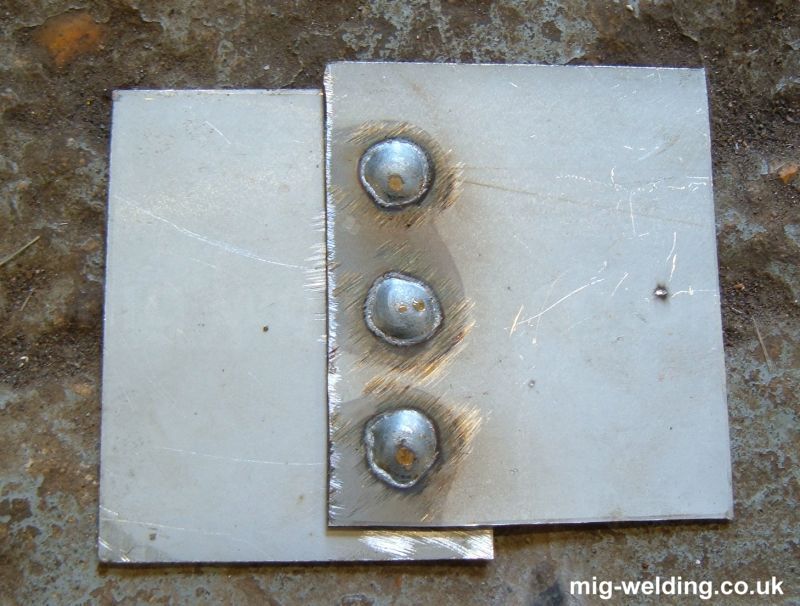
When spot welding isn’t an option, MIG plug welding produces acceptable results with proper technique:
- Drill 8-10mm holes through the outer panel only (not through both layers)
- Clamp panels tightly together with no gaps
- Use short “stitch” welds (1-2 second bursts) to fill each hole
- Build weld metal slightly above surface, then grind flush
- Space plug welds to match original spot weld density
Critical adjustment: Reduce wire feed speed to 150-200 IPM and voltage to 13-15V for thin automotive steel. Higher settings cause burn-through that compromises structural integrity. Practice on scrap metal until you achieve consistent penetration without excessive heat input.
Panel Replacement When Pinch Weld Damage Is Severe
Complete panel replacement becomes necessary when corrosion eats through 50% or more of the pinch weld area. This process takes 4-8 hours but ensures proper flange geometry and weld placement.
Removing Damaged Outer Panels Without Further Harm
Drill out existing spot welds using a step drill bit (starting with 4mm, progressing to 8mm). Insert a flat pry tool between panels and gently separate them—never force separation as this damages surrounding structure. Clean all adhesive residue and rust from the inner panel using wire wheels, then apply rust converter to bare metal before installing the replacement panel.
Preventing Future Rust in Repaired Pinch Weld Areas
Your repair’s longevity depends entirely on proper corrosion prevention—most DIY repairs fail within 12 months due to skipped protection steps.
Applying Seam Sealer for Maximum Moisture Protection
Brushable seam sealer provides the most reliable moisture barrier for visible pinch weld areas. Apply in a continuous 3-5mm bead along the entire seam, tooling it to a smooth profile that follows the panel contour. Allow 2-4 hours for full cure before priming—rushing this step traps moisture that accelerates future corrosion. For hidden seams, use sprayable sealer that creeps into crevices for complete coverage.
Using Zinc-Rich Primers for Long-Term Corrosion Resistance
Apply zinc-rich primer to all bare metal and weld areas before topcoating. The zinc provides sacrificial cathodic protection, corroding instead of your steel. Follow with two-part epoxy primer for maximum moisture resistance. Never skip this dual-layer approach—single-coat primers fail to protect weld areas adequately in salt-exposed environments.
Quality Checks Your Pinch Weld Repair Must Pass
Verify weld integrity before final painting by performing these critical tests:
- Visual inspection: Welds should be continuous without cracks or porosity
- Gap measurement: Consistent 0.5-1.5mm spacing along entire seam
- Function test: Door operation should be smooth with no wind noise
- Water test: Spray repair area with hose—no water should penetrate
Any failed test requires disassembly and correction before proceeding. Rushing to paint hides problems that become exponentially harder to fix later.
Common Pinch Weld Repair Mistakes That Cause Early Failure
Inadequate surface preparation causes 70% of repair failures. Failing to remove all rust and contamination creates weak welds that separate under stress. Excessive heat input from improper welding settings distorts thin panels and weakens the heat-affected zone. Skipping corrosion protection guarantees rust recurrence—always apply seam sealer and zinc primer regardless of climate.
Most critical mistake: Attempting repairs without proper panel alignment. Welding panels under tension creates immediate stress points that cause welds to fail within weeks. Take time to verify alignment at multiple points before striking your first weld.
Learning how to fix pinch welds properly requires patience and attention to detail, but delivers significant savings over professional repairs. Minor repairs take 2-4 hours with the right tools, while panel replacements typically require 4-8 hours. When damage exceeds your skill level or tool capabilities, consulting a professional ensures structural integrity isn’t compromised. Properly executed pinch weld repairs restore both appearance and safety, protecting your vehicle’s value and structural performance for years to come.
Leave a Reply