You’ve just finished a perfect corner weld, but that sharp edge catches your sleeve and leaves metal shards everywhere. That rough seam isn’t just unsightly—it creates safety hazards, traps contaminants, and weakens structural integrity. Whether you’re fabricating stainless steel kitchen equipment or repairing farm machinery, grinding corner welds properly transforms sharp, dangerous joints into smooth, professional finishes. This guide delivers field-tested methods to grind both internal and external corner welds safely and efficiently using common workshop tools. You’ll learn exactly which abrasives to use, how to avoid weakening your weld, and the critical inspection steps most DIYers skip.
Angle Grinder Selection for Tight Corner Access
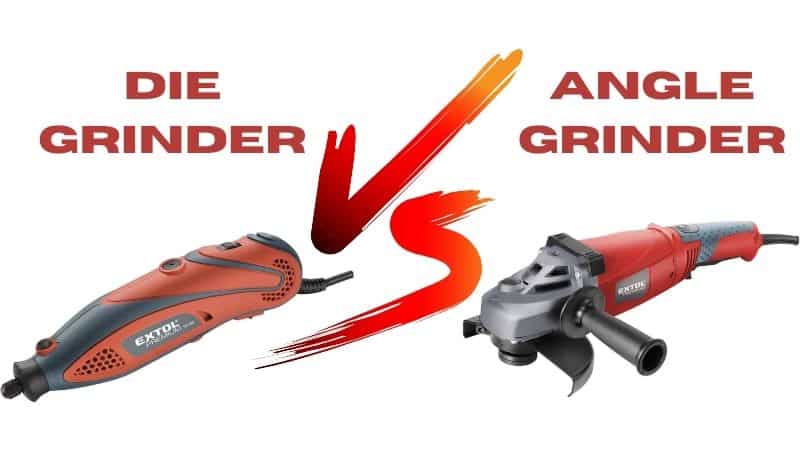
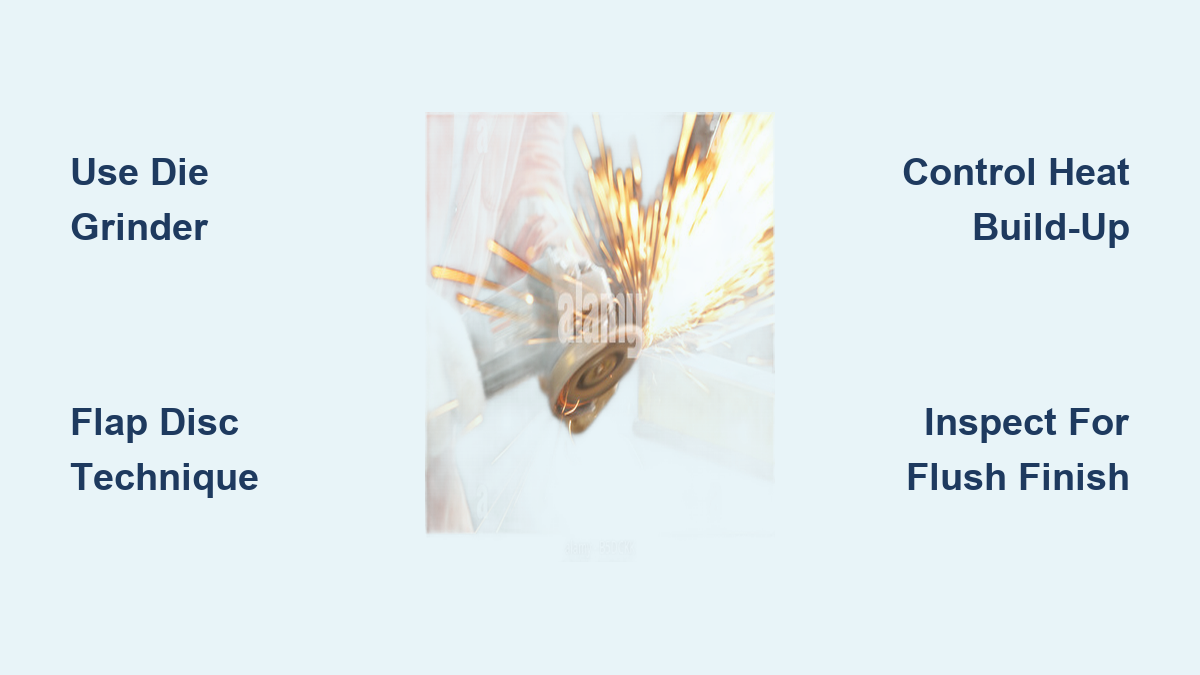
Choosing the right grinder makes or breaks corner weld grinding success. Standard 4.5-inch angle grinders simply won’t fit into tight internal corners common in box frames or tubing joints. For these confined spaces, switch to a compact 3-inch or 4-inch die grinder with flexible shaft attachments that navigate 90-degree angles. External corners on structural beams require the power of a 4.5-inch angle grinder with thin kerf discs, but always verify your grinder’s RPM rating matches the abrasive disc specifications—exceeding maximum speeds causes catastrophic disc failure.
Why Standard Angle Grinders Fail on Internal Corners
Attempting internal corner grinding with full-size grinders creates dangerous kickback as the disc binds in tight spaces. The bulky housing prevents proper wrist positioning, forcing you to grind at awkward angles that produce uneven surfaces. Instead, professionals use right-angle die grinders with 1/4″ or 3/8″ collets that accept narrow flap discs under 1.5 inches wide. These mini-grinders provide the precise control needed to feather weld edges without gouging base metal.
Matching Grit Size to Weld Material Thickness
Thin sheet metal under 1/8 inch demands finer abrasives to prevent burn-through. Start with 80-grit flap discs for initial weld blending on mild steel corners, then progress to 120-grit for smoothing. Stainless steel and aluminum require even finer starting grits—60-grit for heavy welds, never exceeding 40-grit on thin aluminum to avoid embedding particles. Always check disc packaging for material-specific recommendations; using coarse wheels on thin corners removes metal faster than you can react.
Flap Disc Configuration for Corner Contour Matching
Standard flat grinding wheels destroy corner geometry by creating concave surfaces. Flap discs with segmented abrasive flaps naturally conform to corner angles when used correctly. For external corners, position the disc at 15-20 degrees to the vertical surface, letting the leading edge of the flaps feather the weld crown. Internal corners require a different approach: tilt the disc 30 degrees and use the disc’s edge to gradually reduce the weld toe.
Step-by-Step External Corner Grinding Technique
- Secure workpiece vertically in a vise with corner fully exposed
- Start grinding 1 inch from corner using light, overlapping passes
- Gradually angle grinder toward corner while maintaining consistent pressure
- Switch to perpendicular position exactly at the apex point
- Finish with horizontal passes to blend the vertical surface
Critical mistake: Pressing too hard creates heat discoloration on stainless steel and tears metal fibers. Apply pressure no heavier than holding a pencil—let the abrasive do the work. You should hear a smooth “shhh” sound, not a grinding screech.
Internal Corner Grinding with Backstand Technique
Tight internal corners under 1 inch require specialized tactics. Mount a 1.5-inch diameter flap disc on a die grinder and use the “backstand” method:
– Position yourself so your arm moves away from the corner during grinding
– Start disc rotation before contacting metal
– Make short in-and-out motions along the weld seam
– Rotate workpiece 90 degrees after each pass for even material removal
This counterintuitive motion prevents disc binding and gives superior visibility. For box structures, grind opposing corners simultaneously to maintain dimensional accuracy—never grind all corners on one side before flipping the workpiece.
Safety Protocols Specific to Corner Weld Grinding

Corner grinding creates unique hazards beyond standard grinding risks. The acute angle funnels sparks directly toward your body, while metal shards ricochet unpredictably off perpendicular surfaces. Mandatory protection includes:
– Auto-darkening helmet set to shade #3 (grinding produces intense UV)
– Respirator with P100 filters—weld grinding releases hexavalent chromium
– Leather apron with bib to protect neck from falling debris
– Non-slip work gloves with reinforced palms (never wear loose sleeves)
Emergency prep: Keep a Class D fire extinguisher rated for metal fires within arm’s reach. Aluminum grinding sparks can ignite at 1,200°F—water extinguishers worsen these fires.
Heat Management to Prevent Weld Weakening

Excessive grinding heat alters the metal’s crystalline structure, creating brittle zones along the weld toe. The critical danger zone is 400°F for carbon steel and just 200°F for aluminum. Prevent heat buildup by:
– Using intermittent grinding passes (5 seconds on, 10 seconds off)
– Applying dry ice to the weld zone between passes for aluminum
– Never grinding the same spot continuously for more than 3 seconds
– Spraying weld area with compressed air to dissipate heat
Pro tip: Dip your finger in water and touch the weld intermittently—steam formation means you’ve exceeded 212°F. Stop immediately and cool the area.
Flush Grinding Without Metal Loss
Achieving a perfectly flush finish requires strategic material removal. Most beginners grind the weld crown flat but leave the toes protruding, creating stress concentration points. The correct sequence:
1. Reduce weld crown height to 1/32 inch above base metal
2. Focus on feathering the vertical face first using light downward passes
3. Blend the horizontal surface with side-to-side motions
4. Final pass along the entire corner line with disc edge
Visual cue: Run your fingernail perpendicular across the corner. It should glide smoothly without catching at the transition point. Any snag indicates remaining high spots needing attention.
Post-Grinding Inspection Checklist
Skipping inspection leads to premature joint failure. Verify your work with these three field tests:
– Dye penetrant test: Apply red dye, wipe clean, then developer—cracks appear as bright indications
– Coin tap test: Gently tap near the weld with a quarter; hollow sounds indicate undercut
– Gauge measurement: Use a weld inspection ruler to confirm consistent land width
Expert note: Internal corners should have a minimum 0.03-inch radius—sharp 90-degree transitions create crack initiation points under stress.
Tool Maintenance for Consistent Results
Worn grinding tools produce inconsistent finishes that compromise corner welds. After every session:
– Clean disc hubs with wire brush to prevent runout
– Replace worn collets showing scoring marks (causes disc wobble)
– Store flap discs in moisture-proof containers—humidity degrades bonds
– Rotate spare discs regularly to maintain even wear patterns
Discs showing “glazed” surfaces (shiny, non-abrasive areas) must be dressed with a diamond dresser before reuse. Never force a dull disc—it generates excessive heat that damages weld integrity.
Final verification: Run your thumb along both sides of the ground corner. It should feel uniformly smooth with no directional scratches indicating inconsistent grinding angles. For critical applications like pressure vessels, follow up with vibratory finishing to eliminate microscopic stress risers. Remember that proper corner grinding isn’t about removing weld—it’s about harmonizing the joint transition. When executed correctly, your ground corners will pass dye tests, withstand stress cycles, and look like they were cast as a single piece. Keep your abrasives sharp, your angles precise, and your corners will outlast the base metal itself.
Leave a Reply