Struggling with uneven, spattery welds that lack penetration? Creating a professional-quality MIG welding bead separates hobbyists from skilled welders. A properly formed bead shows consistent ripples, perfect fusion with the base metal, and zero defects like porosity or undercut. Whether you’re repairing farm equipment or building custom metal art, mastering how to make a good MIG welding bead transforms your projects from functional to flawless. This guide reveals the exact techniques professional welders use to produce clean, strong beads every time you strike an arc.
Your welding bead quality depends on mastering multiple variables simultaneously—equipment settings, hand technique, and environmental factors. Get one element wrong, and your bead suffers. The good news is that consistent results come from understanding how these factors interact. By the end of this guide, you’ll know exactly how to adjust your setup and technique for perfect beads on any material thickness and position.
Wire Selection and Installation for Optimal Bead Quality
Choosing the right wire diameter directly impacts your ability to create a good MIG welding bead. For materials under 14 gauge, 0.023-inch wire delivers precise control and smooth deposition. When working with 3/16-inch to 1/4-inch steel, step up to 0.030-inch or 0.035-inch wire for proper penetration without burning through. Always match your wire type to your base metal—ER70S-6 provides excellent performance on clean steel, while ER70S-2 handles rusty or painted surfaces better.
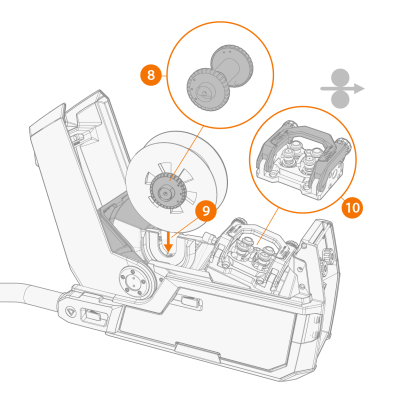
Installing wire correctly prevents feeding issues that ruin bead consistency. Release the tension arm and position the spool with wire unwinding from the bottom. Thread the wire through the drive rollers, ensuring it sits properly in the groove before guiding it through the liner. Before connecting to the gun, cut any bent or crushed wire ends—these cause erratic feeding that creates uneven ripples in your bead. A properly installed wire feeds smoothly, maintaining consistent arc length for uniform bead formation.
Drive Roller Tension: The Secret to Consistent Beads
Drive roller tension that’s too loose causes wire slippage, creating erratic arcs and inconsistent bead ripples. Too tight, and you crush the wire, increasing friction in the liner and causing feeding problems. The perfect tension grips the wire firmly without deforming it. Test by pulling wire from the gun with the feed engaged—you should feel solid resistance without visible wire deformation.
Maintain Precise Stickout Length
Your electrode stickout (ESO)—the distance between contact tip and workpiece—must stay between 3/8 and 1/2 inch for optimal bead quality. Longer stickout cools the wire before it reaches the arc, producing a softer arc with less penetration and a wider bead. Shorter stickout increases penetration but reduces deposition efficiency. Many beginners let stickout grow during welding, causing the bead to flatten out and lose consistency. Mark your contact tip with a paint line at 1/2 inch as a visual reference to maintain perfect stickout.
Finding the Perfect Voltage and Wire Feed Speed
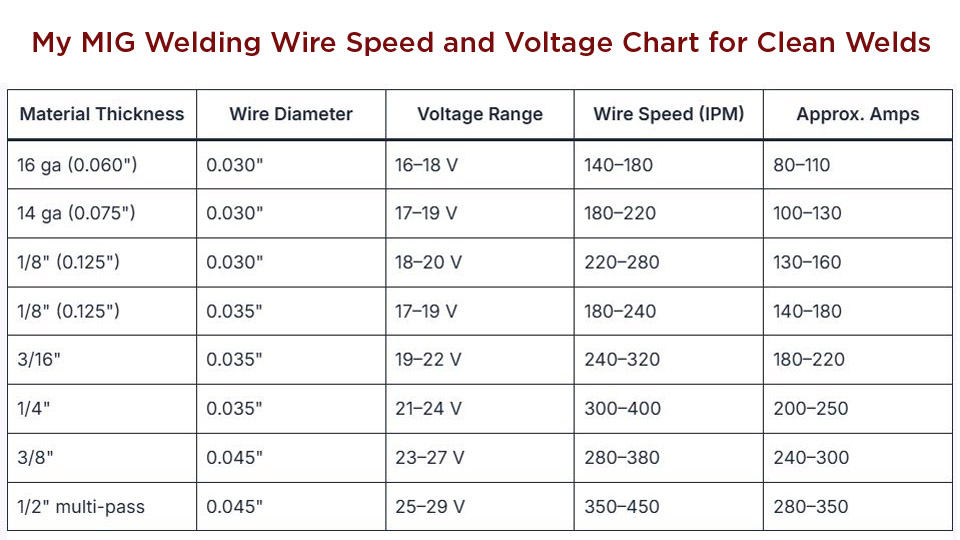
Wire feed speed and voltage work together as your primary bead-shaping controls. Start with your machine’s recommended settings chart, then fine-tune using test beads. For 0.030-inch wire on 1/4-inch steel, begin with 18-22 volts and 200-300 inches per minute wire feed speed. Thinner materials need lower voltage with faster wire speed, while thicker materials require higher voltage with slower wire feed.
Listen to Your Arc for Instant Feedback
The arc sound tells you everything about your settings. A smooth, rhythmic “sizzling bacon” sound with minimal spatter means you’ve hit the sweet spot. A crackling, harsh arc usually indicates voltage too high or wire speed too low—this creates wide, flat beads with shallow penetration. A weak, popping arc means voltage too low for your wire speed, causing the wire to push into the pool without melting properly and creating a ropy, irregular bead.
Master Travel Speed and Gun Manipulation
Travel speed is arguably the most critical factor in how to make a good MIG welding bead. Too slow creates a wide, convex bead prone to burnthrough. Too fast produces a narrow, ropy bead with lack of fusion. Develop a consistent rhythm that matches your speed to the pool size—ideal beads show evenly spaced ripples indicating steady movement.
Push vs. Drag Technique for Different Results
Push welding (gun pointing ahead of travel direction) offers better visibility and produces wider, flatter beads with good penetration—perfect for flat-position welding on thicker materials. Drag welding (gun trailing behind) concentrates heat for deeper penetration with a narrower bead profile, ideal for thin materials and vertical positions. Most welders achieve best results with a slight push angle of 15-20 degrees from perpendicular.
Consistent Motion Creates Professional Results
Move in smooth, steady motions without stopping. Pausing creates pool buildup that can burn through thin material. If you must stop, back up slightly to remelt the crater before lifting the gun. Finish each pass by sweeping back to fill the crater, preventing cracks as the weld cools. Practice on scrap until your hand movement becomes second nature—consistent motion creates consistent beads.
Perfect Your Gun Angle for Flawless Bead Appearance
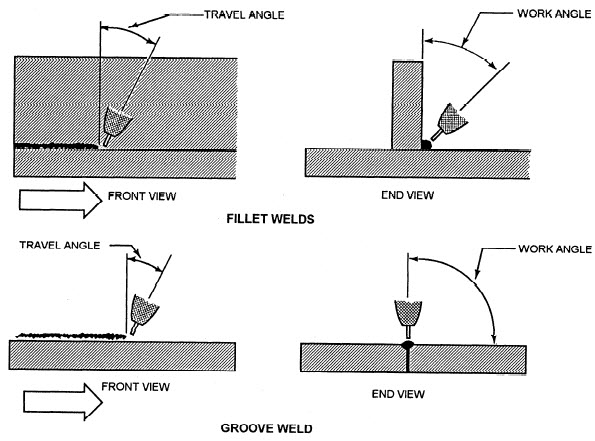
Gun angle dramatically affects bead shape, penetration pattern, and pool behavior. Small adjustments produce noticeable changes in your results.
Fore-Aft and Work Angles Demystified
The fore-aft angle (tilting forward or backward) controls penetration and bead width. Pushing the gun forward concentrates heat at the leading edge, increasing penetration while narrowing the bead. Pulling back widens the bead but reduces penetration. For flat-position welds, a slight push angle of 5-15 degrees works best.
The work angle (side-to-side tilt) determines how the bead lays on the joint. For flat butt joints, use 0-10 degrees. For fillet welds, a 45-degree angle centered on the joint produces optimal penetration on both legs. Angling too far to one side undercuts the opposite side of the joint.
Joint Preparation Makes or Breaks Your Bead
Clean base metal of rust, scale, oil, and paint within at least an inch of your weld joint. Contaminants cause porosity, weak fusion, and erratic arcs. A wire wheel or grinding disc quickly removes buildup. Fit joints with minimal gaps—gaps wider than your wire diameter cause the molten pool to fall through, creating undercut and lack of fusion.
Shielding Gas Selection for Clean, Porosity-Free Beads
The right shielding gas produces clean, shiny beads; the wrong gas causes porosity, spatter, and discoloration.
Best Gas Mixtures for Steel Welding
75% argon/25% CO2 (C25) offers the best balance for general mild steel welding, producing smooth arcs, good penetration, minimal spatter, and attractive bead appearance. Pure CO2 provides deeper penetration but creates a harsher arc with more spatter—use it for thick materials where appearance matters less. For premium welds on thin materials, 90% argon/10% CO2 offers extremely smooth arc action with minimal spatter.
Flow Rate and Coverage Optimization
Set your flow meter between 30-45 CFH for most applications. Too little flow causes porosity from atmospheric contamination. Too much creates turbulence that draws in air. Check coverage by examining bead color—shiny, silver-gray beads confirm adequate protection, while gray or cloudy areas indicate insufficient shielding. Use windshields or increase flow rate in breezy conditions.
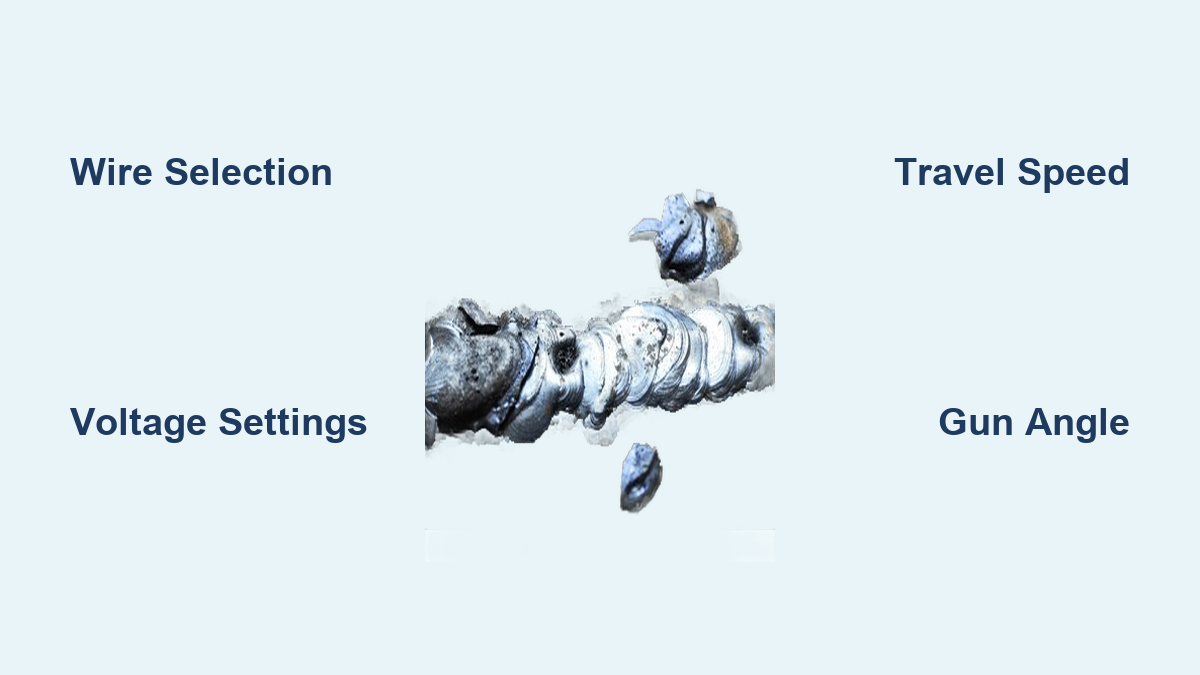
Fix Common Bead Defects Immediately
Every bead problem has specific causes—learn to diagnose issues by reading your welds.
Eliminate Undercut with Simple Adjustments
Undercut appears as a groove melted along the bead edges, significantly weakening the joint. Reduce voltage by 1-2 volts and slow travel speed slightly. Ensure your gun angle isn’t excessively pushed—if you’re pushing too hard, the arc digs into the bead toe. For vertical positions, use a narrower bead with faster travel speed.
Solve Lack of Fusion with Proper Heat Input
Lack of fusion occurs when weld metal fails to bond properly with base metal. Increase voltage slightly or reduce wire feed speed to put more energy into the weld pool. Slow travel speed to allow adequate penetration. Check your gun angle—pushing too aggressively can blast molten metal away before fusion occurs.
Reduce Spatter and Porosity with Clean Setup
Spatter results from unstable arcs caused by incorrect parameters or contaminated materials. Lower voltage slightly and ensure clean base metal. Check your ground clamp connection—a poor ground causes unstable arcs. Porosity (small holes in the weld) almost always indicates contamination—clean your material thoroughly and check gas flow.
Practice Exercises for Immediate Improvement
Building welding skill requires deliberate practice with immediate feedback.
Start with Simple Stringer Beads
Practice straight passes without weaving on clean, flat mild steel. Focus entirely on maintaining consistent travel speed, gun angle, and stickout. Make 20-30 beads, then examine them closely for consistent width, even ripple spacing, and smooth tie-in at start and end points.
Progress to Bead Stacking
Once stringer beads are consistent, practice stacking beads directly on top of each other. This develops pool control and teaches how much overlap creates clean fusion without excessive buildup. Each successive bead should blend smoothly with the previous one.
Pro Tips for Consistent Bead Quality
Maintain your equipment religiously—clean contact tips regularly and inspect liners for wear. Control your breathing and body position for steady hands. Adjust for conditions: cold metal requires slightly higher parameters, while wind demands increased gas flow. Experienced welders constantly read their environment and make small adjustments to maintain consistent results.
Creating quality MIG welding beads requires mastering multiple variables simultaneously. Start with proper equipment setup, then focus on finding correct parameters for your material. Practice travel speed and angle until they become second nature. Diagnose defects by reading your beads critically and adjust based on what you observe. With deliberate practice, you’ll produce structurally sound, visually impressive beads—the hallmark of a skilled welder who knows exactly how to make a good MIG welding bead.
Leave a Reply