Have you ever admired a beautifully crafted metal flower sculpture in a garden or gallery and wondered how it was made? Metal flower welding combines artistic expression with technical welding skills to create stunning decorative pieces that can transform any space. Whether you’re a hobbyist looking to expand your metalworking skills or an artist exploring new mediums, learning how to make a metal flower through welding opens up a world of creative possibilities. This guide will walk you through the essential techniques, tools, and safety considerations you need to transform simple metal pieces into breathtaking floral creations that withstand the elements for years to come.
Essential Welding Equipment for Metal Flower Projects

Before you strike your first arc, you need the right tools for the job. Metal flower welding requires specific equipment that balances precision with creative flexibility. Unlike structural welding projects, artistic metal flowers demand equipment that allows for delicate work while maintaining strong joins between thin metal pieces.
Choosing the Right Welder for Artistic Metalwork
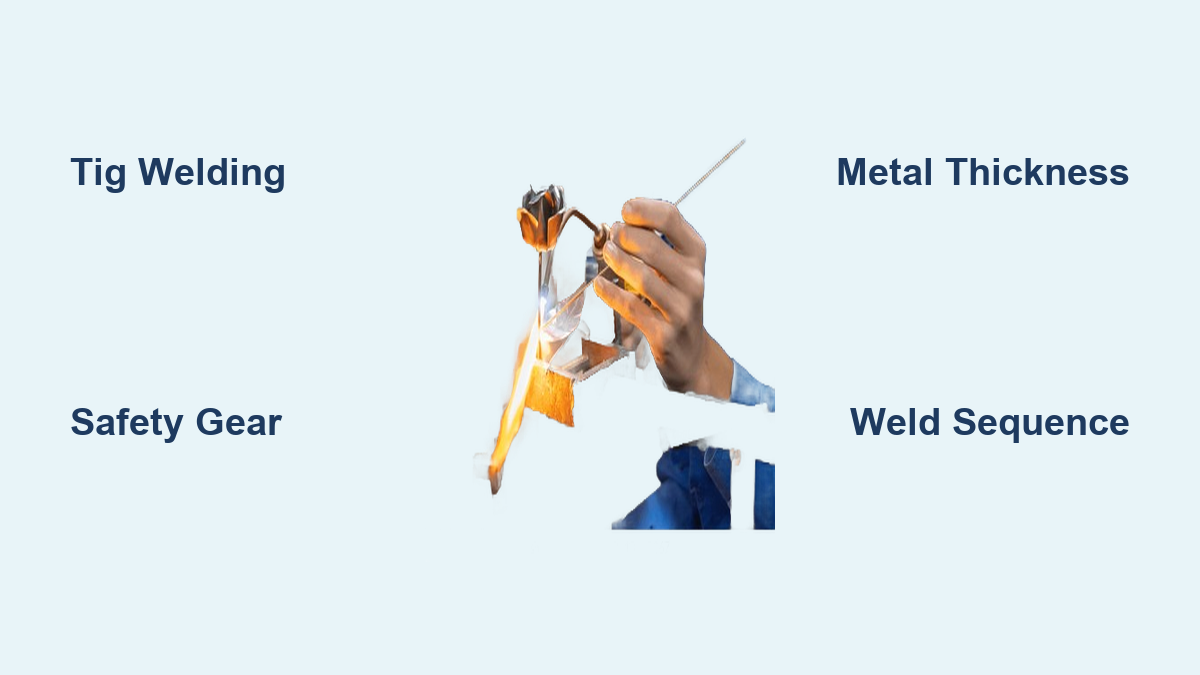
For metal flower projects, TIG (Tungsten Inert Gas) welding is often the preferred method due to its precision control and clean results on thinner metals. TIG allows you to create those delicate petal edges and fine stem details with exceptional control. If TIG equipment is unavailable, a quality MIG (Metal Inert Gas) welder with adjustable settings can work for thicker metal flowers, though it may lack the finesse for more intricate designs. Many metal artists keep both types available—using TIG for delicate flower components and MIG for structural elements like bases or larger stems.
Safety Gear That Should Never Be Skipped
Welding safety isn’t optional—it’s essential for protecting your health while creating metal flowers. Always wear:
– Auto-darkening welding helmet with appropriate shade setting
– Fire-resistant welding jacket (leather or heavy cotton)
– Welding gloves rated for your specific welding process
– Safety glasses worn underneath your helmet
– Steel-toed boots to protect against falling metal pieces
– Respirator when working in poorly ventilated areas
Critical reminder: Never skip eye protection even when “just tacking” pieces together—retinal burns can occur instantly from a stray arc flash.
Metal Selection for Durable, Beautiful Flowers
The metal you choose dramatically affects both the creation process and final appearance of your welded flower. Different metals offer unique working properties, aesthetic qualities, and durability characteristics that will determine how your piece ages and withstands environmental conditions.
Best Metals for Outdoor Metal Flowers
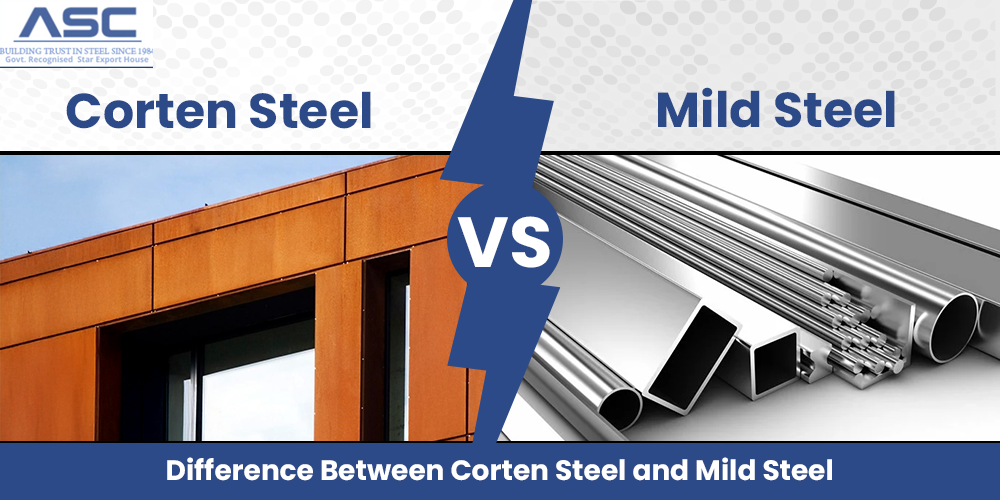
Mild steel is the most accessible option for beginners, offering good weldability at low cost. However, it requires proper finishing to prevent rust when used outdoors. Stainless steel provides excellent corrosion resistance and a distinctive silvery finish that many artists prefer for contemporary designs. Corten steel develops a beautiful, stable rust patina that actually protects the metal beneath, creating that sought-after weathered look without ongoing maintenance. For more intricate work, aluminum offers lightweight properties and a different aesthetic, though it requires specific welding techniques.
Thickness Guidelines for Different Flower Components
Metal thickness significantly impacts your welding approach and final appearance. For petals and delicate elements, 16-18 gauge (1.5-2mm) provides enough structure while allowing for shaping. 14 gauge (2mm) works well for stems that need to support the flower head. 1/4 inch plate makes excellent bases for freestanding sculptures. Remember: thinner metals require lower amperage settings and more precise technique to avoid burning through your material.
Designing Your Metal Flower Blueprint

Successful metal flower welding begins long before you strike an arc—it starts with thoughtful design planning. Creating a detailed blueprint ensures your materials are cut correctly and your welding sequence makes logical sense, preventing wasted time and materials.
Creating Effective Templates for Precision Cutting
Before cutting metal, develop paper templates of each component. Start with simple geometric shapes for petals, then refine them to create natural curves. Trace these templates onto your metal using soapstone or metal marking pencils. For symmetrical flowers, cut multiple identical pieces at once by stacking metal sheets (up to 3 layers of 16-gauge) and clamping them securely before cutting. This ensures uniformity across identical petals or leaves.
Planning Your Welding Sequence Strategically
Welding metal flowers requires thoughtful sequencing to avoid warping and ensure structural integrity. Always weld from the inside out—start with the center components before attaching petals. Tack weld all pieces in position first, checking alignment from multiple angles before committing to full welds. For multi-layer petals, weld the inner layer completely before adding the next layer. Remember that welding creates heat distortion, so weld opposite sides alternately to balance the heat input and minimize warping.
Step-by-Step Metal Flower Welding Process
Now that your materials are prepared and your design finalized, it’s time to bring your metal flower to life through careful welding techniques that balance artistic vision with structural soundness.
Preparing Metal Pieces for Clean Welds
Thorough preparation makes the difference between professional-looking welds and amateur results. Before welding, ensure all cut edges are:
– Deburred using a file or deburring tool
– Cleaned with acetone or alcohol to remove oils
– Free of mill scale (use a wire brush if necessary)
– Properly aligned with appropriate gaps (about 1/16 inch for most joints)
Pro tip: For curved petals, lightly bend metal pieces to their approximate shape before welding—this reduces stress on welds during final shaping.
Executing Precision Welds for Natural-Looking Flowers
When welding metal flowers, your technique should prioritize aesthetics as much as strength. Use lower amperage settings than you would for structural welding to create smaller, more delicate beads. For petal edges, employ a “stacked dimes” technique with consistent, overlapping weld beads that create a smooth transition. When joining petals to the center, use small, evenly spaced tack welds rather than continuous welds to maintain an organic appearance. For stem-to-base connections, reinforce with gussets cut from matching metal for both strength and visual interest.
Shaping Techniques for Realistic Metal Flowers
The magic happens after welding when you shape your metal into natural-looking floral forms. Use a ball-peen hammer and anvil to gently curve petals outward from the center. For more dramatic shaping, employ a English wheel or roller former on larger petals. Heat can also be your friend—carefully heating specific areas with a torch allows for controlled bending without kinking. Remember that metal flowers shouldn’t look perfectly symmetrical; slight variations in petal shape create more natural, artistic results.
Finishing Touches That Elevate Your Metal Flower
The final steps transform your welded metal pieces from rough construction to polished artwork ready for display. Proper finishing protects your work while enhancing its visual appeal.
Surface Treatment Options for Different Aesthetics
Choose your finishing technique based on the look you want to achieve and where the piece will be displayed. For a clean, modern appearance, grind all welds smooth and apply a clear coat. For rustic charm, allow controlled rusting of mild steel followed by a linseed oil treatment. Patina solutions can create beautiful blues and greens on copper elements. Powder coating offers the widest color range and best protection for outdoor installations. Always test your finishing technique on scrap metal first to ensure you get the desired result.
Mounting and Installation Best Practices
How you mount your metal flower affects both its appearance and longevity. For garden installations, set the base in concrete at least 12 inches deep for stability. Use stainless steel hardware for all connections exposed to the elements. If mounting on walls, ensure anchors are appropriate for your wall material and the weight of your sculpture. For freestanding pieces, consider adding a counterweight in the base to prevent tipping in windy conditions.
Troubleshooting Common Metal Flower Welding Issues
Even experienced metal artists encounter challenges when creating floral sculptures. Knowing how to address these issues will save you time and materials.
Fixing Burn-Through on Thin Metal
If you notice holes forming in your thin metal petals, immediately reduce your amperage and increase your travel speed. For existing holes, cut a small patch from matching metal and weld it over the defect. In the future, practice on scrap pieces of the same thickness to dial in your settings before working on your actual flower components.
Preventing Warping During Welding
Warping occurs when heat distribution is uneven across your metal piece. Combat this by:
– Tack welding all components first before full welding
– Welding opposite sides alternately to balance heat input
– Using heat sinks like copper bars to draw heat away from problem areas
– Allowing the piece to cool between weld sequences
Maintenance Tips for Long-Lasting Metal Flowers
Your metal flower’s longevity depends on proper care after installation. Outdoor sculptures face weather challenges that require specific maintenance approaches.
Seasonal Care for Outdoor Metal Flowers
Inspect your metal flowers twice yearly for signs of wear. For painted or powder-coated pieces, touch up any chips immediately to prevent rust. On naturally rusted Corten steel pieces, remove any loose rust flakes with a wire brush but leave the stable patina intact. During winter months in freezing climates, ensure water doesn’t collect in hollow stems where it could freeze and cause damage.
Creating metal flowers through welding blends technical skill with artistic vision, resulting in unique pieces that capture the beauty of nature in enduring metal form. With practice, you’ll develop your own signature style while mastering the techniques that transform raw metal into stunning floral sculptures. Start with simple designs to build your confidence, then gradually tackle more complex compositions as your welding skills improve. Remember that every piece you create contributes to your artistic journey—embrace both successes and learning opportunities as you develop your metal flower welding expertise.
Leave a Reply