Welding jigs transform frustrating, inconsistent projects into professional-quality results with minimal effort. Without a jig, you’re fighting gravity, heat distortion, and human error every time you strike an arc. The right jig holds everything perfectly aligned while you focus solely on creating strong, clean welds. Whether you’re a hobbyist building a single project or a fabricator producing multiple identical parts, a custom jig saves hours of frustrating alignment and rework.
Creating your own welding jig doesn’t require expensive machinery or advanced skills—it starts with understanding your specific project needs and building a simple, effective fixture. This guide reveals exactly how to design and construct jigs that deliver perfect alignment every time, using basic tools and materials you likely already have in your workshop. You’ll learn to identify critical dimensions, select appropriate materials, and implement clamping solutions that make welding faster, easier, and more precise.
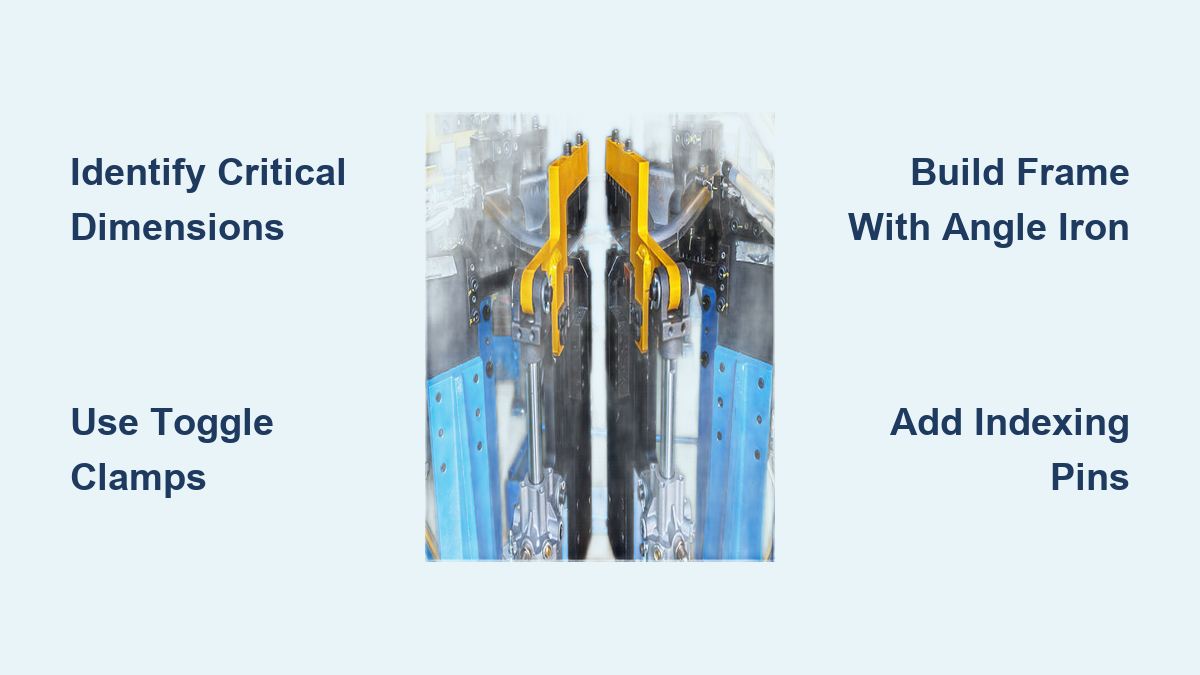
Identify Critical Dimensions for Your Specific Project
Before cutting any metal, determine exactly what your jig must accomplish. Examine your workpiece and identify which dimensions absolutely must remain consistent. Mark these critical points with a permanent marker—these will be your primary contact points for the jig. Consider the welding sequence: which joints need to be welded first to prevent distortion? How will thermal expansion affect alignment during welding?
Create a simple sketch showing workpiece dimensions and critical alignment points. Note where clamps will secure the workpiece without interfering with your welding path. For rectangular frames, the corners represent your most critical alignment points—build your jig to locate these precisely. For complex assemblies, identify reference surfaces that will consistently position multiple components. This planning phase prevents wasted time building a jig that looks impressive but fails to solve your actual alignment problems.
Select the Optimal Jig Type for Your Application

Indexing jigs deliver perfect repeatability for production work. These use precision pins that fit into matching holes on your workpieces, automatically positioning them identically every time. For a simple indexing jig, drill precise holes in your base plate that accept 1/4-inch hardened dowel pins. Machine corresponding holes in your workpieces for perfect registration. This system works best when you can machine consistent reference features into multiple workpieces.
Clamping jigs provide flexibility for one-off projects. These rely on adjustable clamps rather than precision-machined alignment features. Build a basic clamping jig using angle iron to create reference surfaces, then add toggle clamps at strategic points. Position clamps near weld zones to prevent movement during welding, but far enough away to avoid interference with your welding gun. For most hobbyist applications, a well-designed clamping jig offers the best balance of simplicity and effectiveness.
Choose Cost-Effective Materials for Your Jig
Steel angle iron provides the best value for most welding jigs. A 2x2x1/4-inch angle iron frame creates a rock-solid base that withstands welding heat and accidental impacts. The 90-degree angle provides natural reference surfaces for positioning workpieces. For a standard frame jig, cut four pieces of angle iron to form a rectangle sized slightly larger than your workpiece. Steel’s weight prevents movement during welding, while its heat resistance handles proximity to the weld zone.
Hardwood blocks work surprisingly well as temporary positioning aids. Cut scrap wood to match critical dimensions of your workpiece, then clamp these blocks to your steel frame. The wood won’t mar finished surfaces and provides a non-conductive surface that won’t interfere with your welding circuit. For one-time projects, a simple jig made entirely from hardwood can deliver perfect alignment without any welding required to build the jig itself.
Gather Essential Tools for Jig Construction
Basic layout tools include a combination square, center punch, and scribe for marking precise cut lines and hole locations. A machinist’s square verifies 90-degree angles—critical for accurate jig construction. Without these fundamental tools, your jig will compound errors rather than eliminate them. Spend time laying out your jig components carefully; accuracy here determines the entire jig’s effectiveness.
Drilling equipment creates the holes that accept positioning pins and clamps. A drill press ensures perpendicular holes, but a quality hand drill with a drill guide attachment works for most jig applications. Use a center punch to mark hole centers precisely before drilling. For indexing jigs, drill holes slightly undersized, then ream to final dimension for precise pin fit. A set of numbered drill bits helps create properly sized pilot holes for tapping.
Build a Simple Frame-Style Jig in 30 Minutes
Cut four pieces of 2x2x1/4-inch angle iron to form a rectangle slightly larger than your workpiece. For a typical bracket, cut two 12-inch pieces and two 6-inch pieces. Deburr all edges with a file to prevent injury. Layout and mark hole positions for clamps and indexing pins before assembly.
Tack weld the corners together, checking for squareness with your machinist’s square. Complete the welds, then grind the joints smooth. Drill and tap holes for 3/8-inch toggle clamps at 4-inch intervals along the frame edges. Position clamps so their jaws point inward toward the work area. Add 1/4-inch holes for indexing pins at critical corner locations.
Test your jig with a workpiece before final use. Place the workpiece in the jig and verify all critical dimensions align correctly. Adjust clamp positions if necessary. Apply a light coat of oil to prevent rust, but wipe clean before welding to avoid contamination.
Implement Quick-Release Clamping for Maximum Efficiency
Toggle clamps dramatically reduce setup time compared to C-clamps. Install horizontal toggle clamps along the frame edges, positioning them so the clamping force presses workpieces against reference surfaces. The over-center mechanism provides strong, consistent pressure with minimal handle movement. For a standard jig, install four toggle clamps—two on each long side.
Removable stops create instant custom jigs for different projects. Drill and tap a grid of 1/4-20 threaded holes across your jig base. Keep a collection of threaded studs with jam nuts that you position as needed for each workpiece. The jam nuts lock the stops in place, creating custom configurations in seconds. This system works particularly well for positioning tubing or square stock at precise locations.
Optimize Your Jig for MIG Welding Applications

MIG welding produces significant spatter that accumulates on jig surfaces. Design your jig with angled surfaces where possible—spatter slides off rather than building up on flat areas. Use copper or brass inserts in high-spatter zones, as these materials shed spatter more readily than steel. Keep a wire brush dedicated to jig cleaning and remove spatter immediately after each use before it bonds permanently to the jig.
Position clamps at least 1 inch away from weld zones to prevent spatter from welding your workpiece to the jig. This small clearance makes workpiece removal effortless after welding. For critical dimensions, add a secondary set of alignment pins that you insert after initial tack welds to maintain position during full welding passes.
Maintain Your Welding Jig for Long-Term Accuracy
Clean your jig after every use with a wire brush and solvent to remove spatter and debris. Pay special attention to indexing holes and clamp surfaces—any buildup here compromises accuracy. Store your jig upright on a rack rather than flat on a bench where tools might roll onto it and damage precision surfaces.
Check indexing pins monthly for wear that might allow workpiece movement. Replace worn pins immediately—precision jigs are only as accurate as their weakest component. Apply a light coat of oil to threaded holes and moving parts to prevent rust, but wipe clean before use to avoid weld contamination.
Avoid These Common Jig-Building Mistakes
Insufficient clamping causes the most frequent jig failure. Many beginners install just enough clamps to hold the workpiece, not enough to resist welding forces. Always add at least one extra clamp near each weld zone—thermal expansion creates surprising movement during welding. For small brackets, use four clamps minimum even if the workpiece seems secure with fewer.
Poor heat management destroys jigs over time. Continuous welding in the same location eventually warps steel components. Rotate welding positions on production jigs to distribute heat evenly. For critical precision jigs, add copper heat sinks to areas near frequent weld zones—copper absorbs heat without distorting.
Ignoring accessibility makes jigs frustrating to use. Test your welding motion with a dummy workpiece before finalizing clamp positions. Nothing defeats the purpose of a jig more than having to remove clamps mid-weld to access a joint. Position clamps where they secure the workpiece without interfering with your welding technique.
Apply Professional Fabricator Shortcuts
Temporary alignment pins speed up one-off projects. Instead of drilling precise holes, use 1/8-inch welding rods as temporary alignment pins. Insert them through workpiece holes during tack welding, then remove before final welding passes. This simple trick provides perfect alignment without permanent jig modifications.
Magnetic clamps offer instant positioning for steel workpieces. Keep a collection of rare-earth magnets in various sizes—they hold workpieces securely during tack welding without any permanent jig construction. For quick projects, this low-tech solution delivers professional results with zero setup time.
Final Thoughts
Building effective welding jigs starts with understanding your specific project requirements rather than constructing elaborate fixtures. A simple frame with strategically placed toggle clamps solves most alignment challenges for hobbyists and professionals alike. Focus on securing critical dimensions precisely while keeping the design simple enough to use consistently.
The real value of a welding jig isn’t just in the time saved during welding—it’s in the confidence that every piece you produce meets your exact specifications. Start with a basic jig for your current project, then refine your approach as you gain experience. Within a few projects, you’ll develop a collection of jigs that dramatically improves your welding quality while cutting fabrication time in half.
Leave a Reply