Welding clamps are indispensable tools that secure metal pieces firmly in place during welding operations, preventing movement that could compromise weld quality. While commercial welding clamps are readily available, learning how to make welding clamps yourself offers significant advantages in cost savings, customization, and workshop self-sufficiency. Creating your own welding clamps costs a fraction of store-bought versions and allows you to design tools perfectly suited to your specific projects. Whether you’re a weekend hobbyist or professional fabricator, building your own welding clamps is a practical skill that enhances your workshop capabilities while providing the satisfaction of working with equipment you crafted with your own hands.
This guide focuses on creating functional, durable welding clamps using basic workshop tools and materials most metalworkers already have on hand. By following these fabrication techniques, you’ll develop a versatile clamping system that handles most welding and fabrication tasks without draining your tool budget.
Essential Materials and Tools for DIY Welding Clamps
Before starting your welding clamp project, gather appropriate materials that ensure durability and performance. Mild steel (A36 or 1018) serves as the primary material for clamp bodies due to its excellent weldability and strength-to-cost ratio. For most clamp designs, 1/4-inch to 1/2-inch thick flat bar stock provides the ideal balance of rigidity and workability. Threaded components require cold-rolled steel rod or all-thread in common sizes like 3/8-inch, 1/2-inch, and 5/8-inch diameters.
Don’t overlook protective elements—rubber or polymer pads prevent workpiece marring while providing superior grip. These can be cut from old conveyor belts, cutting boards, or even thick rubber mats. Spring steel pieces from discarded hacksaw blades create effective locking mechanisms in certain clamp designs. A coat of high-temperature paint protects finished clamps from welding spatter and extends their service life significantly.
Your essential workshop tools include a reliable welding setup (MIG is most accessible for beginners), angle grinder with cutting and grinding discs, drill press or powerful handheld drill, measuring and layout tools, and basic hand tools. Most metalworkers already own these core tools, making clamp fabrication an accessible project without significant additional investment.
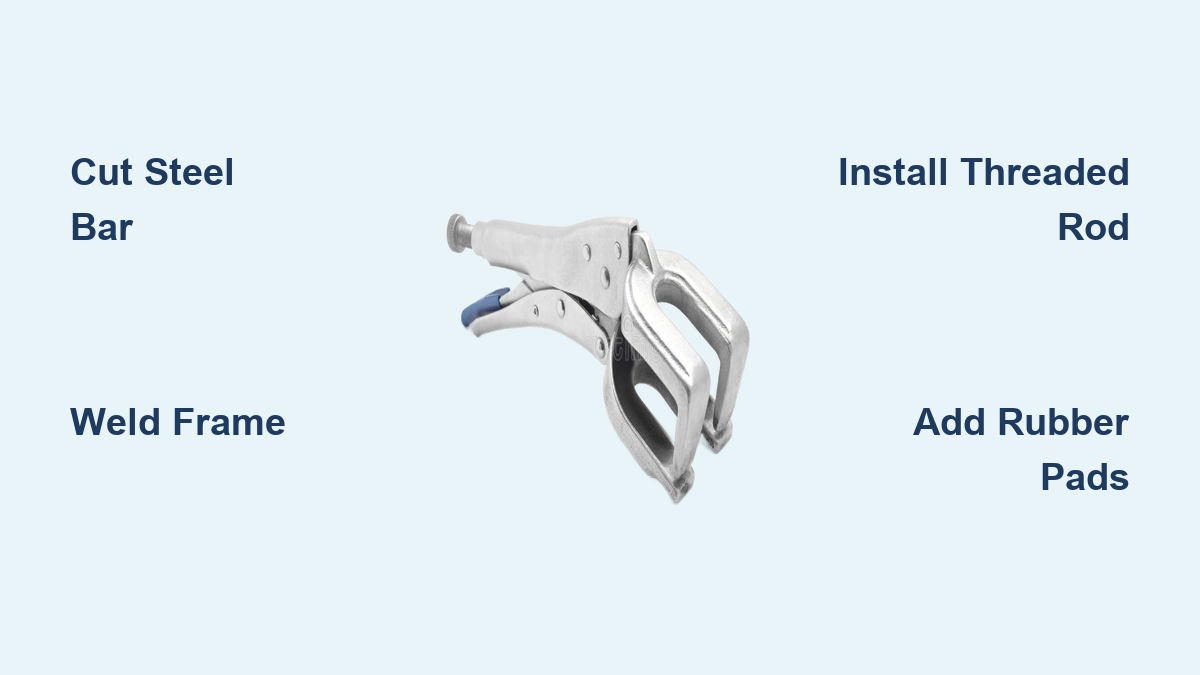
Fabricating a Heavy-Duty C-Clamp

The C-clamp represents the most fundamental and versatile clamping design for any metalworking shop. Start by cutting your C-frame from 2-inch wide by 1/2-inch thick flat bar stock. For general workshop use, create a frame approximately 6 to 8 inches deep with a 2-inch opening. After cutting, clean up the edges with your angle grinder to ensure smooth, square surfaces that weld cleanly.
Drill a 9/16-inch diameter hole in the center of the “anvil” end (the solid end opposite the opening), positioned approximately 1 inch from the edge. This hole accommodates a 1/2-inch threaded rod with slight clearance. Use a drill press for best results to maintain proper alignment—hand-drilled holes often angle slightly, causing clamp binding during operation.
The swivel shoe is critical for proper workpiece contact. Cut a 2-inch square piece from 1/2-inch thick steel plate and weld a 1/2-inch nut securely to the underside. Create the swivel mechanism by cutting a 1-inch diameter piece of round stock about 1-inch long, drilling a 1/2-inch hole lengthwise, then welding a short length of threaded rod into the hole. This ball-and-socket design allows the shoe to angle slightly, ensuring even contact with uneven workpieces—a crucial feature for welding applications.
For the clamping screw, cut 1/2-inch all-thread rod to approximately 8 inches long. Create a T-handle from 3/8-inch thick flat bar about 6 inches wide and weld it perpendicular to the rod’s end. Thread the swivel shoe onto the clamping screw, insert the screw through the C-frame hole, and secure with a nut inside the frame. Test your completed clamp thoroughly before use, checking for smooth operation and adequate holding power.
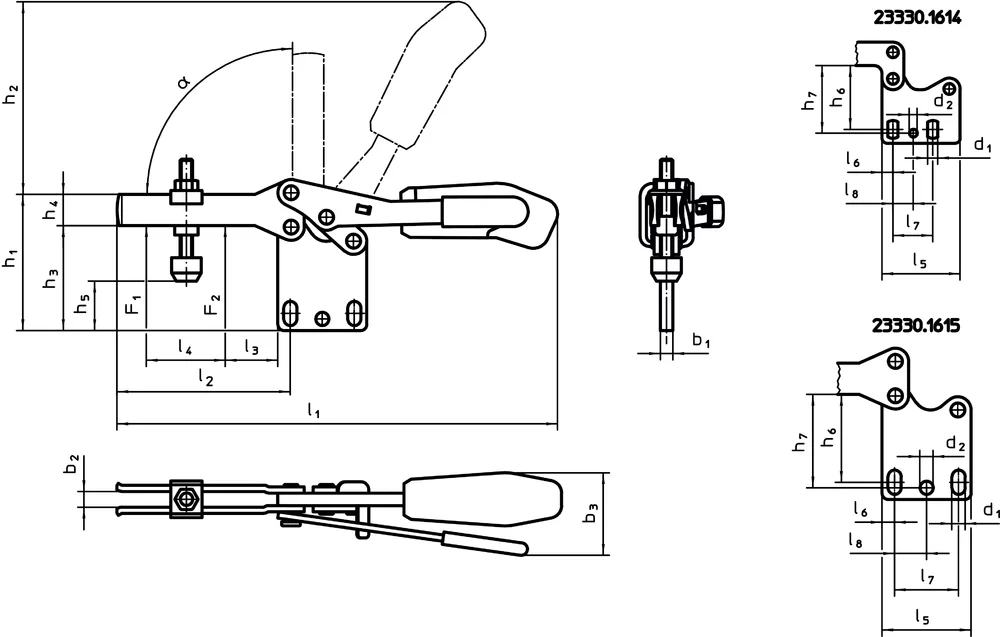
Building a Quick-Acting F-Clamp
F-clamps offer advantages over C-clamps when working with larger workpieces or needing greater reach. Start by cutting the fixed jaw from 1/4-inch thick steel plate, approximately 2 inches wide and 4 inches long. Cut your main frame bar from 1-1/2 inch wide by 1/4 inch thick bar to your desired length (18-24 inches provides excellent versatility).
Weld the fixed jaw perpendicular to one end of the frame bar, ensuring a clean, strong fillet weld along the inside corner. Cut the sliding jaw from the same material as the fixed jaw (2 inches wide and 3 inches tall) and drill two elongated slots to accommodate the clamping screw.
The quick-release trigger mechanism distinguishes quality F-clamps. Cut the trigger lever from 1/8-inch thick steel plate (6 inches long and 1 inch wide) and create a pivot point near one end. Mount the lever on a shoulder bolt in the sliding jaw body. Attach a small rectangular brake pad made from hard rubber to the bottom of the trigger lever—this presses against the frame bar when the lever is released, preventing jaw movement.
For the clamping screw, cut 1/2-inch all-thread rod approximately 18 inches long. Thread a nut onto one end and weld it securely to the fixed jaw pad. The opposite end passes through the sliding jaw assembly with a second nut threaded on outside. Add protective pads to both jaw faces using hard rubber, UHMW plastic, or leather to prevent workpiece marring and provide grip.
Creating a Locking Welding Clamp
Locking welding clamps combine holding power with quick-release convenience, making them ideal for welding applications where constant adjustment would be disruptive. Cut the main clamp body from 1/4-inch thick steel plate in a modified C-shape with approximately 3 inches of opening width.
For the release lever, cut 8 inches of spring steel (1 inch wide) from an old handsaw blade or similar source. Drill a pivot hole near one end and mount it on a shoulder bolt in the clamp body. The lever should rotate through about 90 degrees from fully closed to fully open.
Create the cam mechanism by cutting a 2-inch diameter piece from 1/4-inch steel plate with an off-center pivot hole. When mounted on a bolt through the clamp body, this cam presses against the clamping screw as the lever closes, gradually increasing clamping pressure.
Cut a 6-inch length of 1/2-inch all-thread rod for the clamping screw. One end attaches to the swivel pad assembly while the opposite end passes through the cam mechanism. Fit a compression spring over the threaded rod between the cam and clamp body to provide returning force for release.
The swivel pad should be approximately 1-1/2 inches in diameter with a smooth pivot point that angles freely to match workpiece surfaces. Test your completed locking clamp thoroughly, adjusting the cam profile or spring tension as needed to achieve positive locking action and smooth release.
Crafting Magnetic Holding Clamps
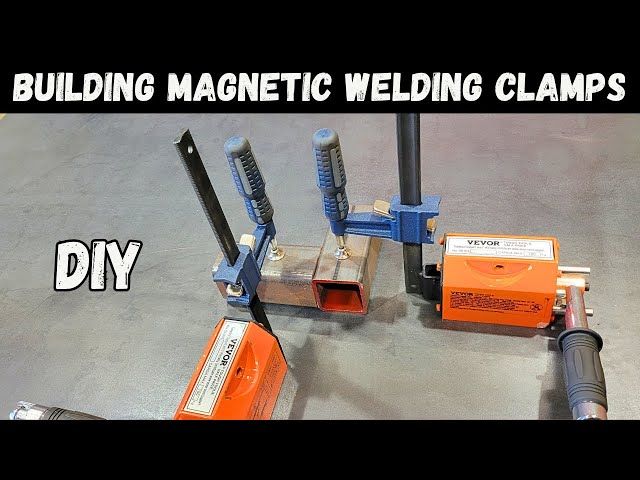
Magnetic welding clamps position and hold steel workpieces with remarkable speed, freeing your hands for welding. For welding applications, ceramic magnets provide the best balance of performance, durability, and cost. When mounting magnets, ensure the surface is perfectly flat and epoxy them securely in their housings.
Create adjustable angle magnet holders by building a 4-inch square base plate from 1/4-inch steel. Cut 6-8 inch arms from 1-inch steel square tubing and hinge them to the base plate using small steel hinges. This allows arms to fold flat for storage and position at any angle from parallel to perpendicular.
For specialized applications, create V-blocks by cutting V-grooves in steel blocks using your angle grinder. Mount magnets in the bottom of these blocks to hold round stock, pipes, or tubing securely during welding. Magnetic corner squares (L-shaped assemblies with magnets at each corner) dramatically speed up frame construction by holding members at perfect 90-degree angles.
Remember that magnetic clamps require periodic maintenance—check magnet strength regularly, keep surfaces clean of spatter and debris, and apply light oil to prevent rust (for non-welding applications).
Finishing Touches for Long-Lasting Performance
Proper finishing extends your clamps’ service life significantly. Thoroughly clean all surfaces using wire wheels to remove mill scale, rust, and oils before applying finish. Apply two thin coats of primer, lightly sanded between applications, for optimal adhesion.
Choose high-temperature paint for areas near welding operations—it resists heat exposure from spatter and grinding sparks better than standard paints. Apply anti-seize compound to all threaded surfaces during assembly to prevent galling and corrosion. Lubricate swivel pad pivot points occasionally to maintain free movement.
Check all fasteners periodically and retighten any that have worked loose from vibration. Consider adding jam nuts or lock washers to critical fasteners during initial assembly. Store completed clamps in a dry location, preferably wall-mounted to prevent damage to threaded components.
Creating your own welding clamps transforms ordinary workshop time into productive tool-building that pays dividends through every welding project. The skills developed during clamp fabrication directly transfer to more complex projects, making this both a practical investment and a valuable learning experience for any metalworker.
Leave a Reply