When your metal components need reinforcement that can withstand extreme stress and vibration, knowing how to pin and weld properly becomes critical. This specialized metalworking technique creates connections stronger than the base material itself by combining mechanical fastening with fusion welding. Automotive fabricators, structural steel workers, and heavy machinery repair technicians rely on pin and weld for applications where ordinary bolts or simple welds would fail under pressure. By inserting a hardened steel pin into a pre-drilled hole and welding it securely in place, you create a permanent joint that distributes forces evenly across the connection point.
The pin and weld method solves problems other techniques can’t address. Unlike standard fillet welds that concentrate stress at the weld toe, pin and welding spreads stress through the pin’s surface area and surrounding weld material. This creates joints that resist both shear forces and vibration far better than either method alone. Whether you’re repairing a cracked engine block, reinforcing suspension components, or mounting heavy equipment brackets, mastering how to pin and weld properly ensures professional results that last.
Why Pin and Weld Outperforms Standard Welding Techniques
Pin and weld creates mechanical interlock that standard welding lacks, making it essential for high-stress applications. When you drill a precise hole, insert a properly sized pin, and weld it securely, you form a connection where forces transfer through both the pin and the weld material. This dual-path stress distribution prevents the stress concentration that causes ordinary welds to crack under cyclic loading.
Automotive applications particularly benefit from this technique. Suspension components, frame reinforcements, and engine mounts experience constant vibration that would eventually fatigue a standard weld. Pin and weld joints in these locations maintain integrity because the pin absorbs much of the shear force while the weld provides molecular bonding. The result is a connection that often exceeds the strength of the original base material.
What Happens When You Skip the Pin
Attempting to repair cracks or reinforce components with welding alone typically leads to premature failure. Without the mechanical interlock provided by the pin, the weld becomes the sole load-bearing element. Under repeated stress, microscopic cracks form at the weld toe and propagate into the base material. Within weeks or months, depending on usage, the repair fails completely—often at the most inconvenient time. Pin and weld prevents this by creating multiple failure paths that must all be overcome before the joint separates.
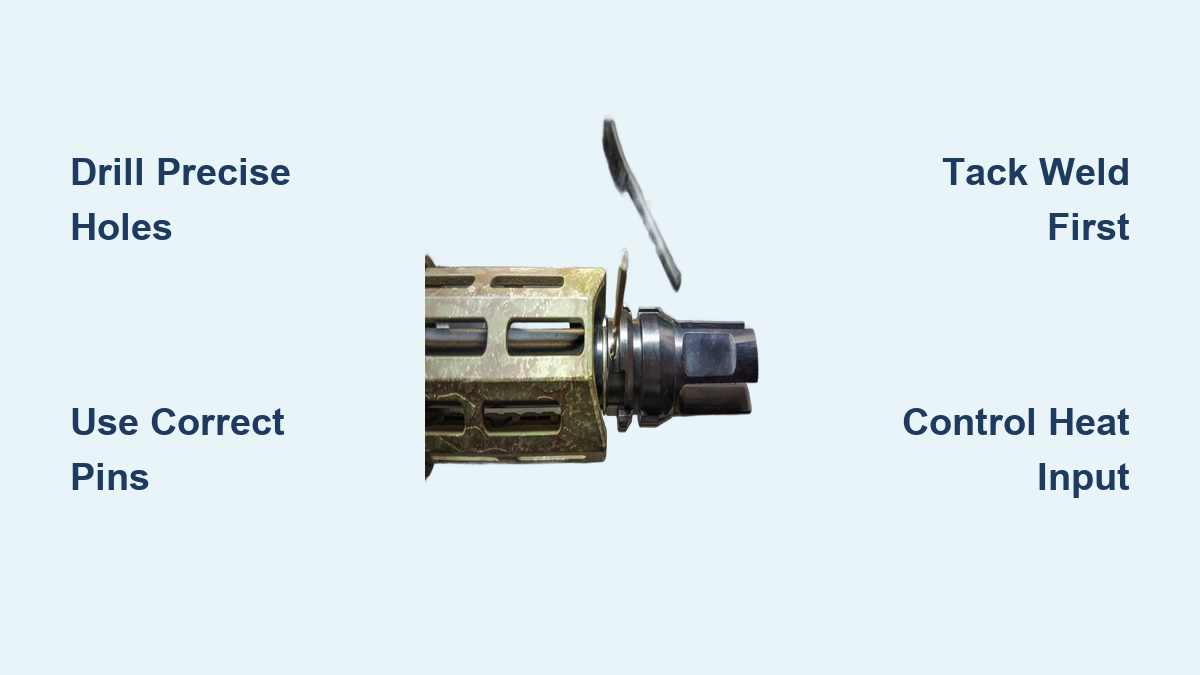
Critical Equipment for Successful Pin and Weld Projects
Gathering the right tools before starting ensures your pin and weld projects succeed. The essential equipment falls into four categories: drilling systems, pin selection, welding apparatus, and safety protection.
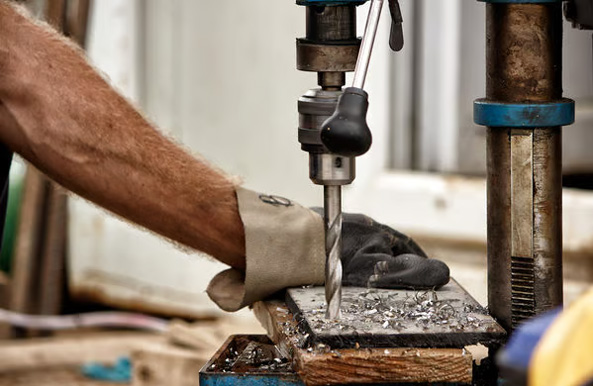
Drilling requires precision equipment to create properly sized holes. A quality drill press delivers the accuracy needed for professional results, though a powerful handheld drill with a guide bushing works for field repairs. Use drill bits sized 1/16 to 1/8 inch larger than your pins to allow for weld penetration. Always include a deburring tool to remove sharp edges that create stress points in the finished joint.
Selecting the Right Pin Type for Your Application
Understanding pin characteristics determines your project’s success. Roll pins (spring pins) provide flexibility for applications requiring some movement tolerance. Their slightly oversized diameter creates constant pressure against the hole walls, enhancing the mechanical bond. Dowel pins offer maximum shear strength for precision applications where minimal movement is acceptable. Threaded inserts work best when you need to restore or create threaded mounting points within the pin and weld structure.
Material selection matters significantly. Case-hardened pins feature a wear-resistant outer shell with a tougher core, ideal for automotive suspension work. Through-hardened pins provide consistent strength throughout but may be more brittle. Stainless steel pins resist corrosion for outdoor or marine applications but require different welding parameters than carbon steel.
Step-by-Step Pin and Weld Execution Process
Following a systematic approach ensures strong, durable pin and weld joints every time. Rushing through any phase compromises the final result.
Proper Hole Preparation Techniques
Begin by cleaning the work area thoroughly with a wire brush and degreaser. Remove all rust, paint, oil, and dirt that could cause weld porosity. Secure the workpiece firmly to prevent movement during drilling. Drill slowly with light pressure to avoid work-hardening the material. For best results, use cutting fluid with high-speed steel bits to extend bit life and improve hole quality.
After drilling, deburr both sides of the hole completely. Use a countersink bit run in reverse or a dedicated deburring tool to remove the raised lip created during drilling. This step is non-negotiable—sharp edges concentrate stress and initiate cracks. Dry fit the pin before welding; it should slide in with light resistance but not require hammering. If the pin is too loose, the joint lacks mechanical strength; if too tight, it may distort during heating.
Welding Sequence for Maximum Strength
Position the workpiece for optimal welding access, preferably in the flat or horizontal position. Insert the pin fully, ensuring it sits flush or slightly below the surface. Begin with two to three tacks placed evenly around the pin circumference—typically at 12, 4, and 8 o’clock positions. Create each tack by establishing a weld pool on the base material adjacent to the pin, then allowing it to flow around the pin surface.
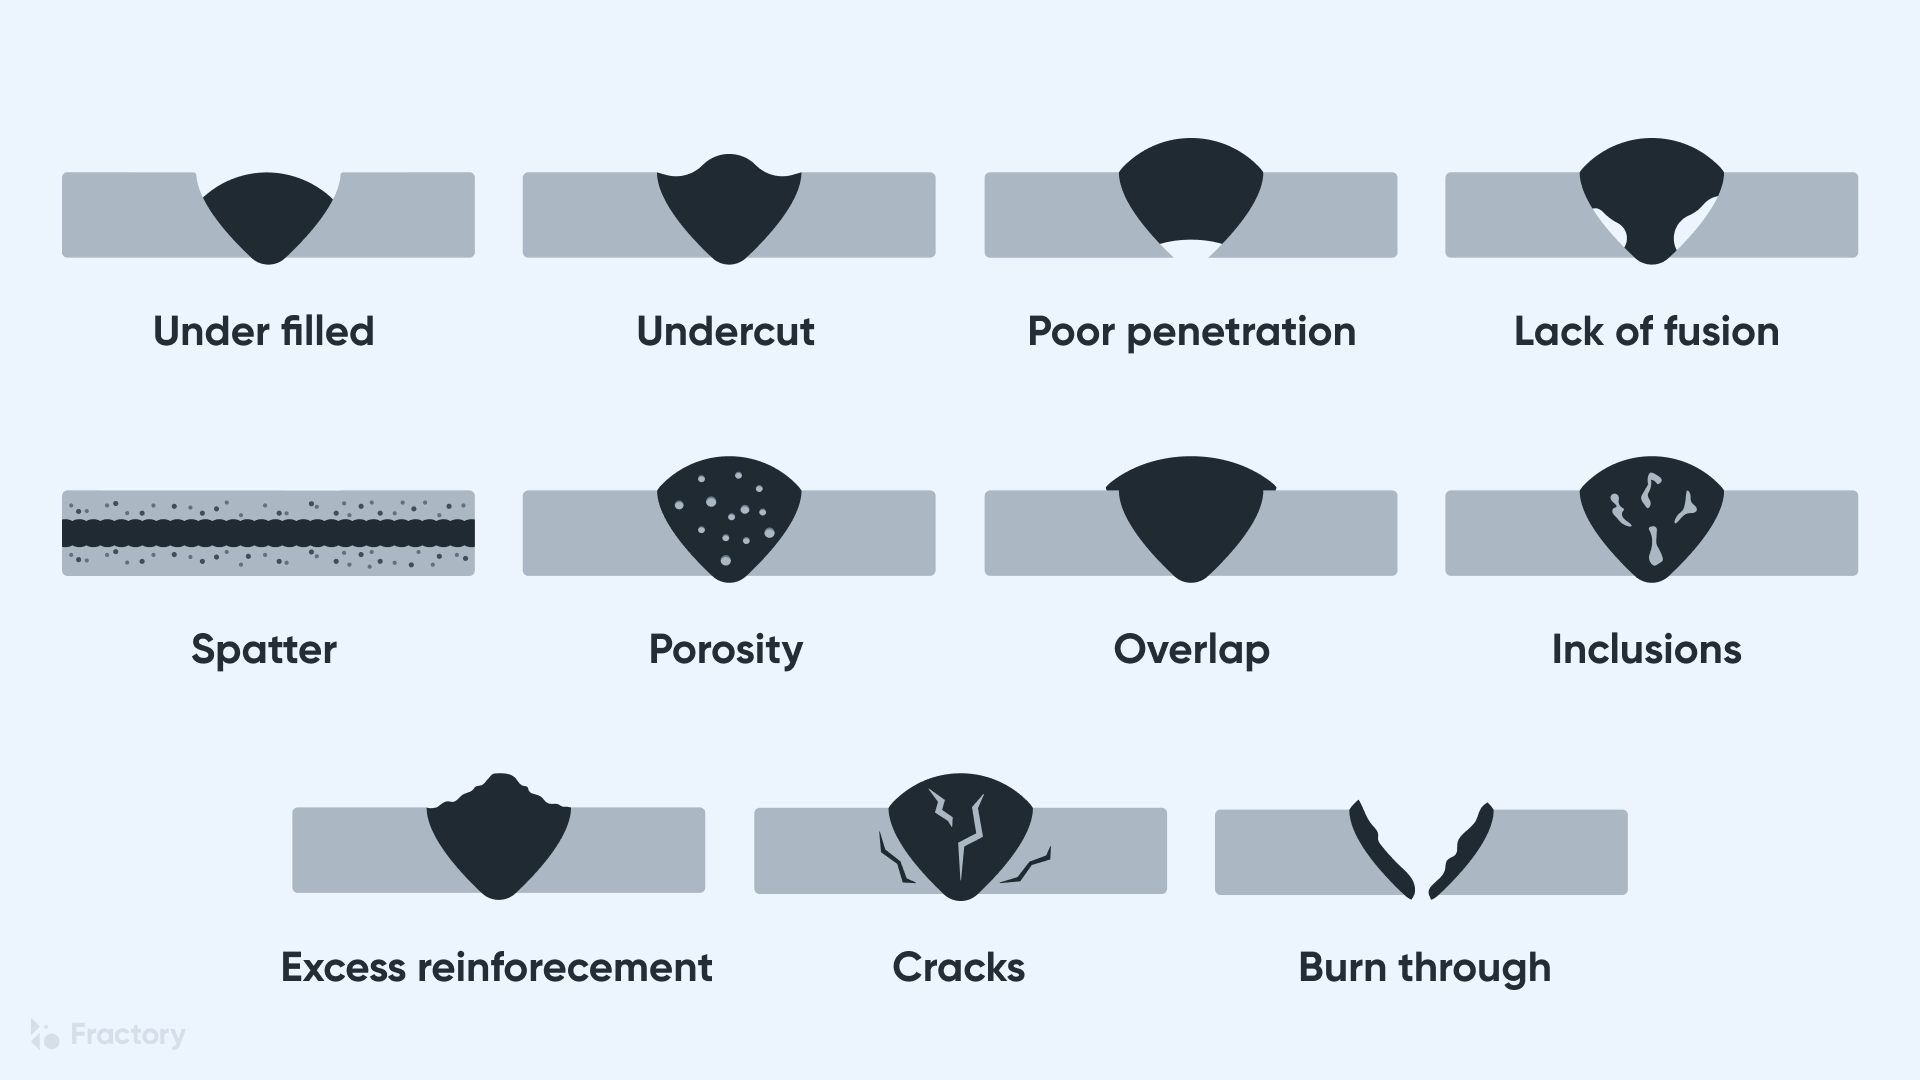
After tacking, complete the weld by making continuous passes around the pin. Maintain consistent travel speed and torch angle to build a smooth fillet that transitions gradually from base metal to pin surface. The ideal weld profile shows complete fusion with no gaps, undercut, or porosity. Allow natural cooling—never quench with water or compressed air—as rapid cooling creates brittleness that leads to premature failure.
Common Pin and Weld Mistakes and How to Avoid Them
Even experienced metalworkers make errors that compromise pin and weld joints. Recognizing these pitfalls ensures your repairs maintain integrity under stress.
Heat Management Errors
Excessive heat input is the most frequent mistake when learning how to pin and weld. This appears as large, bulbous weld profiles, excessive spatter, and widespread discoloration. Too much heat creates an oversized heat-affected zone where the base metal’s properties have been altered, making it more susceptible to cracking. To prevent this, use the lowest amperage that provides adequate penetration and maintain steady travel speed. For multiple passes, allow cooling between layers.
Insufficient penetration creates the opposite problem—welds that look acceptable but lack strength. Signs include easy chipping and visible gaps between weld and base metal. Prevent this by cleaning to bare metal before welding, matching machine settings to material thickness, and maintaining proper travel speed. Your weld should penetrate at least 25% into the base material for optimal strength.
Safety Protocols for Pin and Weld Operations
Safety considerations for pin and weld work extend beyond standard welding precautions due to the combined drilling and welding processes.
Eye protection must be worn throughout the entire operation, not just during welding. Drilling creates metal chips that can cause serious eye injuries, while welding produces intense UV radiation that causes flash burns even with brief exposure. Use safety glasses during preparation and an auto-darkening welding helmet during the welding phase.
Respiratory protection is essential when welding, especially with the additional fumes generated by heated pins. Use a respirator rated for welding fumes and position yourself to the side of the fume plume rather than directly above it. Ensure adequate ventilation in your workspace to prevent fume accumulation.
Fire prevention requires special attention during pin and welding. Sparks from both drilling and welding can travel significant distances. Clear the work area of combustibles, use fire-resistant blankets for protection, and have a fire extinguisher readily accessible. Monitor the area for at least 30 minutes after completing work, as residual heat can reignite hidden embers.
Professional Applications Across Industries

Pin and weld techniques appear across multiple industries where standard fastening methods prove inadequate.
Automotive fabricators use pin and weld extensively for structural modifications. Reinforcing frame rails, securing roll cage mounts, and repairing cracked suspension points all benefit from this technique’s vibration resistance. Performance and off-road vehicles particularly rely on pin and weld for components that must withstand extreme conditions.
Heavy equipment repair shops employ pin and weld to restore worn excavator buckets, loader arms, and bulldozer blades. The technique extends component life significantly at a fraction of replacement cost. Structural steel applications use pin and weld for reinforcing connections and making repairs without disassembling entire structures.
Custom manufacturing facilities utilize pin and weld for creating adjustable jigs and fixtures. The technique allows rapid modification by welding pins at new positions, then grinding them off if changes are needed later—providing flexibility during prototype development.
Achieving Professional Results Consistently
Mastering how to pin and weld to professional standards requires attention to details that separate amateur work from expert craftsmanship.
Consistent technique produces stronger, more reliable joints. Develop a repeatable rhythm and stance that you maintain throughout each weld. Position yourself comfortably with good visibility of the weld pool, and maintain consistent torch angle and distance. Small variations accumulate into significant differences in weld quality, especially when making multiple passes around a pin.
Post-weld cleanup enhances both appearance and corrosion resistance. Use a wire wheel to remove slag and spatter, then apply rust-preventive coating to exposed areas. For critical applications, consider magnetic particle inspection to verify internal weld integrity beyond what visual examination reveals.
By following these guidelines for how to pin and weld properly, you’ll create joints that withstand extreme stress and vibration while maintaining professional quality. The technique requires attention to detail but delivers results that standard welding methods cannot match—making it an essential skill for serious metalworkers across multiple industries.
Leave a Reply