Your first attempt at how to set up a mig welder shouldn’t feel like deciphering rocket science. Many beginners waste hours on poor welds simply because their machine wasn’t configured correctly from the start. A properly set up MIG welder delivers smooth, consistent arcs with minimal spatter, while a rushed setup leads to frustration, wasted materials, and questionable weld strength. This guide cuts through the confusion with concrete steps to transform your new welder from intimidating box to reliable tool.
Most welding problems beginners encounter stem from improper setup rather than lack of skill. When you understand how wire speed, voltage, gas flow, and material thickness interact, you’ll produce quality welds from your very first attempt. Whether you’re unboxing a new machine or finally tackling that dusty unit in your garage, this systematic approach to how to set up a mig welder ensures you’ll avoid common pitfalls and build confidence with every weld.
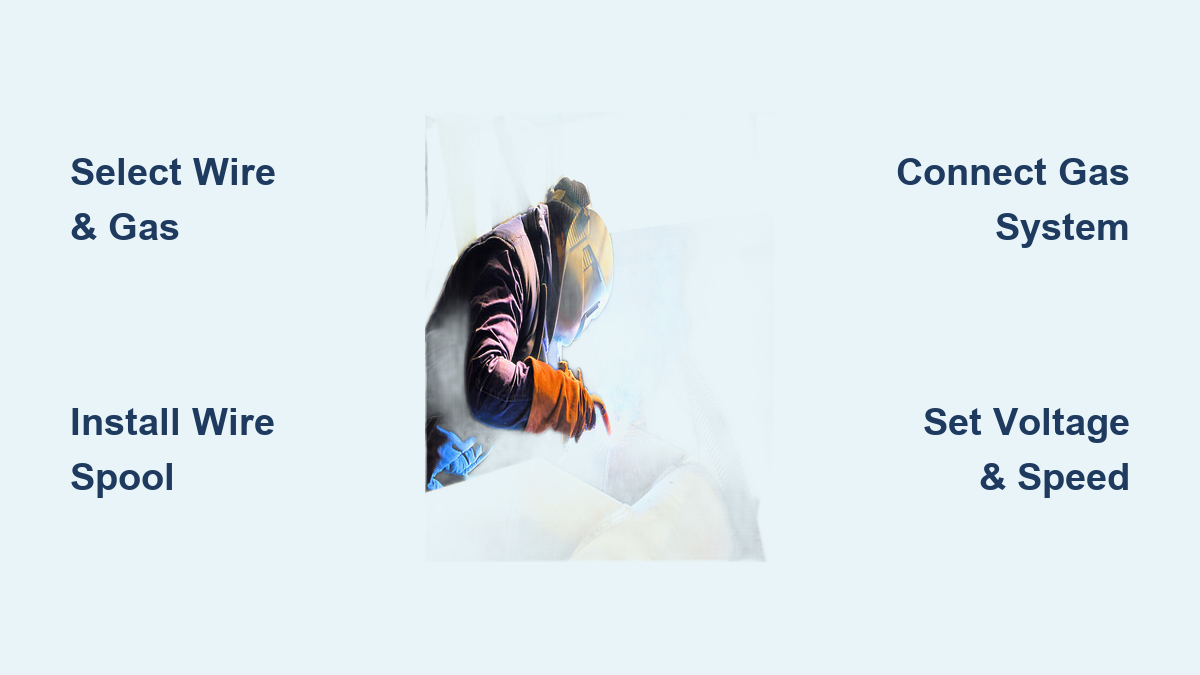
Choose Correct Wire and Gas for Your Project
Selecting the right wire and gas mixture makes or breaks your welding results. Using mismatched components creates porosity, poor penetration, and excessive spatter that has nothing to do with your technique. For most steel welding tasks, ER70S-6 solid wire combined with 75% argon/25% CO2 delivers the best balance of weld quality and ease of use.
Wire diameter depends entirely on your material thickness:
– Thin steel (18-22 gauge): 0.023-0.024 inch wire
– Medium thickness (14-10 gauge): 0.030 inch wire
– Thick material (1/8 inch+): 0.035-0.045 inch wire
Critical warning: Using wire that’s too thick for your material causes burn-through, while undersized wire creates weak, porous welds. Always match wire diameter to your project’s specific requirements before proceeding with how to set up a mig welder.
Avoid These Common Wire and Gas Mistakes
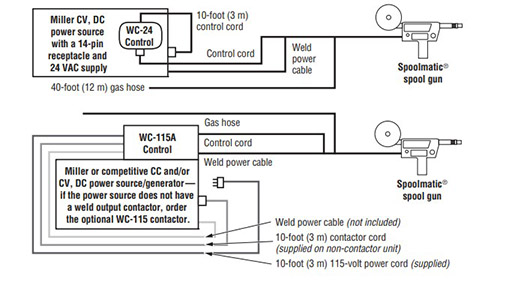
Beginners frequently select improper gas mixtures that compromise weld integrity. Pure CO2 creates deep penetration but produces excessive spatter, while pure argon won’t work with steel—always use an argon/CO2 blend for steel projects. For aluminum welding, you’ll need 100% argon with a spool gun setup, but that’s beyond basic how to set up a mig welder procedures for beginners.
Many new welders also overlook wire storage conditions. Moisture-damaged wire creates porosity that appears as tiny holes in your weld bead. Store wire spools in sealed containers with desiccant packs, and replace spools showing rust or discoloration immediately. Proper wire selection and storage directly impact your success with how to set up a mig welder.
Install Wire Spool with Proper Tension
Wire feeding problems cause 80% of beginner welding frustrations, and most stem from incorrect spool installation. The wire must unwind smoothly without resistance while maintaining consistent tension throughout its path from spool to contact tip. Start by sliding the spool onto the holder with the wire unwinding from the bottom—top-unwinding creates tension issues that lead to bird-nesting.
Secure the spool with the retaining nut, then release drive roller tension completely. Feed the wire through the inlet guide tube, ensuring it sits properly in the drive roller groove. Many beginners mistakenly place wire above or beside the groove rather than directly in it, causing feeding inconsistencies. Once positioned correctly, apply tension gradually until the rollers grip firmly without crushing the wire.
Thread Wire Through Gun Liner Successfully
After threading through the drive rollers, feed approximately 8 inches of wire through the gun liner. Use the machine’s wire feed button in short bursts rather than forcing it manually. When the wire emerges from the contact tip, trim any bent or curled ends with diagonal pliers—these malformed tips cause erratic arc starts.
Pro tip: Apply a light coating of anti-spatter compound to the wire before threading. This reduces spatter buildup inside the gun and extends consumable life. Proper wire threading is non-negotiable when learning how to set up a mig welder—take time to get it right the first time.
Connect Shielding Gas System Correctly
Shielding gas protects your weld pool from atmospheric contamination that causes brittleness and porosity. Never skip this critical step in how to set up a mig welder. Secure your gas cylinder upright with a chain, then attach the regulator by threading it onto the valve and tightening with a wrench. Always close the cylinder valve before connecting.
Open the valve slowly and check the high-pressure gauge to verify gas levels. For most steel welding with argon/CO2 blends, set your flow meter to 20-25 LPM (40-50 CFH). Higher flow rates create turbulence that draws in contaminants, while lower rates provide insufficient coverage.
Verify Gas Flow Before Welding
Trigger the gun briefly to flush the system, then hold the nozzle near a surface to observe flow. The meter ball should remain stable—dropping indicates leaks at connections. Apply soapy water to potential leak points; bubbles reveal escaping gas. Never rely on sound alone to verify proper gas flow when how to set up a mig welder.
Critical warning: Always store cylinders vertically and secured. A tipped cylinder becomes a dangerous projectile. Proper gas system setup prevents costly weld defects that beginners often blame on their technique.
Configure Machine Settings for Material Thickness
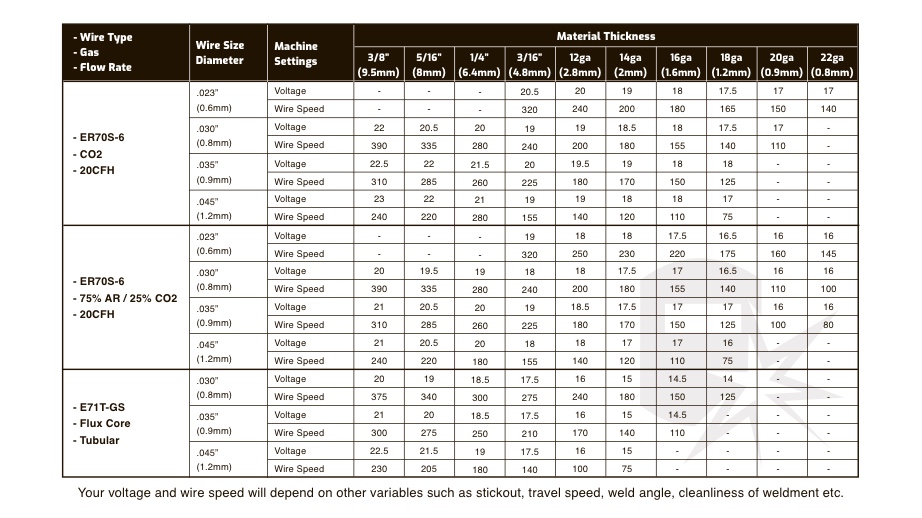
Your machine’s settings chart provides starting points, but fine-tuning creates optimal results. Voltage controls heat input and arc length, while wire speed determines filler metal deposition. These two parameters work together—you must adjust both when changing materials.
For mild steel with 0.030 wire and 75/25 gas:
– 24 gauge: 12-14 volts, 100-150 IPM
– 20 gauge: 15-17 volts, 150-200 IPM
– 1/8 inch: 18-20 volts, 200-275 IPM
– 1/4 inch: 21-24 volts, 275-350 IPM
Pro tip: When in doubt, start with lower settings. It’s easier to add heat than to recover from burn-through. These settings form the foundation of proper how to set up a mig welder for specific applications.
Position Ground Clamp for Optimal Performance
Attach your ground clamp to clean, bare metal near your weld area. Paint, rust, or coatings prevent proper electrical contact, causing inconsistent arcs and poor penetration. If your workpiece is coated, scrape a small area for the clamp or attach directly to your welding table.
Position the clamp as close to your work as possible—longer ground paths increase resistance and reduce effective power at the arc. For large projects, move the clamp periodically as you progress around the workpiece. A solid ground connection is essential when how to set up a mig welder correctly.
Run Critical Pre-Weld System Checks
Before striking your first arc, verify these three critical systems:
- Contact tip condition: Must have a clean, round hole matching your wire diameter
- Wire feed: Should emerge straight without wobbling or hesitation
- Gas flow: Must be steady and sufficient (15-35 LPM)
Inspect the contact tip for wear or spatter buildup—replace if the hole appears deformed. Trigger the gun to check wire feed smoothness, and confirm gas flow by holding cardboard near the nozzle. These quick checks prevent 90% of beginner welding problems when how to set up a mig welder.
Test Weld and Adjust Settings
Make several test welds on scrap material matching your project. An ideal MIG weld shows:
– Smooth, consistent ripples pointing in travel direction
– Slight convex profile with no undercutting
– Minimal spatter on both sides of the bead
– Consistent penetration through the material
If the weld sits on top without fusing, increase voltage or slow travel speed. If burning through, decrease voltage or increase travel speed. These adjustments fine-tune your how to set up a mig welder process for perfect results.
Troubleshoot Common Setup Issues Immediately
Wire bird-nesting typically indicates excessive drive roller tension or a kinked liner. Release tension completely, remove the gun, pull out tangled wire, and rethread carefully. Reduce tension settings incrementally until wire feeds smoothly.
Arc instability usually stems from electrical connection problems. Verify DCEP polarity for solid wire, check ground clamp security, and ensure clean metal contact at both clamp location and weld start point. Proper troubleshooting transforms your how to set up a mig welder experience from frustrating to rewarding.
Maintain Your Welder Between Uses
Before each session, inspect the gun liner for debris and check contact tips for spatter buildup. After welding, close the gas cylinder valve and drain regulator pressure. Monthly maintenance should include:
– Replacing worn drive rollers
– Cleaning internal components with compressed air
– Checking cables for damage
– Releasing drive roller tension during storage
Proper maintenance ensures your how to set up a mig welder process remains consistent and reliable for every project.
Mastering how to set up a mig welder separates functional welds from exceptional craftsmanship. By following these specific steps—selecting appropriate consumables, installing components correctly, configuring settings for your material, and verifying everything before welding—you’ll avoid the frustration that drives many beginners away from welding. Remember that proper setup accounts for 80% of welding success, so invest time in getting it right. Your first successful weld will build confidence that carries through every project, transforming what seemed like complex machinery into a reliable extension of your craftsmanship. Keep this guide handy for your next setup, and you’ll consistently produce clean, strong welds that demonstrate your growing expertise.
Leave a Reply