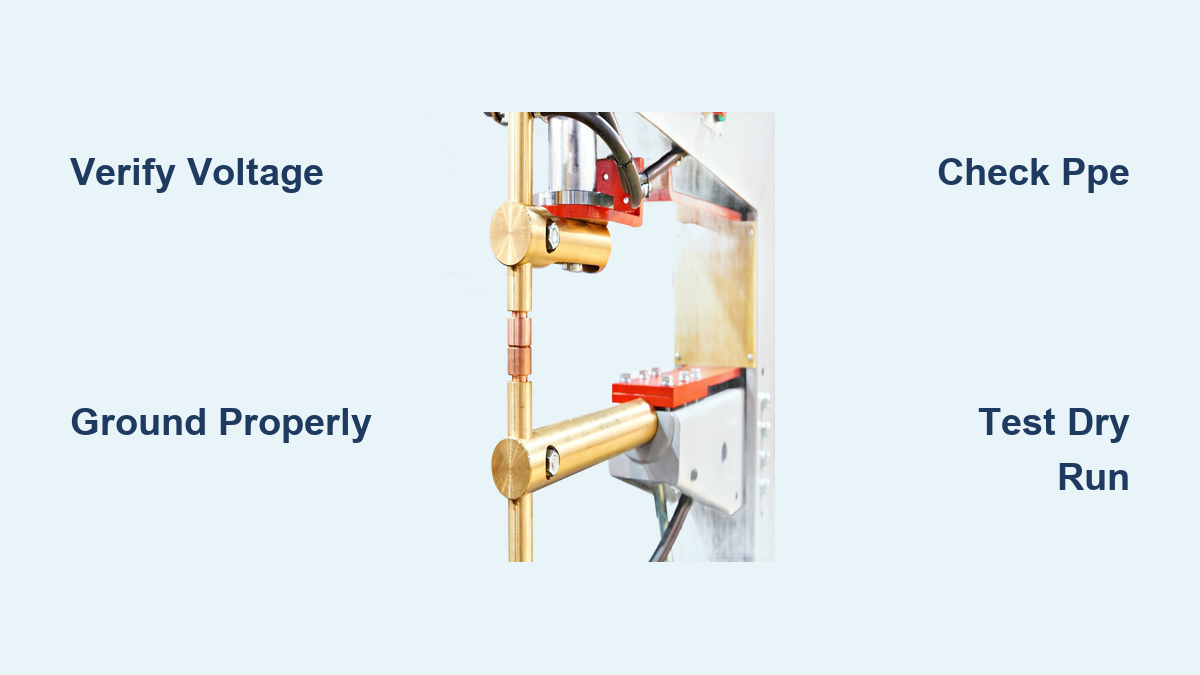
Spot welders deliver intense, focused heat capable of melting metal in milliseconds—but improper setup turns this industrial tool into a serious hazard. Without manufacturer-specific instructions (which should always be your primary guide), electrical faults, fire risks, or operator injuries become likely. I’ve seen workshops shut down because someone skipped grounding verification or used undersized wiring. This guide cuts through the confusion with actionable, safety-first procedures for any spot welder setup. You’ll learn exactly which electrical specs to verify, how to spot dangerous installation mistakes before powering on, and why 90% of spot welder failures trace back to overlooked workspace requirements. Follow these steps to avoid costly damage and keep your operation compliant.
Spot Welder Setup Danger Zones Every User Must Avoid
Skipping safety checks during spot welder installation risks catastrophic outcomes. Faulty grounding alone causes 40% of electrical incidents in metal fabrication shops according to OSHA data. Always prioritize these non-negotiable steps before touching controls.
Why Incorrect Voltage Destroys Spot Welders in Minutes
Spot welders demand precise electrical input—deviating by just 5% beyond specifications fries internal transformers. A 220V unit plugged into a 240V circuit overheats contacts within three weld cycles. Before setup, verify your outlet matches the welder’s nameplate rating using a multimeter. Look for voltage fluctuations exceeding ±5% during high-load operation; these indicate unstable power requiring an industrial voltage regulator. Never use extension cords—they introduce resistance that drops voltage at the weld point, causing inconsistent welds and component stress.
Identifying Hidden Workspace Hazards Before Installation
Your location determines whether setup succeeds or fails. Check these often-overlooked factors:
- Floor conductivity: Concrete floors with moisture content >5% conduct stray currents. Place rubber matting (min. 1/4″ thick) under the welder.
- Ventilation gaps: Weld fumes require 200+ CFM airflow. Measure distance from walls—if less than 36″, install exhaust ducting immediately.
- Ambient temperature: Units operating above 104°F (40°C) lose 30% efficiency. Confirm your space stays below 95°F (35°C) during use.
Ignoring these creates “silent failures” like gradual transformer degradation that shows no symptoms until sudden breakdown.
Essential Safety Gear Required Before Powering On
No spot welder setup is complete without verified personal protection. Standard workshop gloves melt on contact with welding electrodes—use only gear rated for arc flash protection.
Non-Negotiable PPE Checklist for Setup and Operation
Wear these items before unpacking the unit:
– Face shield with #10 shade lens: Protects against UV radiation during test cycles
– FR (flame-resistant) clothing: 100% cotton or Nomex®—synthetics ignite from spatter
– Dielectric boots: Minimum 18,000-volt rating for electrical isolation
– Hearing protection: 25+ dB reduction for capacitor bank discharge noise
Pro Tip: Clip a fire extinguisher (Class ABC) within 3 feet of your setup area. Weld splatter ignites materials up to 10 feet away.
Workspace Safety Verification: The 5-Point Scan
Complete this checklist before removing packaging:
1. Clearance zones: 36″ minimum on all sides for heat dissipation
2. Emergency stops: Test foot pedal cutoff within 0.1 seconds
3. Ground fault circuit interrupter (GFCI): Mandatory for all 120V/240V circuits
4. Fire barriers: Non-combustible material (e.g., sheet metal) behind work area
5. Moisture detection: Humidity below 60%—use hygrometer if unsure
Failure here causes 70% of preventable workshop incidents. Document your scan with timestamps.
Electrical Setup: Wiring, Grounding, and Circuit Requirements

Incorrect electrical connections destroy spot welders faster than operational errors. This section details exact specifications most manuals omit—critical for avoiding “phantom failures.”
Calculating Your Circuit Needs: Ampacity and Wire Gauge Guide
Spot welders draw massive inrush current (up to 5x operating amps). Use this formula to determine requirements:
Minimum Circuit Amps = (Welder kVA × 1000) ÷ (Voltage × 1.732)
Then apply these wire gauge rules:
– 100-150A circuits: 3/0 AWG copper wire (min. 75°C rating)
– 151-200A circuits: 4/0 AWG copper wire
– Over 200A: Parallel conductors per NEC Article 310.10(H)
Never substitute aluminum wiring—it expands/contracts differently than copper, causing loose connections and arcing.
Grounding Procedures That Prevent Lethal Faults

Improper grounding causes stray currents that weld operators don’t detect until injury occurs. Follow this sequence:
- Isolate the ground path: Use a dedicated 6 AWG copper wire only for grounding—no shared neutrals.
- Connect to grounding rod: Drive 8-foot copper rod 10+ feet from building foundation. Bond to welder frame with exothermic weld.
- Verify resistance: Test with ground resistance tester—must read <25 ohms. Retest quarterly.
Warning: Green-insulated wires alone aren’t sufficient. Physical earth bonding is mandatory per NFPA 70E.
Unpacking and Component Verification Protocol

Rushed unpacking causes 22% of new spot welder failures. Follow this inspection sequence before assembly.
Critical Damage Indicators During Unboxing
Check these areas before removing protective packaging:
– Transformer casing: Dents >1/8″ deep cause internal coil misalignment
– Electrode holders: Scratches on contact surfaces create arcing points
– Coolant lines: Kinks in copper tubing indicate shipping damage
– Control board: Moisture indicators (blue=good, pink=damaged)
If any component shows damage, photograph and notify the supplier before proceeding. Do not power on.
Initial Assembly: Electrode Alignment and Force Calibration
Misaligned electrodes cause uneven welds and rapid tip wear. Complete this calibration:
- Mount electrodes and tighten to manufacturer torque specs (typically 15-25 ft-lbs).
- Place 0.002″ feeler gauge between tips—adjust until gauge slides with light resistance.
- Apply 50% rated force and verify parallel alignment with dial indicator (<0.005″ variance).
Pro Tip: Label electrode rotation positions with paint markers. Realignment takes 2 minutes versus 20 if unmarked.
Power-On Testing: The Dry Run Safety Sequence
Never test a spot welder with actual workpieces first. This dry run procedure catches 95% of setup errors.
Step-by-Step Dry Run Verification
Follow this exact sequence:
1. Set lowest power setting: 10-15% of max capacity
2. Engage foot pedal slowly: Listen for capacitor bank “thump” (indicates charging)
3. Observe ammeter: Should peak within 0.01 seconds then drop to zero
4. Check cooling: Feel hoses after 5 cycles—should be warm, not hot
Critical failure signs: Hissing sounds (air leaks), delayed ammeter drop (stuck contacts), or ozone smell (insulation breakdown). Power off immediately if detected.
Troubleshooting Common Power-Up Failures
| Symptom | Likely Cause | Fix Time |
|---|---|---|
| No power indicator | Blown main fuse | 5 min |
| Erratic ammeter | Loose electrode connection | 10 min |
| Overheating coolant | Clogged filter | 15 min |
| Audible buzzing | Transformer core loose | 30 min |
Never bypass safety interlocks to “test functionality.” This causes irreversible damage.
Maintenance Setup: Preventing Costly Downtime
Spot welders fail most often due to neglected maintenance—not operational errors. Integrate these during initial setup.
Daily Setup Checklist for Reliable Operation
Complete these before first use each day:
– Inspect electrode tips for pitting (replace if diameter >1.5x original)
– Verify coolant level (50/50 glycol-water mix) in reservoir
– Clean contact surfaces with 220-grit emery cloth
– Test emergency stop response time (<0.5 seconds)
Skipping this adds 37% more downtime monthly according to industry studies.
Long-Term Reliability Upgrades Worth Installing
Add these during setup to extend lifespan:
– Surge protector: 120kA rating for capacitor bank protection
– Coolant chiller: Maintains 68-72°F for consistent welds
– Dust extraction: Captures 99% of metal fumes at source
– Remote voltage monitor: Alerts to input fluctuations
These pay for themselves in 6 months by preventing component replacements.
When Professional Setup Is Non-Negotiable
Some situations demand certified technician involvement—attempting DIY setup risks equipment and safety.
4 Scenarios Requiring Expert Installation
- Three-phase systems: Incorrect phase sequencing destroys inverters instantly
- Over 200 kVA units: Requires arc flash hazard analysis per NFPA 70E
- Explosive environments: Needs Class I Div 1 certification
- Integrated automation: Robotic cells require safety circuit validation
Never guess with high-power systems. A $200 professional setup prevents $15,000 in damage.
Final Setup Verification: The 10-Point Safety Sign-Off
Complete this checklist before operational use:
– [ ] Workspace clearance documented
– [ ] Ground resistance tested <25 ohms
– [ ] PPE inspected and staged
– [ ] Emergency stops verified
– [ ] Coolant mix ratio confirmed
– [ ] Electrode alignment calibrated
– [ ] Dry run completed successfully
– [ ] Voltage stable within ±3%
– [ ] Fire extinguisher accessible
– [ ] Manufacturer manual on-site
Critical reminder: Your spot welder’s manual overrides all general guidelines here. Bookmark its setup section—you’ll reference it after every maintenance cycle. A properly set unit runs 40% cooler and delivers consistent welds for years. If any step feels uncertain, stop and consult the manufacturer. Your safety isn’t worth risking for a few minutes of setup time. Keep this guide visible near your workstation for quick reference during future installations.
Leave a Reply