When your MIG weld beads resemble a neat stack of coins instead of a messy blob, you’ve achieved what professional welders call “stacking dimes”—the gold standard for demonstrating precise weld pool control. This technique isn’t just about aesthetics; it proves you’ve mastered the delicate balance of travel speed, gun angle, and heat input required for high-quality, structurally sound welds. Whether you’re preparing for welding certification or simply aiming to elevate your fabrication skills, learning how to stack dimes in MIG welding will transform your work from amateur to professional.
The distinctive appearance of stacked dimes comes from consistently overlapping convex weld beads that create the illusion of coins stacked side by side. Each bead must merge seamlessly with the previous one while maintaining distinct edges and uniform height. This guide delivers the exact techniques professional welders use to achieve this benchmark skill, with specific settings, troubleshooting solutions, and a proven 14-day practice progression. By the end, you’ll understand precisely how to stack dimes in MIG welding with the confidence to tackle any project requiring precision bead placement.
Configure Your MIG Welder for Perfect Dime Stacking

Your machine settings directly determine whether you’ll achieve crisp dime-like beads or end up with inconsistent, spattery welds. Proper configuration creates the stable arc foundation necessary for precise control during stacking.
Select the Right Wire Diameter for Your Material Thickness
Wire diameter dramatically affects your ability to control the weld pool. For most dime stacking practice on common thicknesses, 0.030″ or 0.035″ diameter wire provides optimal balance between control and deposition rate. Thinner 0.023″ wire works for sheet metal under 18 gauge but lacks the stability needed for consistent stacking. Thicker 0.045″ wire overwhelms thin materials with excessive heat but becomes necessary for 3/8″ steel and thicker.
ER70S-6 wire serves as the standard choice for most applications, offering reliable performance at reasonable cost. If you’re pursuing exceptionally clean results for visible welds, upgrade to ER70S-2 for 30-40% less spatter. Before you begin, verify your drive roll tension—too loose causes erratic wire feed, while too tight creates bird-nesting. The ideal tension allows smooth wire movement with minimal resistance when you manually pull the wire through the gun.
Optimize Shielding Gas for Clean, Spatter-Free Beads
The standard 75% argon/25% CO2 gas mix creates the ideal balance for stacking dimes, providing stable arc characteristics with minimal spatter and excellent bead wetting. Maintain gas flow between 35-50 CFH—any lower risks inadequate coverage and porosity, while higher flow creates turbulence that pulls in atmospheric contaminants. For critical applications where appearance matters most, the premium 90% argon/10% CO2 mix delivers cleaner results with slightly less penetration.
Before striking your first arc, check for gas flow issues that sabotage dime stacking. Kinks in the hose, low tank pressure, or leaks at connections all disrupt consistent shielding. A simple soap test on connections reveals hidden leaks—bubbles indicate problem areas needing tightening. If you’re welding outdoors or in drafty conditions, position wind barriers to protect your weld pool from gas disruption.
Calibrate Voltage and Wire Feed Speed for Consistent Results
The critical relationship between voltage and wire feed speed determines your arc characteristics. For 1/8″ steel practice—a perfect thickness for learning dime stacking—start with 18-20 volts and 200-250 IPM wire feed speed using 0.035″ wire. Too low voltage creates a stiff, difficult-to-control arc that skips across the surface, while too high voltage produces excessive spatter and a wide, flat bead that lacks the convex dime profile.
Adjust settings based on bead appearance: if your bead looks stringy with poor fusion, increase voltage slightly; if you see excessive spatter and undercut, reduce voltage. Always make adjustments incrementally—changes of 1-2 volts or 10-20 IPM at a time—then test on scrap before continuing your stack. Remember that ideal settings vary by machine, so document what works for your specific welder to create a reliable reference for future projects.
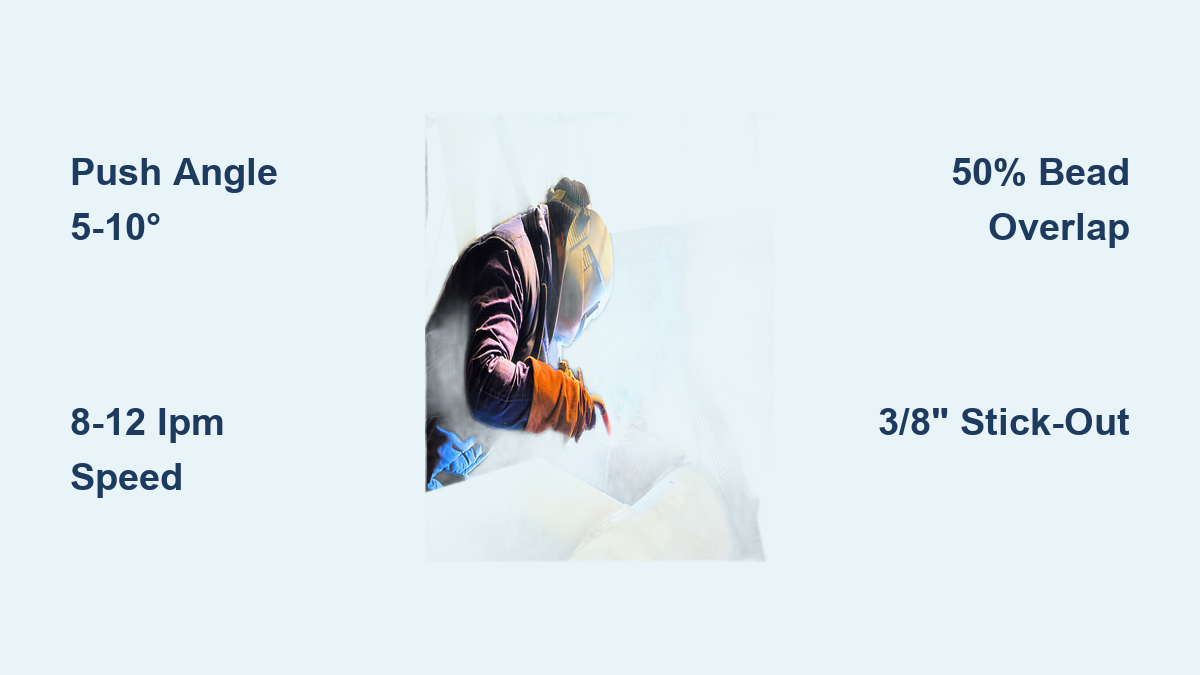
Master the Critical Push Angle for Coin-Like Beads
The angle you hold your welding gun relative to the workpiece fundamentally shapes your bead profile. Mastering this single variable separates welders who consistently stack dimes from those who struggle with uneven, poorly fused beads.
Why a 5-10 Degree Push Angle Beats Pulling for Stacking Dimes
Holding your gun at a 5-10 degree push angle—pointing slightly away from your direction of travel—creates the ideal conditions for stacking dimes. This angle produces flatter, wider beads with superior visibility of the weld pool, allowing you to precisely control where each new bead overlaps the previous one. Pulling the gun (dragging) creates taller, narrower beads with deeper penetration but sacrifices visibility, making consistent overlap nearly impossible for beginners.
The push angle also directs heat toward the previously deposited bead, promoting proper fusion while allowing the current bead to solidify with the characteristic convex dime shape. As you move along your workpiece, maintain this consistent angle without rocking or tilting—even small variations create noticeable differences in bead height and width. Practice this angle on scrap metal until it becomes second nature before attempting multi-bead stacks.
How to Maintain 3/8″ Stick-Out for Optimal Arc Control
The distance from your contact tip to the workpiece—known as stick-out—significantly impacts arc stability. For dime stacking, maintain 3/8″ to 1/2″ stick-out consistently throughout your weld. Shorter stick-out creates a concentrated, stiff arc that’s difficult to control, while longer stick-out produces a soft arc with poor directionality that results in excessive spatter and inconsistent bead shape.
To monitor your stick-out, visualize the distance between two stacked dimes—that’s approximately 3/8″. As you weld, keep your wrist steady and use your forearm for travel motion to maintain this critical distance. If you notice increasing spatter or inconsistent bead width, check your stick-out first—this simple adjustment often solves what appears to be more complex problems. Many experienced welders use a walking stick technique, resting their pinky finger on the workpiece as a consistent reference point for stick-out.
Fixing Common Angle Mistakes That Ruin Your Dime Stack
The most common angle mistake involves unintentionally changing your gun position mid-bead. This creates beads that start wide and flat but end tall and narrow (or vice versa), destroying the uniform dime appearance. To prevent this, anchor your welding hand against your body or use a walking cane jig for consistent movement.
Another frequent error is excessive angle variation when stacking multiple beads. As you move across your workpiece, gravity affects the weld pool differently, causing many beginners to increase their push angle on the far side of the stack. Combat this by practicing on a marked grid—draw parallel lines 1/4″ apart on scrap metal and follow them precisely with your gun tip. This visual reference trains muscle memory for consistent angle throughout your stack.
Execute the 8-12 IPM Travel Speed for Uniform Beads

Travel speed represents the single most critical factor in stacking dimes—you could have perfect settings and angle, but inconsistent speed will ruin your bead appearance. Mastering this variable transforms your ability to produce professional-quality welds.
How to Measure and Maintain Consistent Travel Speed
For 0.035″ wire on 1/8″ steel, target 8-12 inches per minute travel speed—the pace of a slow, deliberate walk. Time yourself on a 6-inch test bead: if it takes 30-45 seconds, you’re in the sweet spot. Too slow (under 8 IPM) creates tall, narrow beads with excessive buildup; too fast (over 12 IPM) produces flat, wide beads with insufficient penetration.
To develop consistent speed, use visual markers on your workpiece—draw 1-inch increments along your weld line and practice hitting each mark at the same interval. Many professionals use a metronome app set to 60-90 BPM, moving one increment with each beat. As you gain confidence, rest your welding arm on a stable surface or use a walking stick technique to eliminate hand tremor that causes speed variations.
Why Slower Speed Creates Tall, Narrow Beads (and How to Fix It)
When your travel speed drops too low, the weld pool grows larger than optimal, creating tall, narrow beads with excessive reinforcement. These beads often develop undercut along the edges where the base metal melts faster than the weld pool can fill it. If you notice these symptoms, consciously increase your speed by 10-15% while maintaining proper gun angle.
The most common cause of slow travel speed is hesitation at bead transitions—when starting a new bead over the previous one. Practice continuous motion through transitions by starting your next bead before the previous one completely solidifies. This creates seamless fusion while maintaining consistent bead height. If you’re struggling with speed consistency, reduce your voltage by 1-2 volts to decrease heat input, making the weld pool easier to control at proper speed.
Why Faster Speed Causes Flat, Weak Beads (and How to Fix It)
Excessive travel speed produces flat, wide beads that lack the convex dime profile and sufficient penetration. These beads often show poor fusion at the edges and may contain porosity from inadequate time for gases to escape. If your beads look washed out with minimal height, deliberately slow your movement by 10-15% while watching the weld pool formation.
Beginners often speed up unconsciously when approaching the end of a bead or when spatter accumulates on the nozzle. Combat this by focusing on pool visibility—clean your nozzle regularly and maintain consistent gas flow to ensure clear visibility throughout your weld. If you’re consistently too fast, increase your voltage by 1-2 volts to create a more stable arc that’s easier to control at slower speeds.
Stack Your First 5 Perfect Dimes in Under 30 Minutes
With proper setup and technique fundamentals, you can produce your first acceptable dime stack within your first practice session. Follow this precise sequence to achieve visible results quickly.
Prepare Your Base Metal for Flawless Fusion
Clean your practice steel thoroughly with a stainless steel wire brush immediately before welding—any rust, oil, or mill scale creates porosity and poor fusion. Clamp your workpiece securely to prevent movement, and attach your ground clamp to bare, clean metal within 12 inches of your weld area. For optimal results, use mild steel at least 1/8″ thick—thinner material requires more precise heat control that distracts from bead stacking practice.
Before striking your arc, inspect your workpiece for contaminants by running your gloved hand over the surface—any texture difference indicates potential problems. If you’re working with new material, remove any protective coating; for scrap metal, grind off heavy rust or paint. Remember that cleaner metal requires less perfect technique to achieve good results, making preparation critical for early success.
Establish Your Weld Pool Without Burn-Through
Position your gun at a 5-10 degree push angle with 3/8″ stick-out, then trigger the gun and allow the arc to establish for 1-2 seconds before moving. Watch the molten pool form—it should appear bright yellow with fluid movement, not sluggish or overly violent. If the pool forms too quickly or spatters excessively, your settings are too hot; if it struggles to form, increase voltage slightly.
Begin your travel motion only when the pool reaches optimal size—about the width of your wire diameter. Move steadily while observing how the pool reacts: if it grows too large, increase speed; if it shrinks, slow down. The first inch of your bead establishes the foundation for your entire stack, so focus intensely on consistency during this critical phase. Don’t rush—take the time to establish proper pool control before proceeding.
Overlap Each Bead by Exactly 1/2 for True Dime Stacking
The signature dime appearance comes from precise overlap between consecutive beads. Overlap each new bead by exactly 50% of the previous bead’s width—too little creates gaps and lack of fusion, while too much causes excessive buildup. Visualize splitting the previous bead in half and covering the outer portion with your new bead.
As you stack, allow the previous bead to cool slightly but not completely solid before adding the next one—this creates optimal fusion while maintaining distinct bead edges. Clean spatter from your contact tip between beads using needle-nose pliers, and maintain consistent starting points by aligning your gun tip with the edge of the previous bead. With practice, this 50% overlap becomes instinctive, creating the unmistakable stacked dime appearance.
Troubleshoot 5 Common Dime Stacking Failures

Even with proper technique, you’ll encounter issues that disrupt your dime stacking progress. Identifying and fixing these problems quickly accelerates your skill development.
Fixing Uneven Bead Height in Your Dime Stack
Inconsistent bead height typically stems from variable travel speed or hand instability. To correct this, anchor your welding hand against your body or use a walking stick technique for consistent movement. Check your drive roll tension—if it’s too loose, wire feed becomes erratic, causing height variations. Replace worn contact tips immediately, as enlarged holes create inconsistent arcs.
Practice on a marked grid with 1/4″ increments to develop muscle memory for consistent bead width. If height variations persist, record yourself welding to identify unconscious hand movements. Many welders discover they subconsciously speed up or slow down at specific points in their motion—awareness allows correction.
Eliminating Lack of Fusion Between Your Dimes
Lack of fusion appears as visible gaps or weak points between stacked beads, compromising structural integrity. Increase your overlap to 50-60% of the previous bead width to ensure proper fusion. If this doesn’t solve the problem, slightly increase your voltage to improve heat input and bead wetting.
Clean between passes with a stainless steel wire brush to remove any oxide or spatter that prevents fusion. If you’re working on thicker material, preheat the base metal slightly to improve thermal conductivity. Remember that proper overlap requires consistent travel speed—varying speed creates inconsistent fusion along the bead length.
Stopping Excessive Spatter on Your Coin-Like Welds
Excessive spatter not only creates extra cleanup work but also disrupts your bead appearance. First, verify your gas mixture and flow rate—the standard 75/25 argon/CO2 mix at 35-50 CFH prevents most spatter issues. Reduce stick-out to 3/8″ if you’ve been using longer extension, and clean your contact tip regularly to prevent spatter buildup that affects arc stability.
Slightly decrease your voltage if spatter appears as fine droplets around your weld pool—this reduces arc force without sacrificing penetration. If spatter persists, check for wire contamination—replace the spool if the wire shows discoloration or corrosion. Many professionals keep a dedicated spool for practice to avoid contamination issues.
Progress From 1 to 20 Dimes in 14 Practice Days
Follow this structured progression to systematically develop your stacking dimes skill from basic bead control to professional-level stacks.
Days 1-3: Perfecting Single Bead Control
Focus exclusively on creating one uniform weld bead across 6-12 inches of travel. Target bead width of 1/4″ to 3/8″ and height of 1/16″ to 1/8″ with full penetration into the base metal. Evaluate each bead for consistent width, no undercut, smooth ripple pattern, and complete fusion at the edges.
Practice until you can produce three consecutive beads meeting these criteria before moving to two-bead stacking. Document your successful machine settings and take photos of your best beads for reference. This foundational skill—consistent single bead control—forms the basis for all stacking success.
Days 4-7: Mastering Two-Bead Overlap Consistency
Now concentrate on creating two overlapping beads with precise 50% overlap and uniform height. Aim for height variation no greater than 1/32″ between beads and smooth transitions without excessive buildup at crossover points. Evaluate each attempt for even overlap, consistent height, and clean appearance.
Focus on maintaining consistent travel speed through the transition between beads—this is where most beginners struggle. Practice starting your second bead precisely at the edge of the first, overlapping by exactly half. When you can consistently produce two-bead stacks meeting quality standards, you’re ready for multi-bead practice.
Days 8-14: Building 5-10 Dime Stacks with Uniform Height
Challenge yourself to stack 5-10 beads with consistent dime-like appearance across 2-4 inches of width. Target individual bead width of 1/4″ to 3/8″ and height of 1/16″ to 1/8″ with distinct dime separation visible in cross-section. Evaluate your stacks for uniform bead dimensions, minimal spatter, and consistent ripple pattern.
As you add more beads, consciously maintain consistent gun angle across the entire stack—gravity affects the weld pool differently as you move away from your starting position. If bead height varies across your stack, anchor your welding arm more firmly or use a walking stick technique for consistent movement. When you can produce five acceptable 5-bead stacks in a row, you’ve mastered the fundamentals of stacking dimes in MIG welding.
Maintain Your MIG Equipment for Consistent Dime Stacking
Consistent results require reliable equipment. Implement these maintenance practices to eliminate 90% of common welding problems.
Daily Checks That Prevent 90% of Welding Problems
Before each session, verify gas tank pressure and flow rate—low pressure causes inconsistent shielding and porosity. Inspect your wire for contamination or kinks that disrupt feed consistency. Clean your contact tip thoroughly to prevent spatter buildup that affects arc stability. Confirm your ground clamp connection is clean and secure on bare metal—poor grounding causes erratic arcs and inconsistent bead appearance.
Check for liner wear by examining wire feed smoothness—if it catches or hesitates, replace the liner immediately. These simple daily checks prevent the most common issues that sabotage dime stacking attempts, saving you hours of frustration troubleshooting avoidable problems.
Weekly Maintenance That Ensures Perfect Wire Feed
Replace your contact tip weekly—even minor wear creates inconsistent arcs that ruin bead uniformity. Clean wire drive rolls with a wire brush to remove built-up debris that causes erratic feed. Inspect your liner for wear and replace if it shows significant scoring or deformation. Check gas hoses for leaks using soapy water—bubbles indicate problem areas needing repair.
Document your maintenance schedule in a welding logbook, noting when you perform each task. Consistent equipment care ensures your machine performs reliably session after session, allowing you to focus on technique refinement rather than fighting equipment issues. Remember that professional results require professional equipment care—don’t neglect this critical aspect of consistent dime stacking.
Leave a Reply