TIG welding stands as the precision gold standard among welding processes, delivering clean, strong joints that require minimal cleanup. If you’ve ever wondered how to start TIG welding properly, you’re about to discover why this method rewards patience with professional-quality results on everything from automotive repairs to custom fabrication projects. The process uses a nonconsumable tungsten electrode that creates an intense arc exceeding 6,000°F while inert shielding gas protects the molten pool from contamination. Unlike MIG welding, TIG demands manual coordination of torch movement, arc length, and filler rod addition—but mastering these elements unlocks unparalleled control over your welds. Whether you’re repairing a cracked exhaust manifold or fabricating stainless steel tubing, understanding how to start TIG welding correctly transforms frustration into satisfaction as you create seamless, high-integrity welds that last.
Choose Your TIG Welding Equipment Strategically
Before striking your first arc, you need properly configured equipment that matches your skill level and intended projects. Selecting the right components prevents early frustration and establishes a foundation for success.
Select the Right Power Source for Your Needs
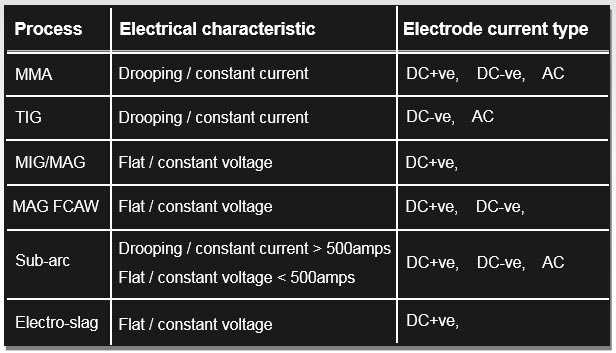
Your TIG welding journey begins with choosing between AC/DC or DC-only machines. For beginners working primarily with steel, a DC machine provides simpler operation, but an AC/DC unit gives you flexibility to weld aluminum later. Modern inverter-based machines offer significant advantages over older transformer models—they’re lighter, more energy-efficient, and provide pulse welding capabilities that help control heat input on thin materials. For your first TIG machine, look for a unit delivering 10-200 amps with high-frequency arc starting, which eliminates the need for tungsten-to-workpiece contact during ignition. This feature dramatically improves your success rate when learning how to start TIG welding.
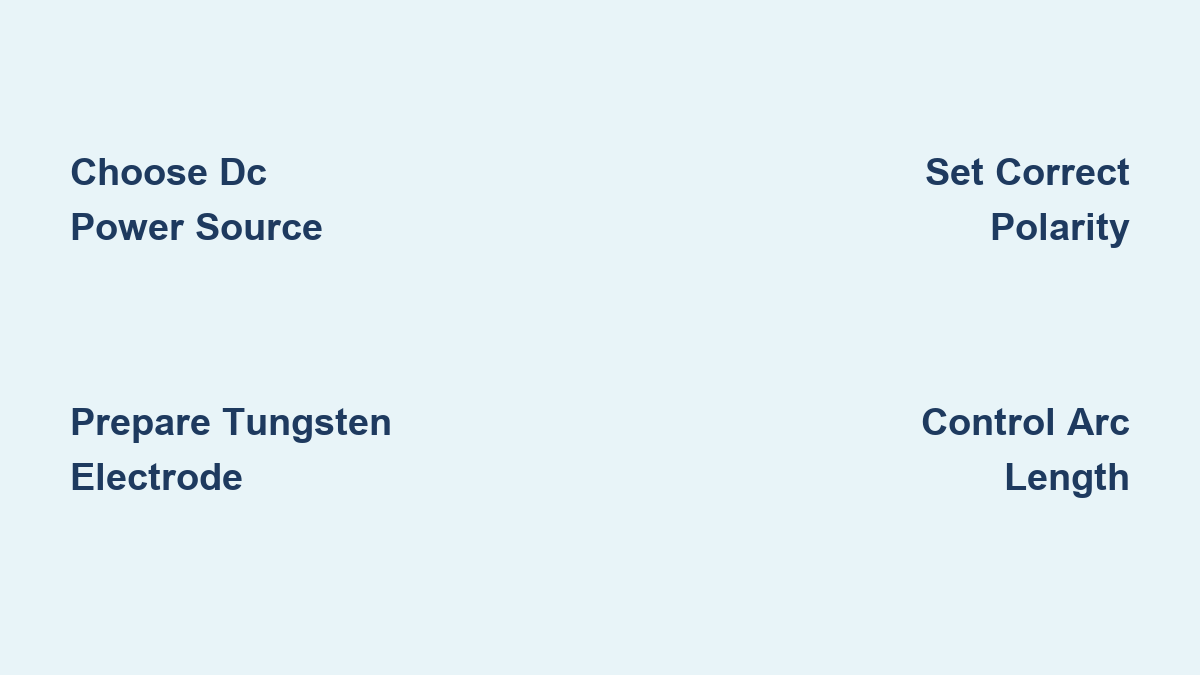
Prepare Tungsten Electrodes Correctly
Tungsten electrode selection directly impacts your ability to start TIG welding successfully. Beginners should start with 2% ceriated tungsten (gray tip), which offers excellent arc starting and works well on both AC and DC currents. For 2mm steel practice, use 1.6mm diameter tungsten ground to a 5-6mm point—this size matches your typical 50-amp practice settings. Never grind tungsten toward the tip; instead, rotate the electrode radially against the grinding wheel to maintain concentricity. An improperly prepared electrode causes erratic arc behavior that frustrates beginners. Keep your tungsten 6mm beyond the collet for optimal cooling and arc stability during your first welding attempts.
Gather Essential Safety Gear Immediately
Welding without proper protection risks serious injury—never skip this step when learning how to start TIG welding. You need auto-darkening welding helmets with shade 10-13 settings, flame-resistant clothing covering all exposed skin, and heavy leather welding gloves that balance protection with dexterity. Unlike MIG welding, TIG produces intense ultraviolet radiation that causes “welder’s flash”—a painful condition resembling sunburned eyes. Safety goggles worn under your helmet provide critical secondary protection against reflected UV rays. Keep a fire extinguisher rated for electrical fires within immediate reach, and ensure your workspace has adequate ventilation to prevent gas accumulation.
Configure Your TIG Welder for First-Time Success

Proper machine setup prevents common beginner frustrations and establishes correct technique from your very first weld.
Install Tungsten and Connect Components Correctly
Begin by unscrewing the back cap of your torch, inserting your prepared tungsten electrode so 6mm protrudes beyond the nozzle, then tightening the cap securely. Misaligned tungsten causes unstable arcs that confuse beginners—ensure the electrode centers perfectly in the nozzle. Connect the torch to the negative output on your machine and attach the ground clamp to your workpiece. For machines with foot pedals, connect this control to the designated port—it allows real-time amperage adjustment during welding. Wrap the torch cable around your forearm during practice to eliminate cable tension that disrupts smooth movement.
Set Correct Polarity and Amperage Settings
Polarity selection makes or breaks your first TIG welds. For steel practice pieces, set your machine to DCEN (Direct Current Electrode Negative)—this concentrates heat on your workpiece for proper penetration. Aluminum requires AC current, but stick with steel for initial learning. Start with 50 amps for 2mm steel practice material and adjust based on results. Too little amperage creates a tiny, unstable puddle that won’t fuse properly, while excessive amps burn through thin material. Your foot pedal controls actual amperage during welding—you’ll develop the coordination to modulate heat as you practice.
Master Critical Starting Techniques Before Welding
Knowing how to start TIG welding requires specific physical techniques that differ significantly from other welding processes.
Establish Proper Torch Position and Angle
Your body position determines everything about your first welds. Sit at a workbench with your upper body weight supported by your posture, not the bench. Hold the torch at 15-20 degrees from vertical, pointing in your direction of travel. This angle creates a natural lead for filler rod addition while maintaining proper arc coverage. Keep your non-dominant hand resting lightly on the workpiece for stability—this subtle support dramatically improves control. Position your head close enough to see the tiny weld pool clearly, but far enough to avoid gas shroud obstruction.
Control Arc Length Within Critical Range
Arc length—the distance between tungsten tip and workpiece—controls heat input more than amperage settings. Maintain 1.5-2.4mm arc length (about the diameter of your tungsten electrode) for steel welding. Beginners typically hold the torch too far away due to fear of contamination, but this creates an unstable, overheated arc. The correct length keeps your tungsten cool enough that brief contact with the pool won’t contaminate it. Watch the reflection of your tungsten in the molten pool—this visual cue helps maintain consistent distance as you develop muscle memory.
Execute Your First Successful TIG Weld
With equipment configured and technique prepared, you’re ready to create your first professional-quality weld.
Prepare Workpiece and Strike Your First Arc
Thoroughly clean your practice steel with a grinding wheel to bare metal—any contamination causes porosity. Position your tungsten 2mm from the workpiece, then press the foot pedal to initiate high-frequency arc starting. Don’t touch the tungsten to the metal—modern machines start the arc without contact. Hold the torch steady for 3-5 seconds to establish a stable pool about 4mm wide before moving. This initial pool size determines your entire weld bead width—too small creates weak fusion, too large causes excessive penetration.
Add Filler Metal with Proper Timing
After establishing the initial pool, introduce filler rod to the leading edge of the molten area—not directly into the arc. The pool melts the rod, not the arc itself, so maintain constant contact between rod and pool. Dip the rod rhythmically, withdrawing slightly between additions to control heat input. For 2mm steel, use 1.6mm diameter filler rod cut to 6-inch lengths for better control. Travel at approximately 1mm per second—slower than you might expect but faster than beginners typically move when juggling multiple tasks.
Troubleshoot Common First-Time Problems
Understanding these frequent beginner issues saves hours of frustration when learning how to start TIG welding.
Fix Tungsten Contamination Immediately
Tungsten contamination occurs when the electrode contacts the pool, creating black specks in your weld. This almost always results from excessive arc length—keep your tungsten within 2.4mm of the workpiece. If contamination happens, stop welding immediately and grind the affected tungsten tip before continuing. Continuing with contaminated tungsten introduces tungsten inclusions that weaken your weld.
Correct Penetration Issues Through Technique
Lack of penetration typically stems from traveling too fast or amperage too low—watch for narrow heat-affected zones alongside weak fusion. Conversely, burn-through happens when you move too slowly or use excessive amperage for the material thickness. Adjust travel speed first before changing machine settings—this develops crucial puddle-reading skills. For 2mm steel, your heat-affected zone should measure about 15mm edge-to-edge when parameters are correct.
Accelerate Your TIG Welding Learning Curve
Strategic practice dramatically shortens the time required to become proficient at TIG welding.
Start Practice on 2-3mm Steel, Not Thin Material
Beginners waste countless hours struggling with thin materials. Thicker practice stock (2-3mm steel) creates larger, more stable weld pools that give you time to observe and react. The increased thermal mass provides forgiveness while you develop coordination. Once you consistently produce good welds on thicker material, transfer those skills to thinner stock by reducing amperage and increasing travel speed proportionally.
Progress Through Skill Development Stages
Follow this progression for fastest results: First, practice striking arcs and establishing pools without moving. Next, lay beads on flat plate without filler rod to master torch control. Then add filler metal to flat plate practice. Finally, move to butt joints which provide immediate visual feedback on your technique. Fillet welds represent the true milestone—if you can produce consistent fillet welds, you’ve achieved fundamental TIG proficiency.
Mastering how to start TIG welding requires patience, but the payoff is exceptional control over your results. With approximately 40 hours of deliberate practice on properly configured equipment, you’ll develop the muscle memory and visual recognition skills that transform complex coordination into natural workflow. Start with thick steel practice pieces, focus on maintaining consistent arc length, and don’t rush the learning process—each successful weld builds the foundation for increasingly complex projects. The precision and quality achievable through TIG welding make the investment worthwhile for any serious metalworker, opening possibilities from automotive restoration to custom fabrication that other processes simply can’t match.
Leave a Reply