Oxy-acetylene welding remains one of the most accessible metal-joining techniques for beginners, offering unmatched portability and simplicity without electrical requirements. Developed over a century ago, this process creates intense heat by combining oxygen with acetylene gas—reaching temperatures up to 6,300°F—sufficient to melt most common metals. Unlike modern welding methods that require complex power sources, oxy-fuel welding works anywhere, making it ideal for field repairs, artistic metalwork, and home workshops. Properly executed, this versatile technique handles carbon steel, cast iron, copper, and aluminum with the right adjustments. This guide cuts through the complexity to show you exactly how to start oxy-acetylene welding safely and effectively, whether you’re repairing farm equipment or creating metal sculptures.
Essential Oxy-Acetylene Equipment Setup
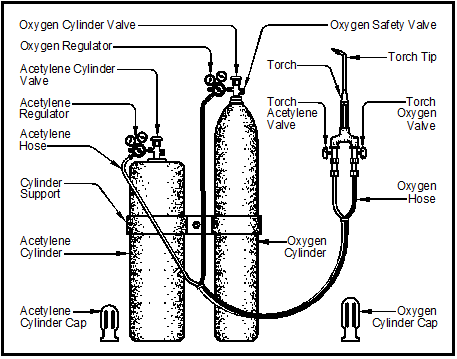
Before striking your first flame, you need the right equipment configured correctly. Your core system requires two separate cylinders—one containing oxygen and another holding acetylene—secured upright with chains to prevent dangerous tipping. Connect pressure regulators to both cylinders, ensuring the acetylene regulator doesn’t exceed 15 psi due to acetylene’s instability at higher pressures. Use color-coded hoses: green for oxygen and red for acetylene, with left-handed threads on the fuel gas connection to prevent accidental misconnections. Attach these to a welding torch with the appropriate tip size for your material thickness—typically #2 or #3 for beginners working with 1/8- to 1/4-inch steel.
Critical Safety Checks Before Ignition
Perform these safety checks before lighting your torch: verify all cylinder valves are closed, confirm regulator connections are tight with no visible damage, and ensure flashback arrestors are properly installed on both lines. Apply soapy water to all connections; bubbles indicate dangerous leaks requiring immediate attention. Position cylinders at least 15 feet from your work area with oxygen and fuel cylinders separated by 20 feet minimum. Never skip this critical step—gas leaks can lead to explosive situations within seconds.
Lighting Your First Oxy-Acetylene Torch
The correct ignition sequence prevents dangerous flashbacks and ensures a stable flame. First, open the acetylene cylinder valve just one-quarter turn (never fully), then slowly open the oxygen cylinder valve completely. Adjust the acetylene regulator to 5-7 psi and oxygen to 10-12 psi for most beginner applications. At the torch handle, open the acetylene valve one-quarter turn and the oxygen valve slightly—just enough to allow ignition.
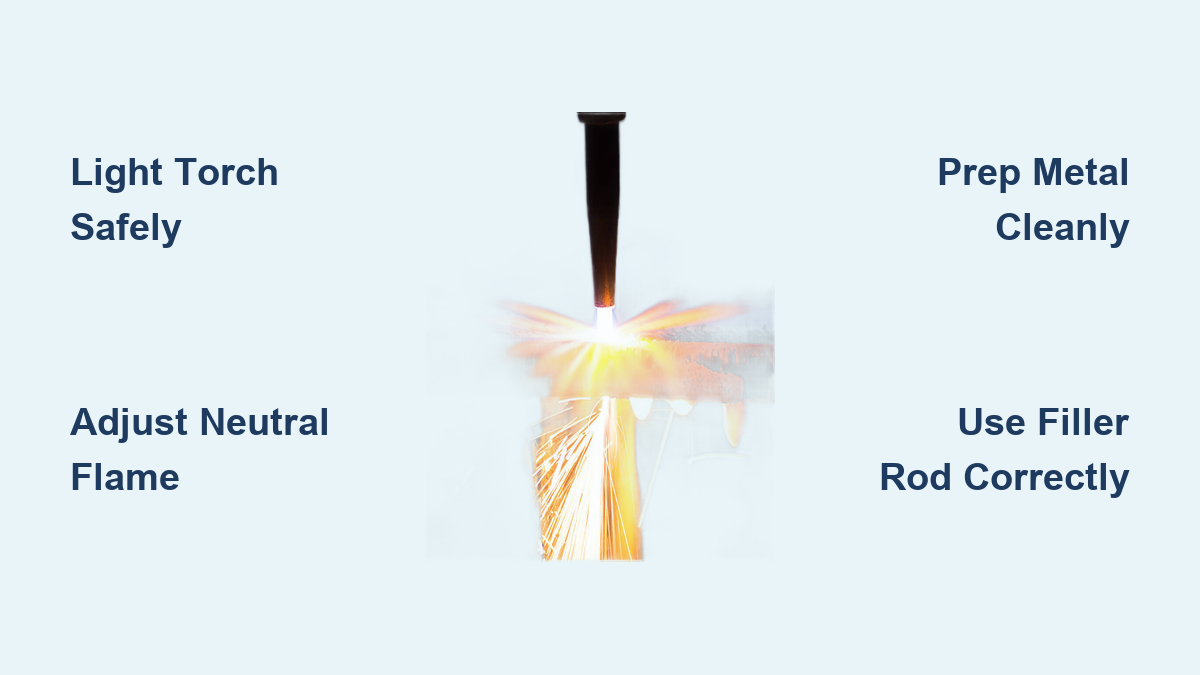
Achieving the Perfect Neutral Flame

Ignite the torch using a sparking tool while pointing it safely away from people and flammables. Gradually open the oxygen valve until you see a distinct blue inner cone surrounded by a lighter blue outer flame—this neutral flame is essential for most welding. The inner cone should measure about 1-1.5 inches for standard welding. If you see a feathery outer edge, you have a carburizing flame (too much acetylene); if the inner cone shrinks and hisses, you’ve created an oxidizing flame (too much oxygen). Adjust until you achieve that crisp, well-defined neutral flame.
Execute Your First Weld on Carbon Steel
Position your torch at a 45-degree angle to the workpiece and hold it 1/8 inch above the metal. Move the torch in small circular motions to evenly heat the base metal until a molten puddle forms—typically 1-2 seconds on 1/8-inch steel. Introduce filler rod by dipping it into the leading edge of the puddle, allowing the flame to melt the rod without directly touching it to the torch flame.
Common Beginner Mistakes to Avoid
Excessive heat is the most frequent error—when your puddle becomes too large or starts dripping through the metal, immediately reduce flame size. Inconsistent travel speed creates uneven beads; practice maintaining steady movement at about 1 inch per second on thin materials. Never push filler rod ahead of the puddle—that technique works for MIG welding but causes cold laps in oxy-fuel welding. If you notice porosity (tiny holes) in your weld, clean the metal thoroughly before trying again—oil or rust contamination is likely the culprit.
Critical Safety Protocols for New Welders
Your personal protective equipment isn’t optional—it’s your primary defense against serious injury. Wear heavy leather welding gloves that cover your wrists, safety glasses with shade 5 protection underneath a full-face shield, and 100% cotton clothing without synthetic blends that can melt onto skin. Keep a Class ABC fire extinguisher within immediate reach and ensure your workspace has adequate ventilation to prevent toxic fume buildup.
Proper Cylinder Handling Procedures
Never roll cylinders to move them—use an appliance dolly with secure straps. Always keep safety caps in place when cylinders aren’t connected. If an acetylene cylinder falls and the valve breaks off, immediately evacuate and call emergency services—the cylinder becomes an unguided missile. Store cylinders upright in a dry, well-ventilated area away from direct sunlight, with oxygen and fuel cylinders separated by at least 20 feet or by a 5-foot-high fire-resistant barrier.
Material Preparation for Successful Welds
Cleaning your metal properly makes the difference between a strong weld and a failed joint. Remove all rust, paint, oil, and mill scale from the weld area using a wire brush or grinder—contaminants trapped in the weld puddle cause porosity and weakness. For steel thicker than 1/4 inch, bevel the edges at 30-45 degrees to ensure proper penetration. Clamp pieces securely to prevent movement during welding, as gaps wider than 1/16 inch make consistent welding nearly impossible for beginners.
Choosing the Right Filler Metal
Match your filler rod to your base metal composition—309L works for most carbon steel applications while aluminum requires 4043 alloy. Hold the rod at a 30-degree angle to the workpiece and feed it steadily into the leading edge of the puddle. If the rod melts too quickly, your flame is too large; if it doesn’t melt smoothly, increase heat slightly. Beginners often use too much rod—feed just enough to fill the joint without building excessive height above the base metal.
Troubleshooting Common Welding Problems
Weld won’t penetrate base metal: Increase flame size slightly and slow your travel speed. On thicker materials, make multiple passes rather than trying to force penetration in one pass.
Excessive spatter and irregular puddle: Your metal likely has surface contaminants—clean thoroughly and try again. Also check for proper neutral flame adjustment.
Weld bead cracks when cooling: High-carbon steel may require preheating to 500-600°F before welding. Allow welds to cool slowly by covering with insulating ceramic fiber blanket.
Shutting Down Your Equipment Safely
Always reverse the startup sequence when shutting down: first close the acetylene valve at the torch, then the oxygen valve. Next, close the acetylene cylinder valve followed by the oxygen cylinder valve. Release pressure by opening the torch valves briefly to bleed hoses, then close them again. Never skip this sequence—shutting off oxygen first creates a dangerous backfire risk as unburned acetylene accumulates in the torch.
Essential Maintenance for Long Equipment Life
Clean torch tips weekly using specialized tip cleaners to remove carbon buildup that disrupts gas flow. Store hoses neatly coiled away from direct sunlight, which degrades rubber compounds. Replace hoses showing cracks, abrasions, or stiffness—don’t risk gas leaks with damaged equipment. Before storing, ensure all cylinder valves are closed and regulators are depressurized by turning adjusting screws counterclockwise until loose.
First Weld Practice Routine for Beginners
Start with scrap pieces of 1/8-inch mild steel in a flat position. Practice making tack welds every 2 inches along a seam before completing the full weld. Focus on maintaining a consistent 1/8-inch gap between torch and metal while moving steadily along the joint. Your first goal is creating uniform bead appearance—not strength. Dedicate 30 minutes daily to practice; most beginners produce acceptable welds within 10-15 hours of focused practice. Record your progress with photos to track improvement in puddle control and bead consistency.
Mastering oxy-acetylene welding opens possibilities across fabrication, repair, and artistic applications. By following these essential steps, maintaining strict safety protocols, and dedicating consistent practice time, you’ll develop the foundational skills needed for quality welds on various metals. Remember that proper flame adjustment and metal preparation contribute more to weld quality than any single factor—perfect these fundamentals before advancing to more complex techniques. With regular practice and attention to detail, you’ll soon join the ranks of skilled welders who’ve relied on this versatile process for over a century.
Leave a Reply