Stainless steel stick welding presents unique challenges that catch many welders off guard. Unlike carbon steel, stainless contains chromium (10.5-20%) that creates a protective oxide layer but also concentrates heat in the weld zone due to lower thermal conductivity. One frustrated fabricator recently ruined a $500 stainless sink by using the wrong electrodes and excessive heat, only to watch it corrode at the weld seams within weeks. This common mistake happens because stainless steel demands precise technique to maintain its corrosion resistance and structural integrity.
Whether you’re working with common 304 stainless for kitchen equipment or marine-grade 316 for boat fittings, mastering how to stick weld stainless steel properly saves costly rework and ensures your welds perform as well as the base material. This guide reveals the specific electrode choices, heat management techniques, and post-weld treatments that produce durable, corrosion-resistant stainless steel welds every time.
Select the Correct Stainless Steel Electrodes for Your Project
Choosing the right electrode makes or breaks your stainless steel weld’s performance. Using standard carbon steel electrodes on stainless creates weak, corrosion-prone joints that fail prematurely in demanding environments.
Match Electrodes to Your Specific Stainless Grade
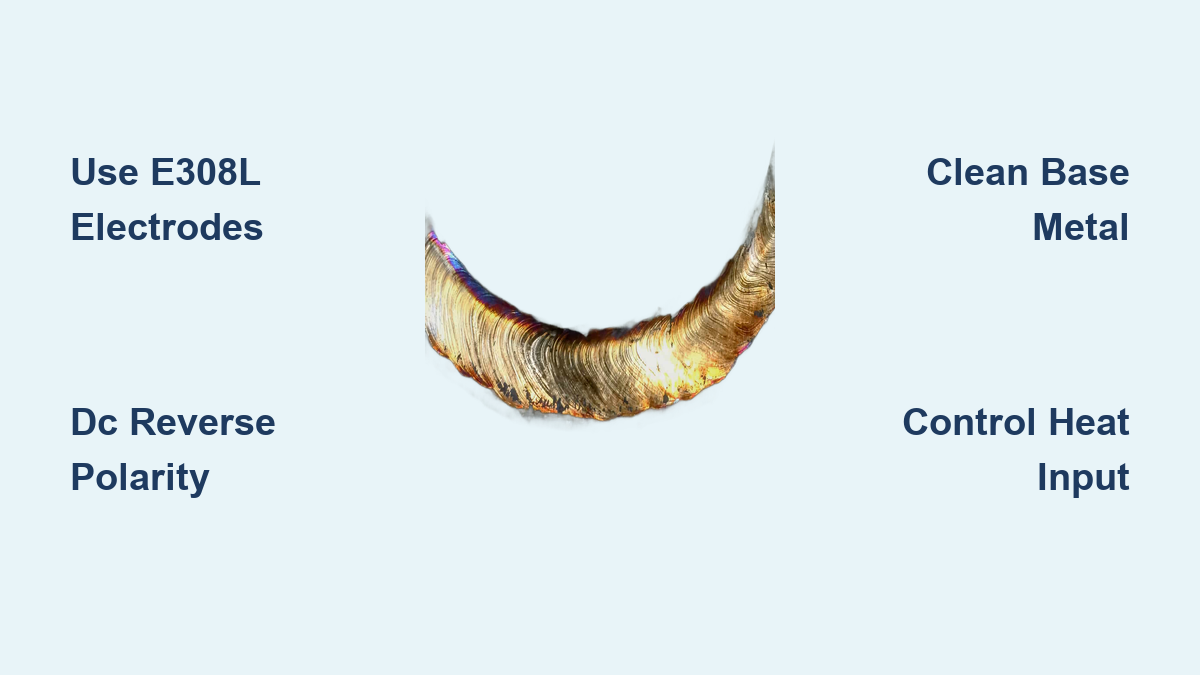
For 304 and 304L stainless steel (the most common grade), E308L electrodes deliver optimal results. The “L” signifies low carbon content (under 0.04%), preventing carbide precipitation that would compromise corrosion resistance around your weld. When working with 316 or 316L stainless for marine or chemical applications, E316L electrodes containing 2-3% molybdenum provide essential pitting resistance that standard E308L cannot match.
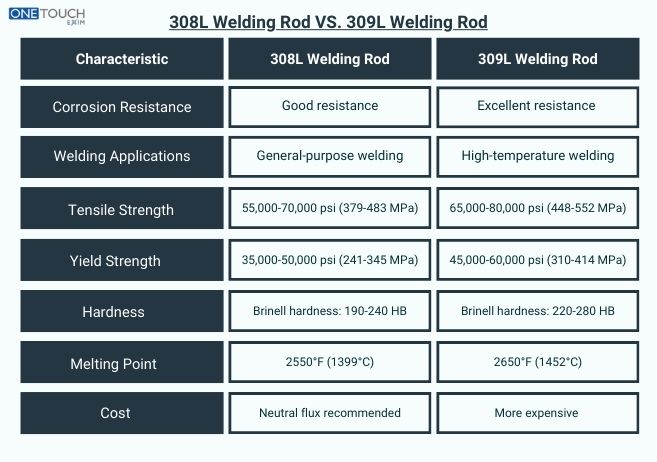
Joining stainless steel to carbon steel? E309L serves as your universal solution, with higher chromium (22-25%) and nickel (12-14%) content that accommodates the dilution when the weld pool mixes with carbon steel. This prevents brittle, crack-prone joints that fail under stress. For high-temperature applications using 309 or 310 stainless, select E310 electrodes with their pure 25% chromium, 20% nickel composition that maintains strength up to 2100°F.
Store Electrodes Properly to Avoid Costly Mistakes
Stainless steel electrodes require strict storage protocols that many welders overlook. Moisture absorption causes porosity, hydrogen cracking, and erratic arc behavior that ruins otherwise proper welds. Keep electrodes in a rod oven maintained at 250-300°F until the moment you need them. Discard any electrodes exposed to humidity for more than 4-8 hours—moisture-damaged rods create excessive spatter and porosity that compromise weld integrity.
Set Up Your Stick Welder for Stainless Steel Success
Proper equipment configuration ensures consistent arc performance that stainless steel demands. The wrong settings lead to frustration and substandard welds regardless of your skill level.
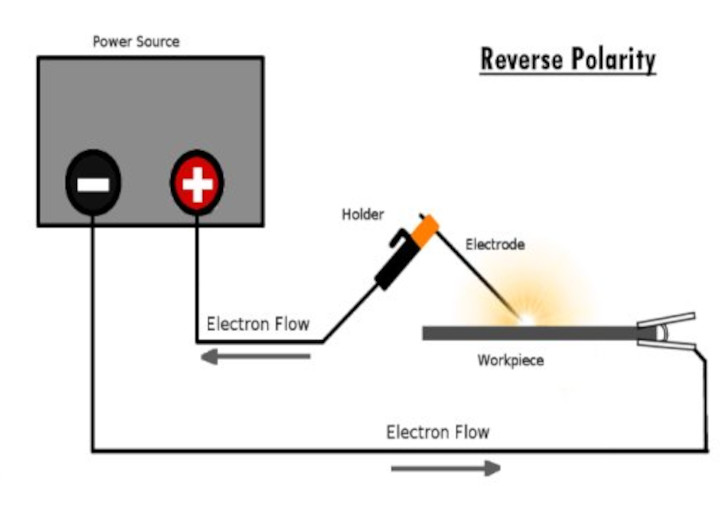
Configure for DC Reverse Polarity
Stainless steel stick welding requires DC reverse polarity (DCEP) for virtually all applications. This positive electrode setting provides deeper penetration and more stable arc behavior compared to DC straight polarity or alternating current. Verify your machine’s polarity setting before striking your first arc—using the wrong polarity causes poor fusion and excessive spatter that weakens your joint.
Select the Right Electrode Holder and Cables
Undersized welding cables cause voltage drop that results in poor arc performance. For 200-amp welding up to 50 feet, use 2 AWG cables minimum. Going one size larger provides margin for voltage fluctuations. Your ground clamp deserves equal attention—select a 400-amp capacity clamp with copper braid contact and attach it directly to the workpiece within 12 inches of the weld zone. Distant grounding through work tables creates inconsistent arc behavior and incomplete fusion.
Prepare Stainless Steel Joints for Optimal Fusion
Joint design and material preparation determine whether your weld achieves complete fusion or fails at the edges. Stainless steel’s lower thermal conductivity requires thoughtful joint geometry.
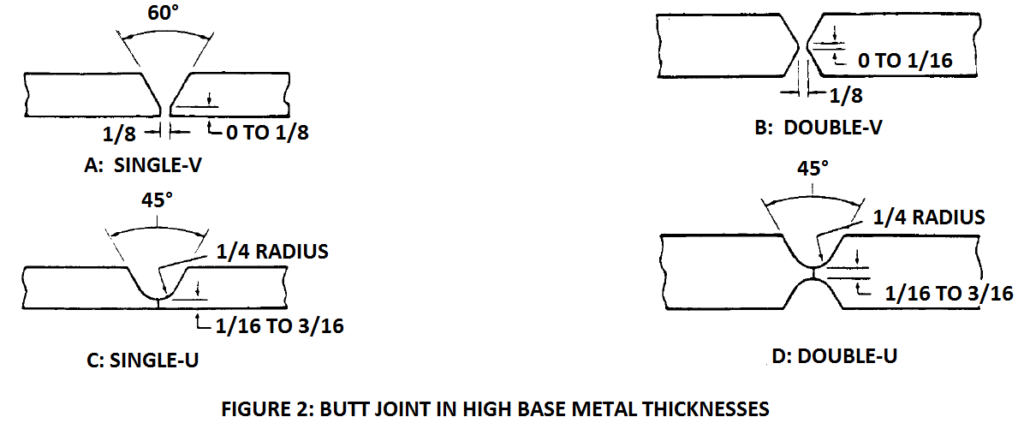
Design Joints Specifically for Stainless Properties
Square groove butt joints work for material up to 3/16 inch thick without edge preparation, requiring only a 1/16 to 1/8 inch root gap. Thicker material demands edge preparation: single V-grooves serve 1/8 to 1/2 inch thickness at 60-70 degrees included angle. Material over 1/2 inch benefits from double V-groove preparation that reduces distortion while maintaining symmetry.
Clean Base Metal Thoroughly Before Welding
Contamination causes more stainless steel weld failures than any other factor. Oil, grease, rust, and carbon steel particles from grinding wheels create porosity and reduced corrosion resistance. Clean to bare metal using stainless steel wire brushes never used on carbon steel, fresh grinding wheels, or silicon carbide sanding discs. Finish surfaces to 80-120 grit minimum before welding. Remove all oil and grease with acetone, allowing solvents to evaporate completely before striking an arc.
Master Heat Control When Stick Welding Stainless
Stainless steel’s thermal conductivity runs approximately one-third that of carbon steel, meaning heat concentrates in the weld zone. This concentration creates greater residual stresses and carbide precipitation risk.
Select the Right Amperage for Your Material
Choose amperage at the lower end of your electrode’s recommended range for the material thickness. For 1/8-inch stainless steel, 75-90 amps typically achieves complete penetration without excessive heat buildup. Increase amperage only when you observe lack of fusion at bead edges. Maintain the shortest arc length possible—approximately equal to the electrode diameter—to prevent nitrogen absorption and porosity.
Adjust Travel Speed Based on Visual Cues
Travel speed directly controls heat input and bead profile. Moving too slowly produces excessive penetration and a wide heat-affected zone, while moving too quickly creates lack of fusion. For 1/8-inch stainless steel, travel at 6-10 inches per minute for proper penetration. Watch your weld pool behavior as your primary guide—a properly formed pool flows smoothly behind the arc with slight convexity and uniform edges.
Execute Perfect Stick Welding Techniques for Stainless Steel
Technique distinguishes acceptable stainless steel welds from exceptional ones. The right combination of movement and control produces welds with correct profile and minimal heat damage.
Use Appropriate Weave Patterns for Each Pass
Stringer beads (straight travel without side-to-side motion) provide the deepest penetration and work best for root passes on thin material. Weave beads become necessary for fill passes on thicker material—keep maximum weave width to 3-4 times the electrode diameter. Wider beads develop cold shuts at the edges and suffer from lack of fusion. Common effective patterns include the caterpillar weave with steady oscillation and slight pauses at bead edges.
Manage Interpass Temperature to Prevent Cracking
The maximum interpass temperature for austenitic stainless steels (300 series) is 350°F. Exceeding this allows excessive grain growth in the heat-affected zone and increases distortion. Monitor temperature using indicating crayons that melt at specific temperatures or infrared thermometers. When approaching the maximum, pause welding until the workpiece cools sufficiently or continue on an alternate joint to allow cooling time.
Clean and Passivate Your Stainless Steel Welds Properly
The weld itself represents only part of the battle for corrosion-resistant joints. Post-weld cleaning and passivation restore the protective oxide layer that welding disrupts.
Remove Slag and Discoloration Immediately
Immediately after completing each pass, remove slag with a chipping hammer followed by a stainless steel wire brush. Inspect for cracks and fusion defects before continuing. Heat discoloration indicates heat exposure severity—light straw coloring remains acceptable, while dark blue or black indicates excessive heat that may have degraded corrosion resistance.
Apply Proper Passivation Treatment
Citric acid passivation has largely replaced nitric acid for environmental and safety reasons while achieving excellent results. Apply 10-20% citric acid solution by weight in water at 120-140°F for 20-60 minutes, then rinse thoroughly. For aerospace and medical applications requiring the highest corrosion resistance, nitric acid passivation at 20-50% concentration for 30-120 minutes remains the specified standard.
Troubleshoot Common Stainless Steel Stick Welding Problems
Even experienced welders encounter issues. Understanding root causes saves time and material while building your expertise.
Porosity indicates moisture in electrodes or base metal contamination—remedy by drying electrodes in a rod oven and cleaning to bare metal. Lack of fusion points to insufficient heat or excessive travel speed—increase amperage and reduce speed. Undercut develops from excessive amperage or long arc length—reduce amperage and shorten the arc. Cracking suggests hydrogen-induced damage—remove and reweld with dry electrodes, add tack welds to reduce restraint, and use E309L buffer layers for dissimilar metals.
Avoid Critical Safety Hazards When Welding Stainless Steel
Stainless steel welding generates hexavalent chromium, a known carcinogen. Always wear a NIOSH-approved respirator appropriate for chromium and nickel fumes, or use a powered air-purifying respirator (PAPR) for extended sessions. Ensure adequate ventilation of at least 2,000 cfm per welder, and position local exhaust ventilation to capture fumes within 12 inches of the arc.
Start with E308L electrodes and 304 stainless for your initial projects—the most forgiving combination for skill development. Progress to E316L for marine applications and master E309L for dissimilar metal joints. With these fundamentals, you can confidently tackle virtually any stainless steel stick welding challenge while producing welds that maintain stainless steel’s defining characteristics: corrosion resistance, strength, and appearance.
Leave a Reply