Tack welding separates professional welders from hobbyists who struggle with misaligned parts and warped projects. When you’re working on automotive repairs, structural steel assemblies, or precision fabrication, knowing how to tack weld properly determines whether your final weld holds or fails catastrophically. These strategically placed temporary welds maintain perfect alignment while preventing movement during the critical welding process. Unfortunately, most beginners treat tacking as an afterthought, creating weak bridge welds that shift under heat stress and ruin hours of work. This guide reveals the exact techniques professional welders use to create tack welds that hold tight through final welding—plus the critical mistakes that cause 90% of tack-related failures.
What Is Tack Welding and Why It Matters for Your Projects
Tack welding isn’t just “temporary welding”—it’s precision fixturing that determines your project’s structural integrity. According to the American Welding Society, tack welds are joints that hold components in correct alignment until final welding completes the assembly. These small welds (typically ½ to ¾ inch long) act as your project’s skeleton, maintaining dimensional accuracy while resisting thermal forces that pull metal out of position. When performed correctly, tack welding eliminates the need for excessive clamping and creates a stable foundation for flawless final welds.
Tack vs. Spot Welding: Critical Differences Every Welder Must Know
Many beginners confuse tack welding with spot welding, but the distinction determines whether your project succeeds or fails. Spot welding creates permanent joints between metal surfaces without filler material, primarily used on thin materials like sheet metal. Tack welding produces temporary joints specifically for alignment during fabrication. Think of tack welds as the tape holding your pieces in position—the final weld is what actually joins them permanently. Using spot welding techniques for tacking creates brittle joints that crack under thermal stress, while treating tacks as permanent welds wastes time and introduces unnecessary heat.
Why Bridge Tacks Fail: The Penetration Problem Most Beginners Make
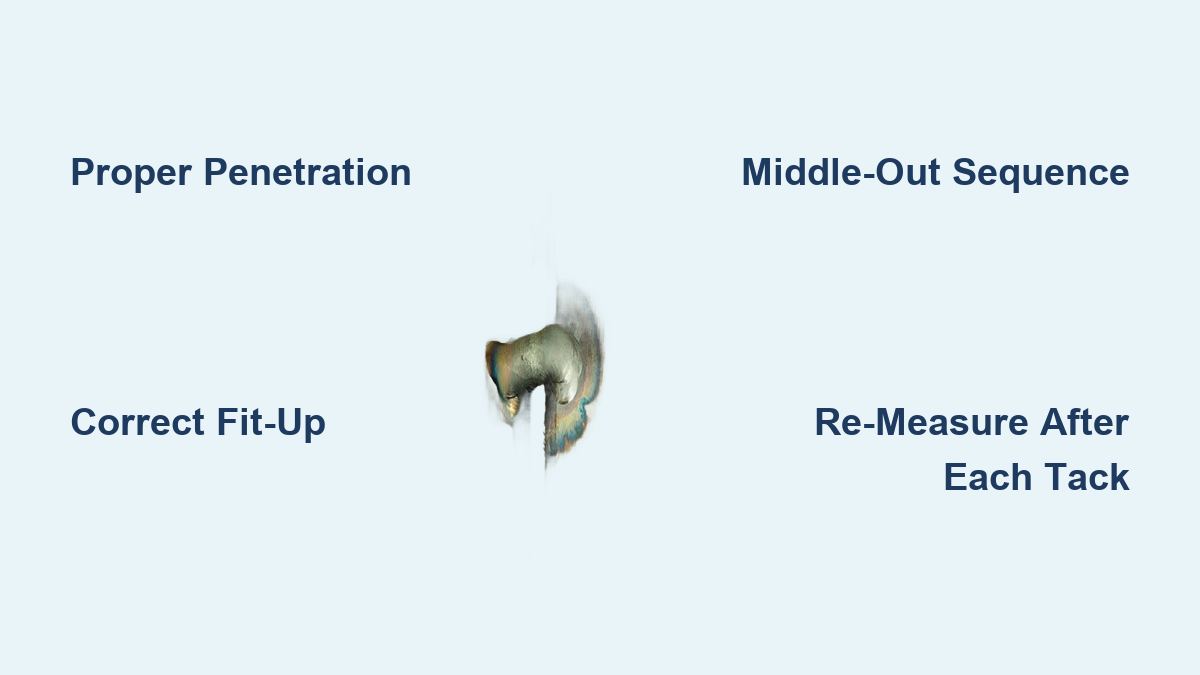
The most common tack welding mistake is creating “bridge tacks”—surface welds that sit on top of metal without proper fusion. These weak joints appear to hold pieces together initially but fail when heat from final welding causes them to separate. True tack welds must penetrate both pieces of metal to create molecular bonding. When you place a tack, both metals must reach fusion temperature and intermingle at the joint. Without this penetration, thermal expansion during final welding will shift your alignment, creating gaps or overlaps that compromise structural integrity.
Prepare Metals for Successful Tack Welding
Proper preparation separates tack welds that hold from those that fail. Before striking your first arc, you must ensure metals are clean, properly fitted, and correctly positioned. Any contamination between mating surfaces—rust, oil, paint, or mill scale—prevents proper fusion and creates weak points that separate under stress.
Essential Cleaning Steps Before Tack Welding Any Metal
Start by thoroughly cleaning the joint area using a stainless steel wire brush or grinding wheel. For steel, remove rust and scale within one inch of the joint on both sides. For aluminum or stainless steel, cleaning becomes even more critical since these materials form oxide layers that interfere with fusion. After mechanical cleaning, wipe surfaces with acetone to remove residual oils or fingerprints that could cause porosity. Never skip this step—contaminants trapped under tack welds create weak points that propagate through your final weld.
Perfect Fit-Up: How to Check Alignment Before Placing Your First Tack
Fit-up determines whether your tack welds hold or fail. Your pieces must fit together with consistent contact or controlled gap throughout the entire joint length. Check alignment at multiple points using a straightedge or precision measuring tools. For critical applications, verify perpendicularity with a machinist’s square and gap consistency with feeler gauges. If you discover misalignment, correct it before tacking—tack welds cannot fix poor fit-up, they only hold whatever position you give them. Remember: precise tacking requires precise positioning first.
Set Correct Power Settings for Your Material
Your welding machine settings dramatically affect tack weld quality. One of the most common mistakes beginners make is using too low amperage for tacking thin materials, resulting in weak surface welds with no penetration.
Thin Metal Tack Welding: Higher Heat, Shorter Duration Technique
For thin sheet metal (under 16 gauge), use higher power settings with less time rather than lower settings held longer. A quick, hot tack penetrates both pieces effectively without burning through, while a low-power tack held longer sits on top without achieving true fusion. Test your settings on scrap material first—you should hear a consistent sizzle and see uniform penetration through both pieces. Adjust until you create tacks that penetrate completely but don’t blow holes.
Stainless Steel Special Considerations: Managing Thermal Expansion
Stainless steel requires special attention due to greater thermal expansion than mild steel. Space your tacks closer together—no more than 2-3 inches apart—to counteract this expansion. You may need slightly higher heat input to slow cooling rates and prevent hard, brittle microstructures in the heat-affected zone. For austenitic stainless steels, consider preheating to 250-300°F for thicker sections to minimize cracking risks.
Create Strong Tack Welds That Hold
Penetration matters just as much in tacking as it does in final welding. When you tack, you must achieve proper fusion between both pieces of metal—surface welds that don’t penetrate will fail under thermal stress.
The Circular Motion Technique for Complete Fusion
For most applications, use a small circular or U-shaped motion rather than holding the torch stationary. This technique spreads heat across both pieces rather than concentrating it in one spot, reducing burn-through risk while ensuring adequate penetration. Hold the torch at 10-15 degrees travel angle and maintain a short arc length (1/8 inch or less). The circular motion should cover an area about twice the diameter of your electrode—complete one to two rotations before lifting the arc.
Optimal Tack Size: When to Go Small vs. Large for Different Materials
Tack weld size depends on your material thickness and project requirements:
– Thin sheet metal (18-22 gauge): ¼ to ½ inch tacks
– Medium thickness (14-16 gauge): ½ to ¾ inch tacks
– Thick materials (12 gauge and above): ¾ to 1 inch tacks
Place tacks no more than 3-4 inches apart for most applications, with closer spacing for materials prone to warping. Never exceed 1 inch in tack length—larger tacks introduce excessive heat and become difficult to remove if alignment issues arise.
Tack Weld Sequence Patterns That Prevent Distortion
The sequence and direction of your tack welds significantly impact whether your project stays straight or warps out of alignment. Thermal expansion and contraction during welding creates shrinkage forces that pull pieces out of position if not managed properly.
Middle-Out Method: Why Starting in the Center Prevents Warpage
For long seams and large panels, always start tack welding at the middle of the joint and work toward both ends alternately. This approach prevents shrinkage from closing the gap at one end while causing overlap at the other. If you place tacks progressively from one end to the other, cumulative shrinkage can close the gap completely at the far end. After completing your tacking sequence, allow the assembly to cool slightly before returning to complete final welds—this brief cooling period lets the structure stabilize.
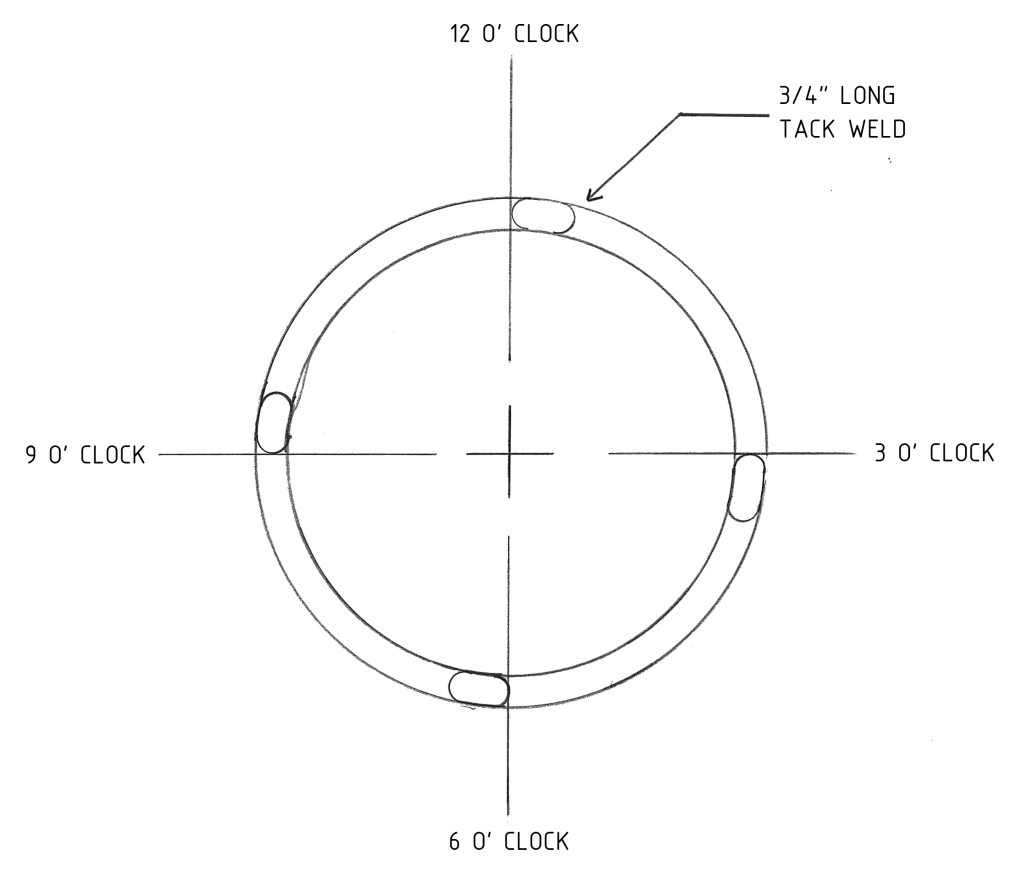
Pipe Welding Sequence: Achieving Consistent Root Opening
For pipe welding, proper tack sequence ensures consistent root opening for the critical root pass. Start with two tacks 180 degrees apart to establish alignment, then add tacks at 90-degree intervals. Check root gap at each tack location using a gap gauge—maintain consistent 1/16 to 1/8 inch root opening throughout. If alignment issues appear at any tack point, correct them immediately before proceeding.
Control Warpage and Distortion Effectively
Warpage frustrates welders working on precision projects, but understanding its causes helps you prevent it. When metal heats during welding, molecules expand, and upon cooling, they contract in different positions—this thermal cycling creates shrinkage forces that pull pieces out of alignment.
Metal as Elastic: Why Clamping Matters Even with Tack Welds
Think of metal as elastic—if you don’t secure it while heating, it will move. Good welding clamps hold pieces in position even when warpage occurs. For precision work, use more clamps than you have pieces of metal. Clamp all sides equally so thermal effects balance out, keeping your assembly close to its original position. Even with extensive clamping, re-measuring after each tack remains essential—pieces often shift in ways that aren’t immediately obvious.
The Re-Measuring Rule: When to Check Alignment After Each Tack
Many welders make the critical mistake of checking alignment only after completing all tacks. Always re-measure after placing tacks on each side of your assembly. If you notice alignment issues early, you can often correct them with additional clamps or by tacking the opposing side to counterbalance shrinkage. Waiting until after all tacks are placed usually means discovering problems that require grinding out multiple tacks—a time-consuming fix that could have been prevented with one extra measurement.
Avoid Common Tack Weld Mistakes
Even experienced welders fall into bad habits that compromise their tack welding. Recognizing these common mistakes helps you avoid them in your own work.
Progressive Tack Failure: Why End-to-End Sequencing Ruins Projects
Placing tack welds progressively from one end to the other concentrates shrinkage forces at the far end, potentially closing the gap or causing overlap. Always work from the middle outward or alternate your sequence to distribute shrinkage forces evenly across the joint. For rectangular panels, follow this sequence: corners first, then middle of each edge, then middle of those segments. This pattern minimizes cumulative distortion and maintains consistent alignment throughout your project.
Meet Quality Standards for Tack Welds
The temporary nature of tack welds misleads some welders into thinking quality doesn’t matter as much as with final welds. This assumption is dangerously wrong—poor tack quality compromises your entire project.
AWS Guidelines: What Certified Welders Know About Temporary Joints
According to welding codes, tack welding must be performed only according to qualified welding procedures by welders fully certified in the process used for final welding. Tack welds must not introduce defects like arc strikes, craters, cracks, or slag inclusions that could degrade final weld quality. All tack welds must be thoroughly cleaned before final welding to remove harmful oxides. For materials sensitive to rapid cooling, slightly larger tack welds with appropriate preheat help prevent hard, brittle microstructures in the heat-affected zone.
Preparing Tack Ends: Why Grinding Start/Stop Points Is Non-Negotiable
Both ends of each tack—the start and stop points—are weak areas that often contain unacceptable defects like craters or lack of fusion. Before final welding, grind these ends smooth to create a gradual slope that blends into the base metal. This preparation eliminates stress concentrations and allows the final weld to pass over these areas without creating defects. Skipping this step introduces weak points that can cause catastrophic failure under load.
Maintain Consistent Results Across Projects
Developing consistent tack welding technique requires practice and attention to fundamentals. Every tack weld you create should achieve proper penetration, appropriate size, and clean appearance without visible defects.
Track which techniques and settings produce the best results for different materials and thicknesses, building a reference that helps you quickly set up for new projects. Remember that tack welding is a specialized skill that requires the same attention to technique and quality as final welding—treat every tack as if it will be inspected, and your final welds will benefit from the discipline this attitude creates. With proper tack welding technique, you’ll spend less time grinding out failed welds and more time completing professional-quality projects that stand the test of time.
Leave a Reply