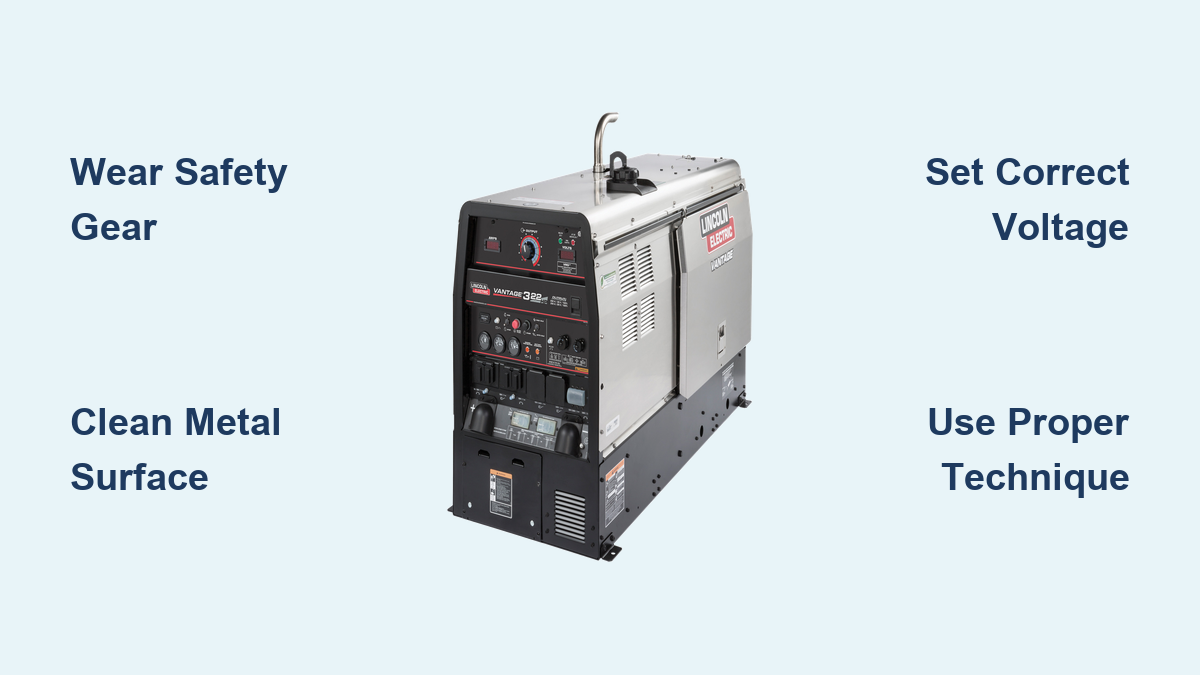
Welding transforms raw metal into functional creations, and a Lincoln welder gives you the power to make it happen. When you fire up your first Lincoln machine, you’re joining a century-long tradition of quality welding equipment that professionals trust. Whether you’re repairing a trailer hitch, building a custom grill, or fabricating shop tools, knowing how to use a Lincoln welder properly means the difference between strong, reliable joints and frustrating failures that won’t hold up.
This practical guide cuts through the confusion and shows you exactly how to use a Lincoln welder safely and effectively. You’ll learn the essential setup steps, proper technique for clean welds, and troubleshooting methods for common issues—all based on real-world experience with Lincoln’s popular models like the 140 MIG and the 225 Stick welder.
Essential Safety Gear Before You Start
Skipping proper safety equipment when using a Lincoln welder risks serious injury that could end your welding journey before it begins. The intense UV radiation from welding arcs can cause “welder’s flash” (photokeratitis) within seconds of exposure, while flying sparks can burn through regular clothing and ignite nearby materials.
Your minimum safety equipment must include:
- Auto-darkening welding helmet with appropriate shade setting (shade 10-12 for stick welding, 5-8 for MIG) that activates within 1/25,000th of a second
- Full-grain leather welding gloves rated for your specific welding process (thick for stick, more flexible for MIG)
- Flame-resistant jacket or apron that covers your entire torso without gaps
- Steel-toed leather boots that cover your ankles completely
- Safety glasses worn underneath your helmet for protection when grinding or chipping slag
Never rely on makeshift protection like sunglasses or regular work gloves—they won’t shield you from the unique hazards of welding. Position yourself with your back to other people to prevent accidental arc exposure to bystanders, and always have a Class C fire extinguisher within immediate reach when operating your Lincoln welder.
How to Adjust Your Auto-Darkening Helmet Correctly
Proper helmet adjustment prevents eye strain and improves your welding results. Set the sensitivity control to detect even weak arcs—too low and the lens won’t darken quickly enough; too high and it may darken from ambient light. Adjust the delay knob to keep the lens darkened slightly longer for stick welding (about 0.5 seconds) versus MIG (0.3 seconds). Test your settings on scrap metal before starting important work to avoid frustrating interruptions from improper lens response.
Understanding Your Lincoln Welder Components

Your Lincoln machine’s control panel holds the keys to successful welding, but confusing terminology often trips up beginners. The “voltage” control on MIG welders determines how hot your arc burns—higher voltage creates deeper penetration but risks burn-through on thin material. On stick welders, the “amperage” knob controls electrical current flow, with higher settings needed for thicker metals and larger electrodes.
Critical Differences Between Lincoln MIG and Stick Models
MIG welders like the Lincoln 140 simplify the process with continuous wire feed, making them ideal for thin sheet metal and beginners. They require shielding gas (typically 75% argon/25% CO2 for steel), which flows through the gun to protect the weld pool. Stick welders like the Lincoln 225 operate without gas, using flux-coated electrodes that create their own shielding as they burn—perfect for windy outdoor conditions or rusty metal where gas shielding would blow away.
Prepare Your Workspace and Materials
Welding on a cluttered or flammable surface creates fire hazards that could destroy your workspace. Clear a 10-foot diameter area around your Lincoln welder of all combustible materials including wood scraps, paper, and solvent containers. Place fire-resistant welding blankets on nearby surfaces that can’t be moved, and never weld near gasoline containers or propane tanks.
How to Properly Clean Metal Before Welding
Contaminated metal causes weak, porous welds that fail prematurely. Remove rust and mill scale with a stainless steel wire brush dedicated only to cleaning—not for打磨 (grinding)—to avoid embedding carbon steel particles that cause rust later. For painted or oily surfaces, use a chemical degreaser followed by acetone wipe-down. Always clean in the direction of your intended weld to prevent trapping contaminants in surface grooves.
Set Up Your Lincoln MIG Welder
Improper wire tension causes most MIG feeding problems that frustrate beginners. When loading your Lincoln welder, adjust the drive roll tension until the wire feeds smoothly without kinking—too tight crushes the wire, too loose allows slippage. The ideal setting lets you stop the wire with firm finger pressure while it’s feeding. Match your wire diameter to the drive roll groove size (use U-groove for solid wire, V-groove for flux-core).
Correct Gas Flow Rate for Common Projects
Setting improper gas flow creates invisible weld defects that compromise strength. For most mild steel projects with your Lincoln MIG welder, set flow rate between 15-20 CFH—measured at the regulator before welding. Higher flow wastes expensive gas; lower flow allows atmospheric contamination. Check for leaks by spraying soapy water on connections—bubbles indicate leaks that must be fixed before welding.
Execute Proper MIG Welding Technique
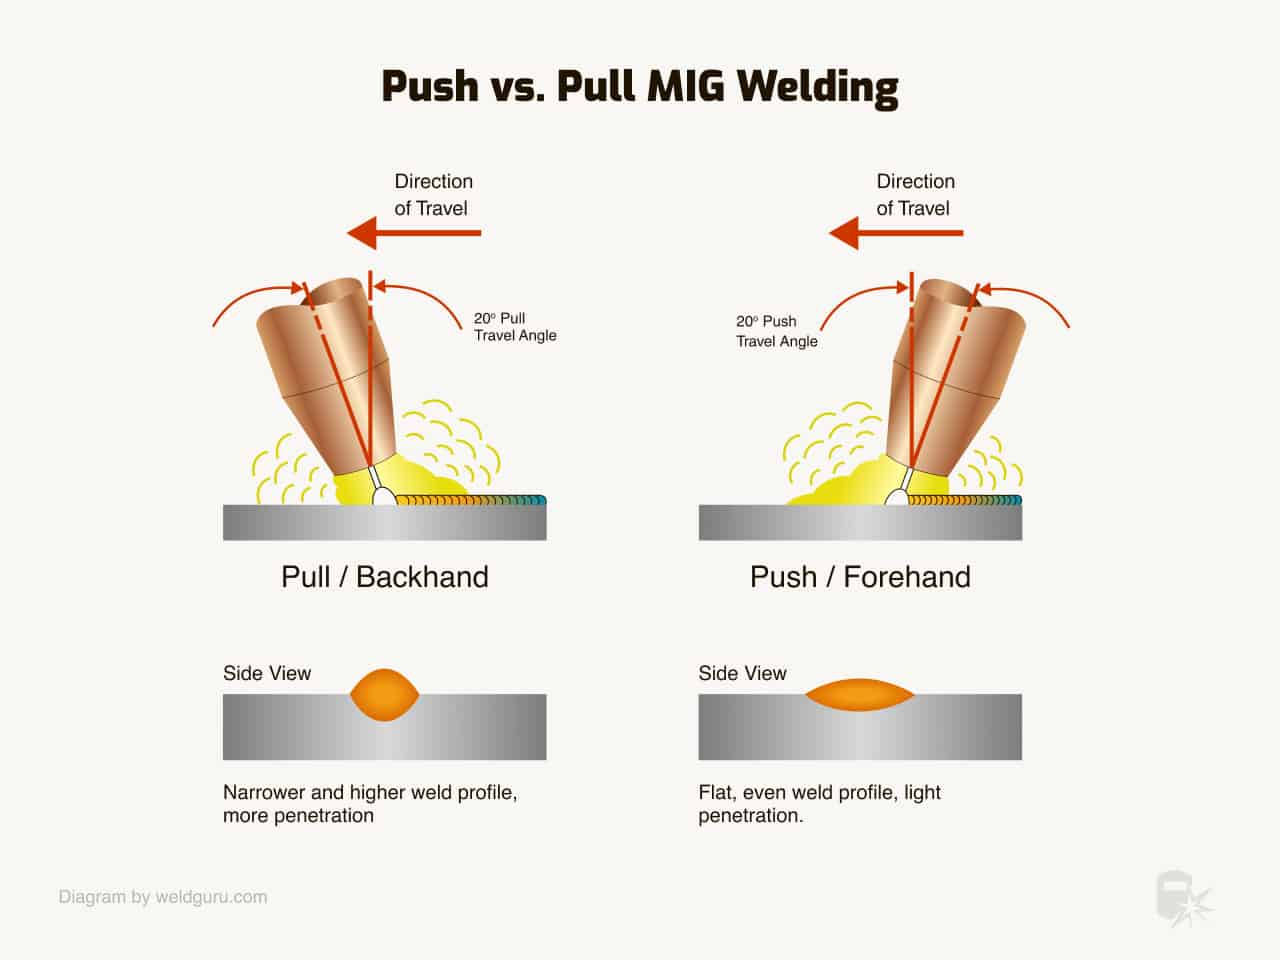
The “push” versus “pull” technique dramatically affects your weld quality. Pushing the gun (10-15 degree angle away from weld direction) creates deeper penetration with a narrower bead—ideal for thin sheet metal under 1/8 inch. Pulling the gun (15-20 degree angle toward weld direction) produces a wider, flatter bead with better slag coverage—best for thicker materials where appearance matters. Maintain consistent travel speed by moving your entire body, not just your wrist, for straighter lines.
How to Diagnose Bad Welds by Sound
Your Lincoln welder’s arc sound provides instant feedback about your settings. A proper MIG weld produces a steady “sizzling bacon” sound—if it crackles loudly, reduce wire speed; if it sounds like “hissing,” increase voltage slightly. For stick welding, a smooth “crackling” indicates correct arc length; loud popping means the electrode is too far from the workpiece. Train your ears to recognize these sounds before judging weld appearance.
Lincoln Stick Welding Fundamentals
Electrode selection makes or breaks your stick welding results. E6013 electrodes work best for beginners with their forgiving arc and easy slag removal—perfect for thin metal and out-of-position welding. E7018 rods produce stronger, more ductile welds but require dry storage and higher skill—ideal for structural applications. Never use damp electrodes; they cause porosity that weakens joints and creates difficult-to-remove slag.
Proper Stick Welding Angle for Different Positions
Flat welding (1G position) allows a 10-15 degree travel angle with moderate arc length equal to electrode diameter. For vertical-up welding (3G), reduce amperage 10-15% and use a 15-degree uphill angle with slightly shorter arc. Overhead welding (4G) requires the lowest amperage setting and a 20-degree travel angle with tight arc control to prevent weld pool drooping. Always point the electrode toward the direction of travel to maintain proper puddle control.
Common Mistakes and How to Avoid Them
Burn-through on thin metal happens when beginners use settings for thicker material. Reduce amperage 20-30% below recommended settings for sheet metal under 1/8 inch, and weld in short 1-2 inch segments to control heat buildup. For persistent burn-through, clamp a copper backing bar behind the joint to draw heat away from the weld zone—this simple trick saves countless thin metal projects.
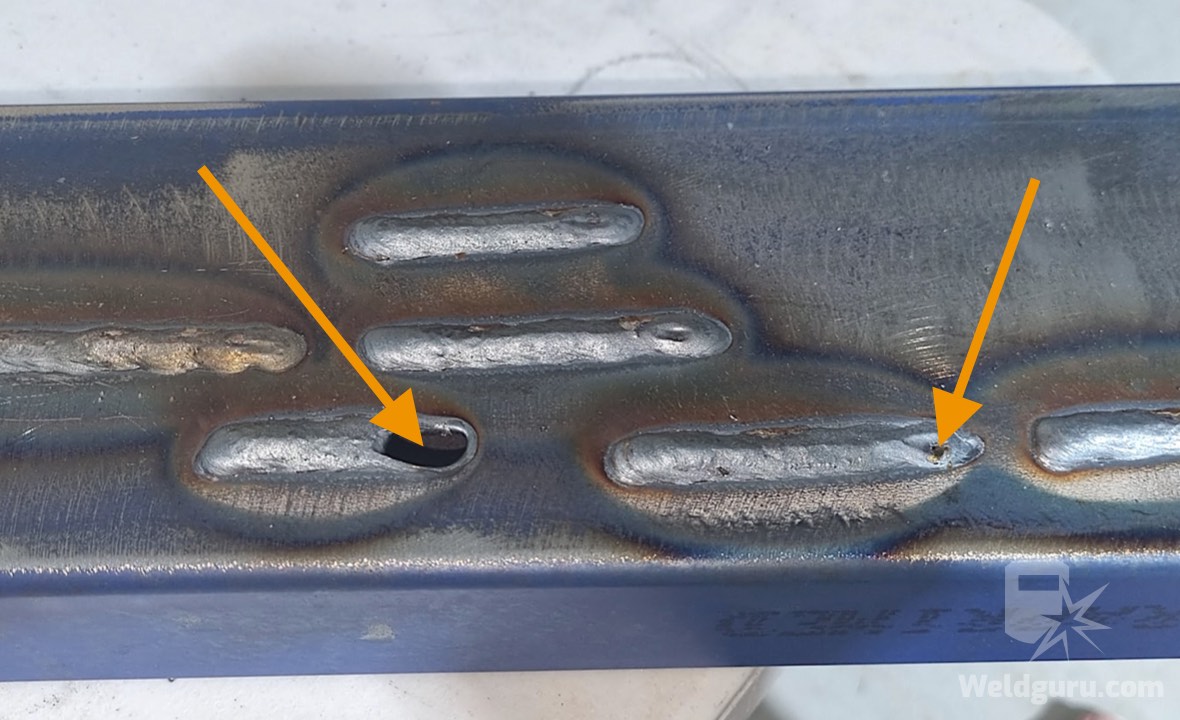
How to Fix Excessive Spatter on MIG Welds
Spatter that coats your workpiece in metal droplets indicates mismatched voltage and wire speed. If spatter looks like fine mist, increase voltage slightly; if large globs form, reduce wire speed. Always match your contact tip size to wire diameter—using a .035 tip with .030 wire creates erratic arcs and excessive spatter. Clean your gun’s diffuser weekly with a wire brush to maintain consistent gas flow.
Maintain Your Lincoln Welder for Longevity
Neglected maintenance causes 70% of preventable Lincoln welder failures according to service technicians. After each use, blow out the gun liner with compressed air to remove copper shavings that cause feeding issues. Replace contact tips when the hole becomes oval-shaped rather than round—worn tips create unstable arcs and inconsistent wire feeding. For MIG machines, inspect the drive rolls monthly for worn grooves that no longer grip wire properly.
Critical Storage Practices for Long-Term Reliability
Store your Lincoln welder indoors in a climate-controlled environment—never leave it in a damp garage or outdoors where moisture causes internal corrosion. For gas-shielded models, close cylinder valves completely and release regulator pressure when not in use to prevent gas leaks. Wrap cables loosely in large loops rather than tight coils to avoid damaging internal wiring from repeated bending stress.
Final Thoughts
Mastering how to use a Lincoln welder transforms you from a frustrated beginner into a capable fabricator who can tackle real-world projects with confidence. Start with simple butt joints on scrap metal, focusing on consistent travel speed and proper arc length before attempting complex welds. Keep a welding journal noting settings for different materials—this reference will accelerate your learning curve dramatically.
Remember that every professional welder started exactly where you are now. With your Lincoln machine properly set up, safety gear in place, and these practical techniques applied consistently, you’ll create strong, reliable welds that hold up to real-world demands. The most important step? Plug in your Lincoln welder today and make your first practice pass—experience trumps theory every time in the welding world.
Leave a Reply