Spot weld cutters are indispensable tools for anyone working on automotive restoration, collision repair, or panel replacement projects. These specialized cutting tools allow you to remove spot-welded panels efficiently while preserving the underlying structure, making them essential for professionals and serious hobbyists alike. Whether you’re separating a rusted quarter panel from a classic car or removing a damaged door from a modern vehicle, understanding how to use a spot weld cutter properly can save hours of frustrating work and prevent costly damage to surrounding areas. This guide walks you through everything you need to know—from selecting the right cutter for your materials to executing clean cuts safely and effectively.
Learning to use a spot weld cutter correctly requires understanding the tool’s operating principles, choosing appropriate equipment for your specific application, and following proper techniques that ensure both precision and safety. The process involves more than simply drilling; it requires preparation, the right setup, controlled cutting motion, and consistent safety practices throughout. By mastering these fundamentals, you’ll achieve professional-quality results while extending the life of your cutters and protecting yourself from common injuries associated with high-speed metal cutting operations.
Choose the Right Spot Weld Cutter for Your Project

Selecting the appropriate spot weld cutter forms the foundation of successful spot weld removal. The market offers several distinct categories, each designed for specific applications and material types, so understanding these differences prevents costly mistakes and ensures efficient work.
Standard spot weld cutters, such as the Blair original design, work excellently with conventional automotive steels found in older vehicles. These cutters feature a straightforward design that accepts multiple sharpening cycles, making them economical for shops that regularly perform restoration work on classic cars or trucks. The thicker cutter wall construction available in modern iterations significantly extends tool life, allowing you to get more projects from a single cutter before replacement becomes necessary. Pro Tip: For vehicles manufactured before 2000, standard high-speed steel cutters typically provide the best balance of performance and cost-effectiveness.
For modern vehicles incorporating Boron steel or Ultra-High Strength Steel in structural components, solid carbide spot weld cutters deliver the performance you need. Tungsten carbide construction maintains sharpness far longer than high-speed steel alternatives when cutting these exceptionally hard materials. These cutters are available in metric sizes—6.5mm, 8mm, 10mm, and 12mm—matching the standard range of spot weld diameters found in automotive applications. While the initial investment exceeds standard cutters, the extended life and consistent performance justify the cost when working with contemporary vehicle construction. Warning: Attempting to cut Boron steel with standard cutters will quickly dull the teeth and compromise your results.
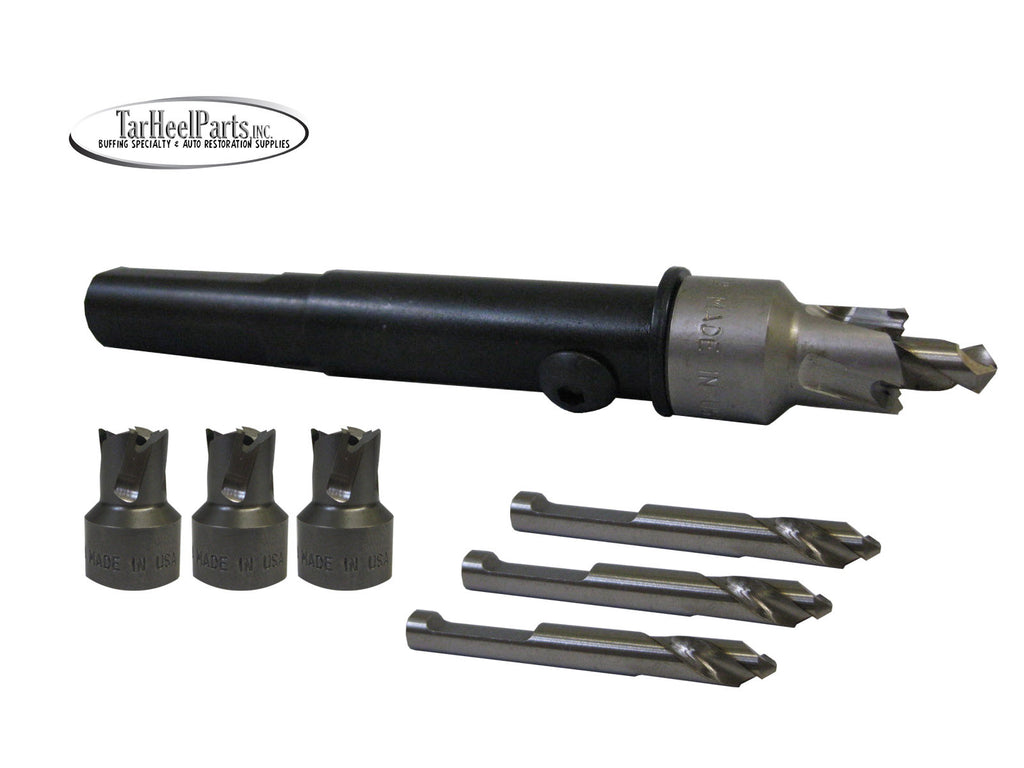
Premium spot weld cutter kits provide the most versatile option for shops handling diverse projects. These kits typically include multiple cutter sizes paired with quality arbors designed for specific applications. Kits featuring skip-proof pilot technology help maintain accurate positioning during drilling, reducing the risk of the cutter wandering off the spot weld and damaging surrounding panel areas. Having three standard cutter sizes available ensures you’re prepared for the variation in spot weld dimensions found across different vehicle manufacturers and model years. If you work on multiple vehicle types, investing in a comprehensive kit saves time and money compared to purchasing individual cutters as needed.
Set Up Your Equipment Properly for Optimal Results
Proper setup prevents frustration and ensures clean cuts from the first moment you begin drilling. Taking time to prepare your equipment correctly pays dividends throughout the entire spot weld removal process.
Begin by inspecting your cutter for any visible damage or excessive wear. Dull or damaged teeth produce ragged cuts, generate excessive heat, and place unnecessary stress on both the cutter and your drilling equipment. If the cutter shows significant wear, replace it or have it professionally sharpened before proceeding. The pilot pin at the center of the cutter must be intact and properly sized to fit into the dimple created by the original spot weld—this precise fit prevents wandering during the cutting operation. Expert Note: A quick tap test on a scrap piece of similar metal can reveal if your cutter needs sharpening—listen for a clean, consistent sound rather than a grinding or scraping noise.
Secure your workpiece firmly before beginning any cutting operation. Spot weld removal requires stable positioning, and any movement during cutting compromises accuracy and can damage the underlying panel. For the Enforcer spot weld drill system, utilize the included 360-degree swivel frame clamps to secure panels effectively. These clamps accommodate openings from 2-5/16 inches to 5-5/8 inches, providing secure mounting for various panel configurations. If using a conventional drill, employ clamps or a vise to prevent movement, and ensure the cutting area is accessible from a comfortable working angle. Pro Tip: Apply masking tape around the cutting area to contain metal shavings and improve visibility of your work surface.
For pneumatic tools like the Enforcer system, verify your air supply meets the specified requirements. The system requires 90 psi operating pressure and consumes 4 CFM of air. Connecting to a compressor with inadequate capacity results in inconsistent performance and frustrating slowdowns during critical cutting phases. Inspect air lines for damage or restrictions, and ensure quick-disconnect fittings function properly. Dry, filtered air extends tool life and prevents moisture-related issues that can affect both tool performance and cut quality. Time Saver: Keep a pressure gauge attached to your air line to immediately identify supply issues before they affect your cutting results.
Execute Proper Cutting Technique for Clean Results

Mastering the actual cutting technique separates professional results from amateur attempts. The annular cutting principle used by spot weld cutters differs significantly from conventional drilling, and understanding this distinction improves your outcomes dramatically.
Position the cutter so the pilot pin rests directly in the center of the spot weld dimple. This dimple, created by the original welding process, provides a natural guide that keeps the cutter centered throughout the operation. Apply gentle initial pressure as the teeth engage the material, allowing the cutter to establish its cutting path before increasing feed pressure. The cutter should remain perpendicular to the panel surface throughout the operation—angled cutting results in incomplete cuts, uneven wear, and potential damage to underlying structures. Visual Cue: Look for consistent metal shavings rather than smoke or discoloration, which indicates excessive heat and improper technique.
Maintain consistent feed pressure throughout the cutting process. Too much pressure overheats the cutter and can cause premature wear or tooth damage, while insufficient pressure results in slow material removal and potential loading of the cutter teeth. For the Enforcer system’s manual feed design, the leverage handle allows you to apply consistent downward pressure without relying on pneumatic force, providing direct tactile feedback about cutting progress. This direct control enables better decision-making during the operation and typically results in faster spot weld removal compared to purely pneumatic feed systems. Pro Tip: Count to three as you apply pressure—this helps maintain consistent feed rate rather than forcing the cutter.
Allow the cutter to do the work rather than forcing it through the material. Spot weld cutters remove material efficiently when operated at appropriate speeds—the Enforcer system operates at 800 RPM, optimized for Ultra-High Strength Steel and Boron steels commonly found in modern vehicle construction. This lower speed generates less heat, maintains cutter edge integrity longer, and provides operators with better control during the cutting process. If using a conventional drill, select a speed appropriate for the material and cutter type, erring toward slower speeds for harder materials. Time Estimate: Most spot welds take 15-30 seconds to cut properly when using the correct technique.
Follow Critical Safety Practices Every Time
Safety considerations deserve your full attention when operating spot weld cutters. The combination of high-speed rotation, metal debris, and potentially hazardous tool materials creates several risks that proper precautions can effectively mitigate.
Eye protection is non-negotiable during any spot weld cutting operation. The cutting process generates metal shavings and fragments that travel at high velocities, creating serious eye injury risks. Quality safety glasses or a face shield should be worn throughout the entire operation, from initial setup through cleanup. Consider glasses with side shields for additional protection, and never remove them until all metal debris has been cleared from the work area. Warning: Metal particles can remain airborne for minutes after cutting stops—keep protection on until full cleanup.
Hearing protection becomes important during extended operations. The Enforcer spot weld drill system operates at 84 dB, a level that can cause hearing damage with prolonged exposure. Standard pneumatic drills and high-speed rotary tools may produce similar or higher noise levels. Disposable foam earplugs or reusable ear muffs provide adequate protection for most shop environments, and wearing them throughout the entire job prevents cumulative exposure that could affect your hearing over time. Pro Tip: If you need to shout to be heard by someone three feet away, the noise level is dangerous to your hearing.
Solid carbide spot weld cutters contain cobalt, a chemical classified as carcinogenic by the State of California. While the solid carbide construction provides superior cutting performance, you must handle these tools carefully to minimize exposure risks. Avoid breathing dust created during cutting operations by ensuring adequate ventilation in your work area. Wash hands thoroughly after handling carbide cutters, and clean work surfaces regularly to prevent metallic dust accumulation. When disposing of worn cutters, follow local regulations for hazardous material disposal. Expert Note: A shop vacuum with HEPA filtration helps contain fine metal particles during and after cutting operations.
Troubleshoot Common Cutting Issues Quickly
Even experienced operators encounter problems during spot weld removal, and recognizing common issues helps you address them quickly. Understanding the root causes of poor cut quality, excessive wear, or cutter damage enables you to adjust your technique or equipment before significant problems develop.
Cutter wandering or deviation from the intended path typically indicates improper pilot pin engagement. The pilot pin must fit securely into the spot weld dimple to maintain accurate centering throughout the cutting operation. If the pin doesn’t fit snugly, either the cutter size is incorrect for the weld being removed, or the dimple has been deformed by previous attempts or corrosion. Stop immediately and reposition the cutter—continuing with a wandering tool damages surrounding material and produces poor results. Pro Tip: Clean the dimple with a small pick before starting to ensure proper pilot pin seating.
Excessive heat generation during cutting suggests several possible issues. Dull cutters require more force and generate more friction, producing heat that can discolor metal and accelerate cutter wear. Inadequate lubrication or cooling, particularly when cutting harder materials, also contributes to overheating. If you notice discoloration of the cut edge or smell burning, stop and allow both the cutter and workpiece to cool. Check cutter sharpness, verify your speed settings, and consider applying cutting fluid for difficult materials. Time Saver: Keep a spray bottle of cutting fluid nearby for quick application during extended operations.
Incomplete cuts or material remaining at the center of the cut often result from premature removal of the cutter before the operation completed fully. The cutting process is complete when you feel the cutter break through the underlying material and encounter less resistance. Removing the cutter too early leaves a thin layer of material connecting the core to the surrounding area, requiring additional effort to complete the separation. Trust the tactile feedback—once the resistance drops significantly and the cutter can be advanced easily, the cut is complete. Visual Cue: Look for the cutter’s core to separate from the surrounding material before attempting to remove it.
Achieve Professional Results with Consistent Practice
Successfully using a spot weld cutter requires integrating proper tool selection, meticulous setup, controlled technique, consistent safety practices, and proactive maintenance into a unified workflow. Each element supports the others—choosing the right cutter enables effective cutting, proper setup prevents problems during execution, correct technique produces clean results, safety practices protect you throughout the process, and maintenance extends your equipment’s useful life.
The investment in quality equipment pays dividends in reduced frustration and improved results. Premium spot weld cutter kits with skip-proof pilots, dedicated systems like the Enforcer spot weld drill, and appropriate cutter types for your materials all contribute to professional outcomes. Taking time to understand your equipment’s capabilities and limitations enables you to push performance appropriately without exceeding design boundaries that lead to damage or poor results. Pro Tip: Keep a log of cutter performance on different materials to build your knowledge base for future projects.
As you develop proficiency with spot weld cutters, you’ll find the process becoming increasingly automatic. The tactile feedback from successful cuts, the visual cues indicating proper penetration, and the feel of a cutter working as designed all become familiar through experience. This expertise enables you to tackle increasingly complex panel removal and repair projects with confidence, knowing you can separate welded components cleanly while preserving underlying structures for subsequent repair or replacement work. Final Note: Mastery comes with practice—start with less critical projects to build your skills before tackling high-visibility restoration work.
Leave a Reply