Stick welding, also known as Shielded Metal Arc Welding (SMAW), remains one of the most versatile welding processes for metal fabrication. Whether repairing farm equipment, building structural steel, or tackling DIY projects, understanding how to use a stick welder properly opens doors to countless applications. This guide delivers practical, actionable steps to help you produce strong, clean welds from your very first attempt. With the right technique and practice, even beginners can achieve professional-quality results on rusty or dirty metals where other welding methods fail.
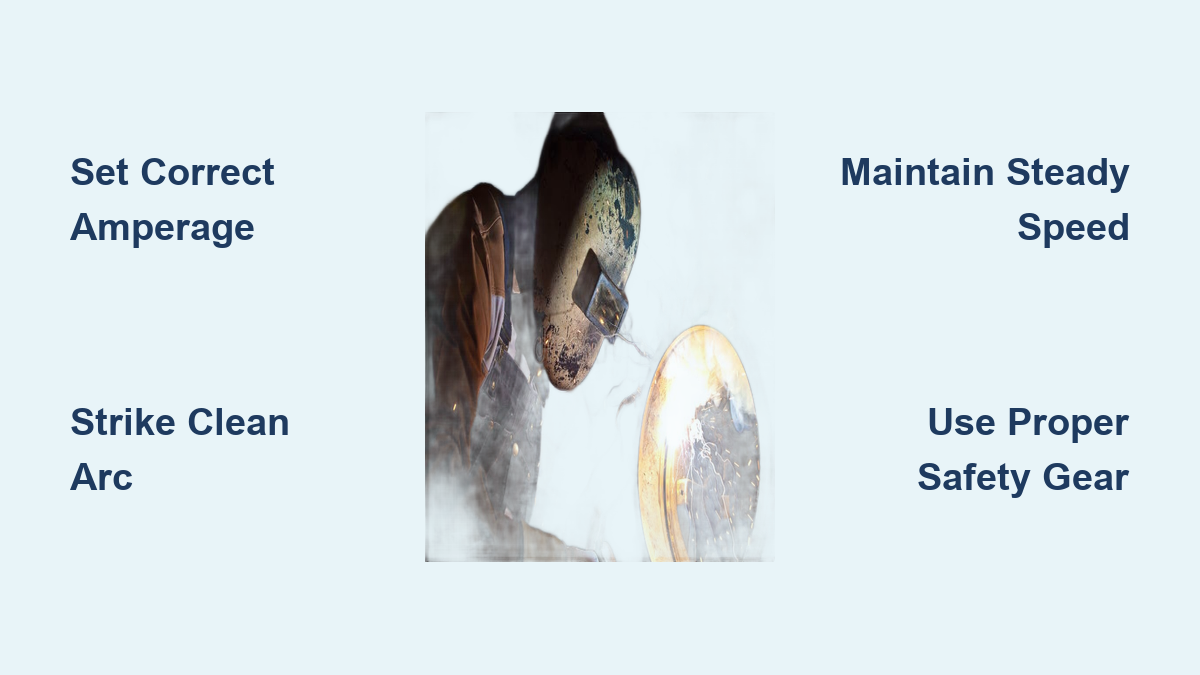
Set Up Your Stick Welder Correctly
The foundation of successful stick welding begins with proper equipment setup. Connect your ground clamp directly to clean, bare metal on your workpiece as close to the weld area as possible. Scrape or wire brush the contact point to remove paint, rust, or scale—poor grounding causes inconsistent arcs and weak welds. Insert your electrode into the holder with just enough of the metal portion exposed for comfortable handling, typically the diameter of the rod plus your intended arc length.
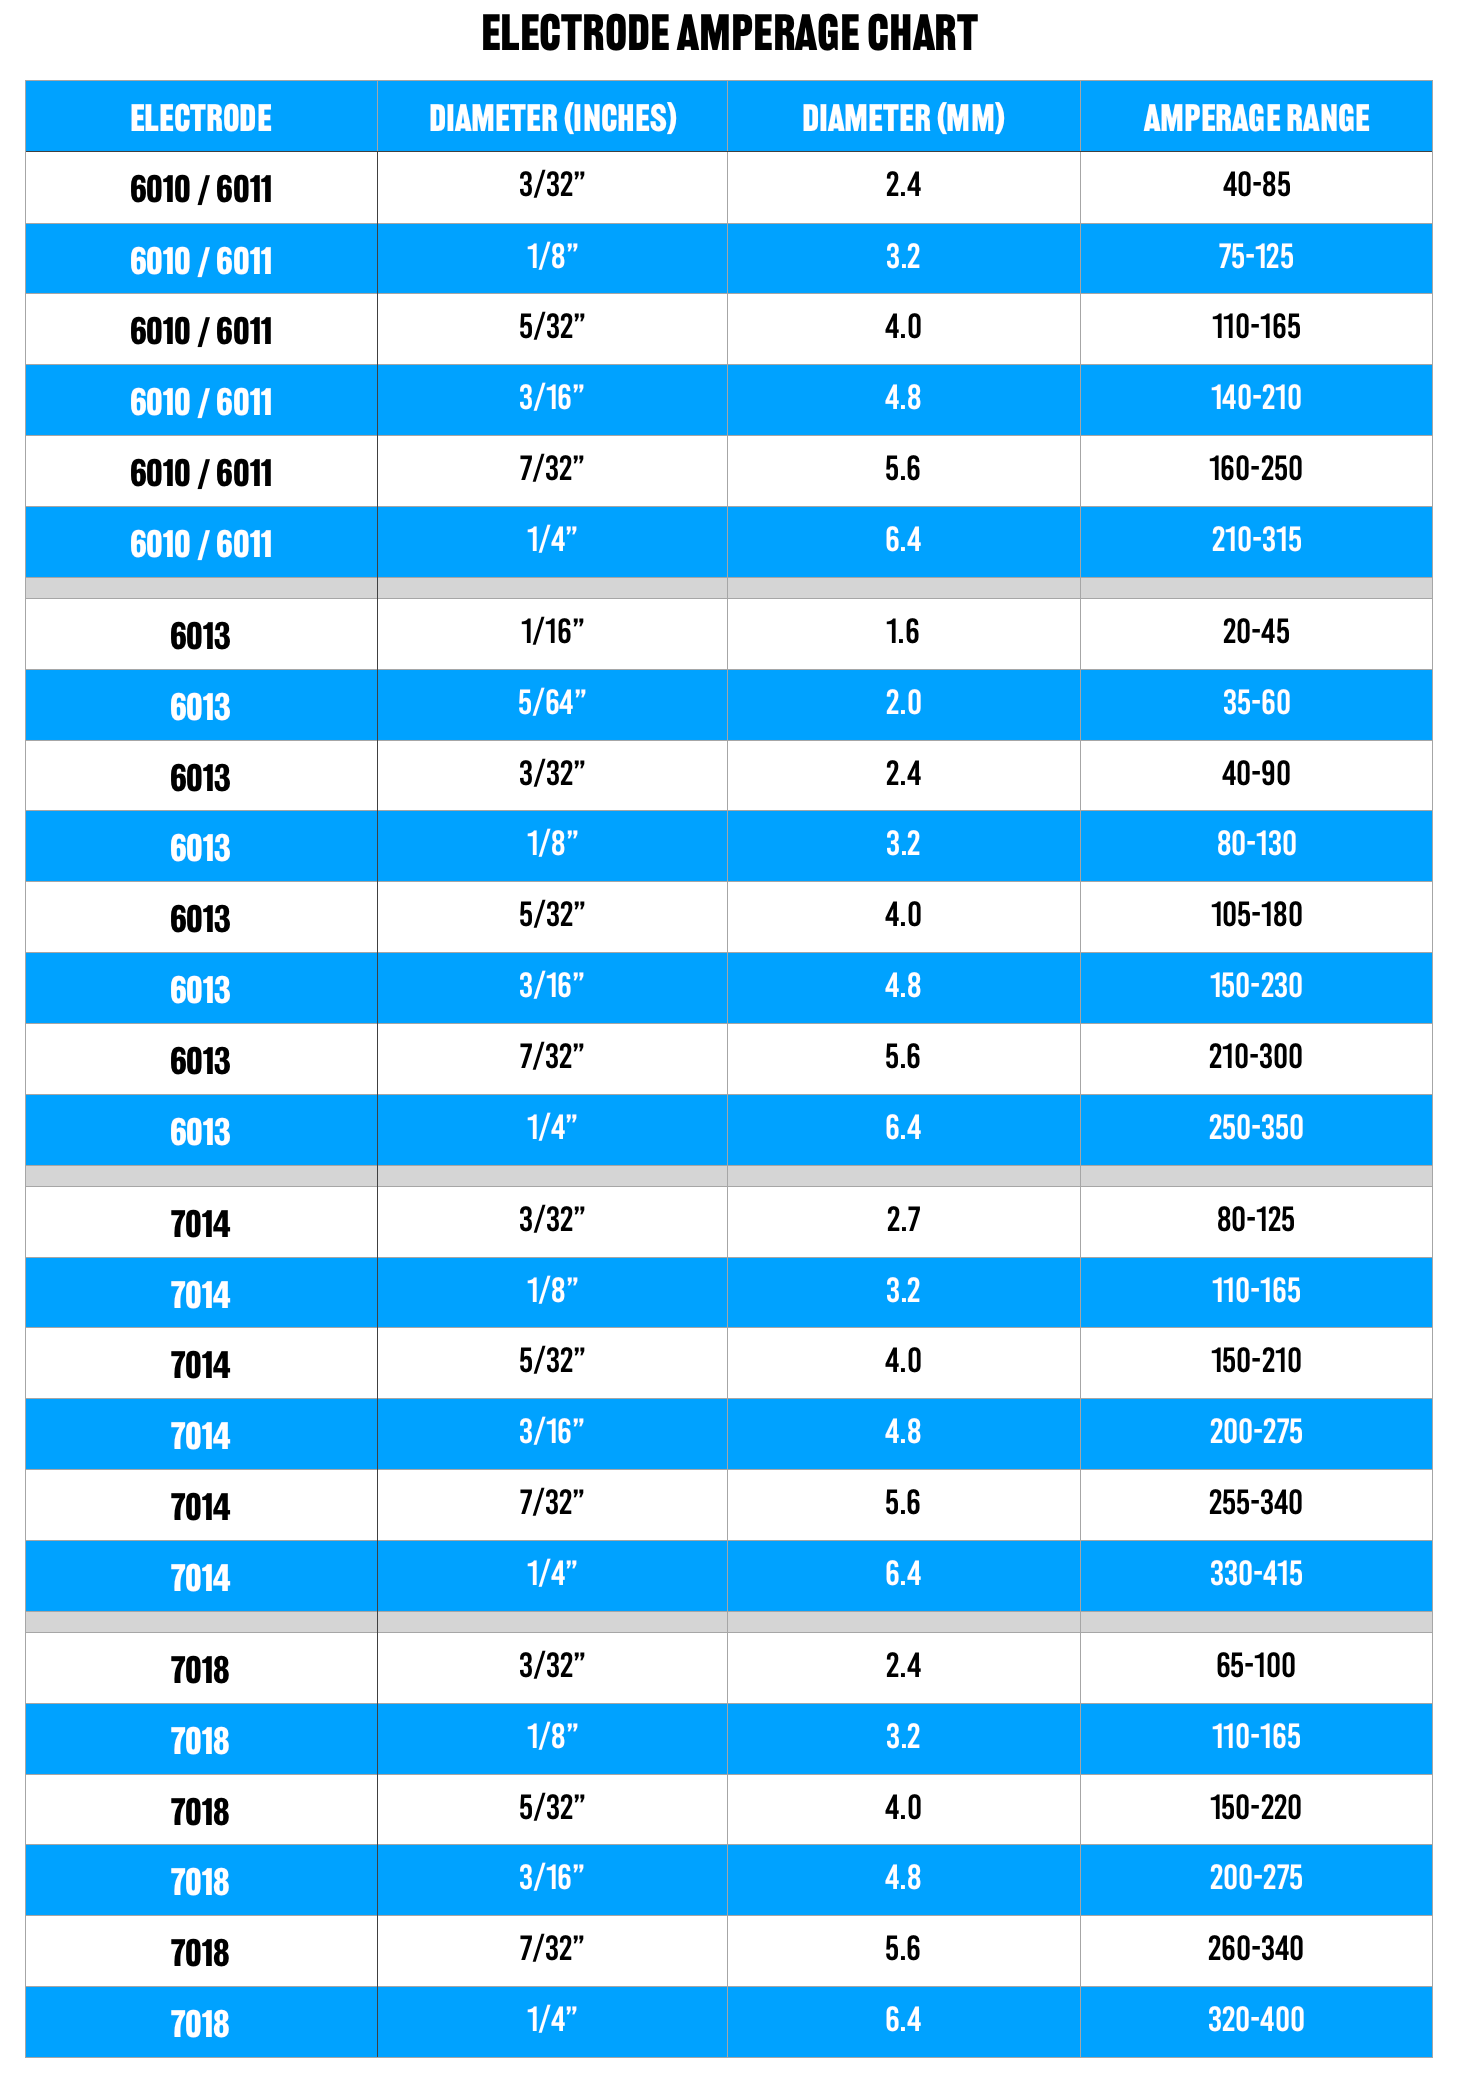
Adjust your amperage based on the electrode you’re using. For E6013 rods, multiply the electrode diameter in millimeters by 30-35 (a 2.6mm/3/32″ rod needs 78-91 amps). E7018 electrodes typically require 10-15 amps more. Start within the recommended range and adjust based on visual feedback: excessive spatter and deep craters indicate too much power, while difficult starts and shallow penetration mean insufficient amperage. Proper setup takes less than five minutes but prevents 80% of beginner welding problems.
How to Determine the Right Electrode for Your Project
Choosing the correct electrode makes or breaks your welding success. Beginners should start with E6013 rods—they strike easily, work on dirty or rusty metal, and provide forgiving characteristics while developing proper technique. Match electrode diameter to material thickness: 1/16″ for metals up to 1/8″ thick, 3/32″ for general-purpose work, and 1/8″ for thicker materials.
For higher-strength applications, E7018 low-hydrogen rods deliver superior mechanical properties but require dry storage conditions. If exposed to humidity, dry them in a rod oven at 250-300°F for two hours before use. Never use damp E7018 rods, as moisture creates hydrogen gas that causes cracking. The electrode’s final digit reveals coating type: 0 for cellulose sodium (deep penetration), 1 for cellulose potassium (all-position), and 8 for low-hydrogen iron powder (smooth operation).
Essential Safety Gear You Can’t Skip
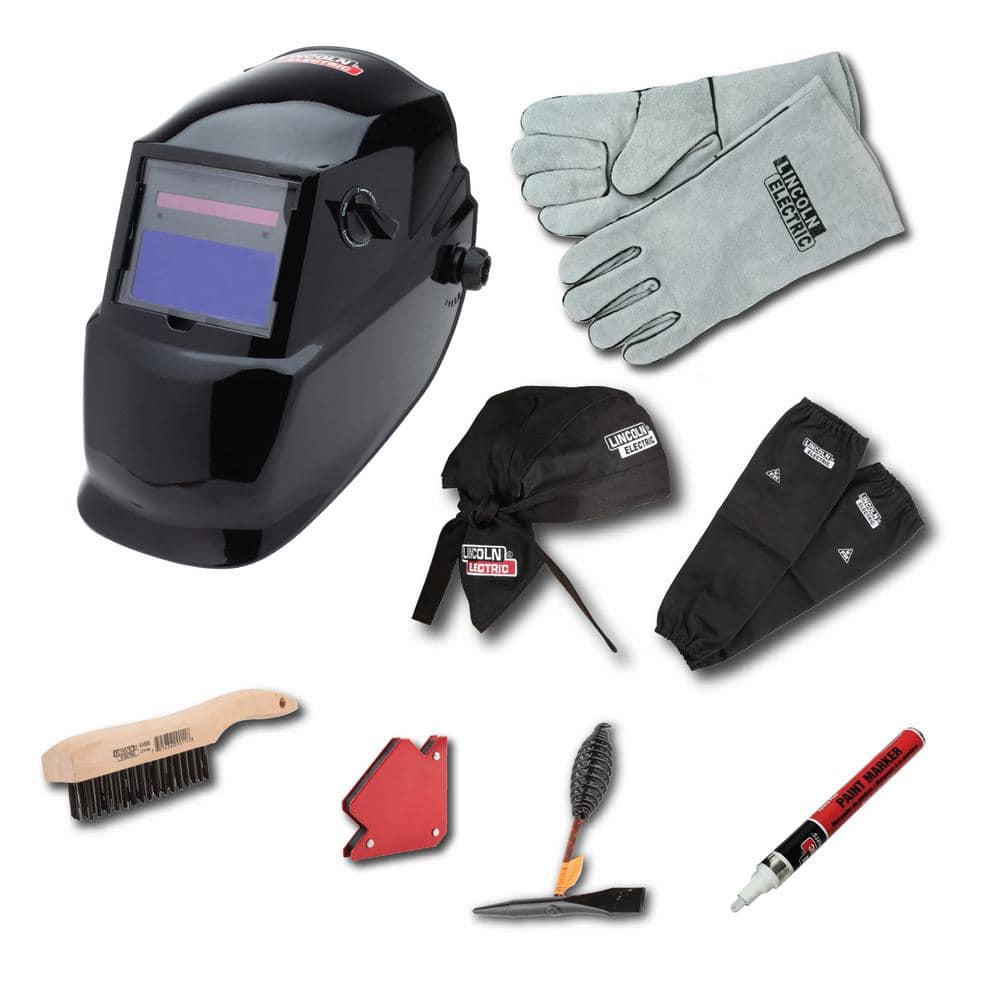
Welding without proper protection risks permanent injury. Your auto-darkening welding helmet is non-negotiable—set it to shade 10-12 for typical stick welding amperages. Without adequate eye protection, even brief arc exposure causes “arc eye,” a painful corneal sunburn that feels like sand in your eyes. Inspect your helmet’s sensors regularly to ensure proper darkening response.
Flame-resistant welding gloves protect your hands from intense heat and sparks. Standard work gloves won’t suffice—they’ll ignite or transfer heat quickly. Look for gloves with reinforced palms and extended cuffs made from heavy leather. Before each use, check for holes or thin spots that compromise protection. Similarly, wear a flame-resistant cotton or leather jacket—never synthetics that melt onto skin when exposed to sparks.
Why Workspace Preparation Prevents 90% of Welding Failures
Your welding environment directly impacts success. Work in a well-ventilated area to avoid inhaling hazardous fumes from electrode flux and metal coatings. Position your workpiece at elbow height to maintain steady hand movement without fatigue—bending or reaching causes inconsistent welds. Clear all combustible materials within a 35-foot radius, as sparks travel farther than most beginners expect.
Secure your ground clamp on clean metal near the weld zone, not on your workbench or table legs. Poor grounding creates erratic arcs that make consistent welding impossible. If working outdoors, shield your area from wind with barriers—air currents disrupt the protective gas shield from the electrode flux, causing porosity in your weld bead. Investing 10 minutes in proper workspace setup saves hours of rework and frustration.
Master the Critical First Step: Striking the Arc
Striking a clean arc separates successful welds from frustrating failures. Use the scratch start method: position the electrode at 15-20 degrees from perpendicular, then drag it across the metal like striking a match. As it drags, lift slightly to establish proper arc length—approximately the diameter of the electrode away from the workpiece. You’ll hear a smooth, steady hiss when you’ve achieved the right distance.
The tap start works better for tight corners: position the electrode perpendicular to the metal, tap firmly, then immediately lift to establish the arc. If your electrode sticks, quickly roll the holder sideways to break the connection without yanking it away. Allow 2-3 seconds for the weld pool to form before moving—this preheat period ensures proper fusion at the start point and prevents weak beginnings that require grinding out.
How to Maintain Consistent Weld Beads Like a Pro
Your travel speed determines weld quality more than any other factor. Move too quickly and you’ll get a narrow, convex bead with potential lack of fusion; too slowly creates wide beads with excessive penetration and possible burn-through. The ideal speed produces a bead width approximately three times the electrode diameter with consistent ripples.
Maintain steady electrode angle (10-20 degrees in travel direction) and arc length throughout your weld. Watch the leading edge of the weld pool rather than the electrode tip—this visual cue helps maintain consistent speed. For wider joints, use a slight weave pattern no wider than three times the electrode diameter to avoid undercutting at the edges. Practice on scrap metal first, focusing on consistency rather than speed.
Fix Common Stick Welding Problems Immediately
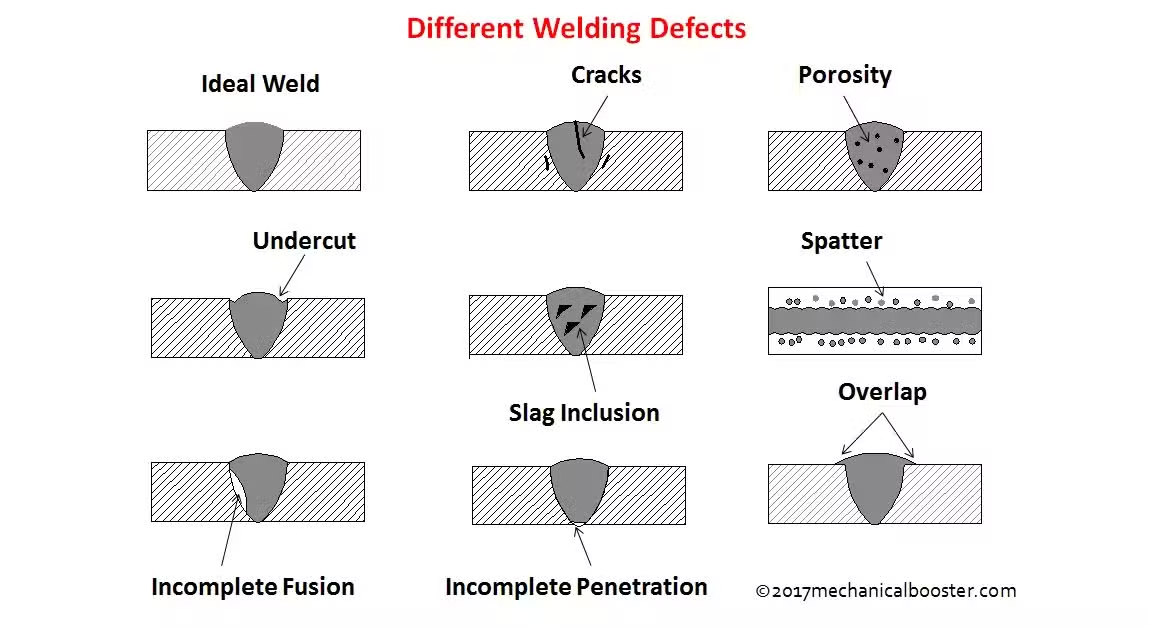
Porosity (tiny holes in the weld) typically results from contamination or moisture. Clean base metal thoroughly with dedicated wire brushes, and ensure electrodes remain dry—especially low-hydrogen types. If working outdoors, shield the weld zone from wind that blows away the protective flux gas.
Lack of fusion—where weld metal fails to bond with base metal—usually stems from insufficient heat or improper technique. Increase amperage slightly, reduce travel speed, and ensure you’re wiggling the electrode enough to wet the joint edges. Excessive spatter indicates too high amperage or inconsistent arc length—reduce power by 5-10 amps and focus on maintaining steady electrode height.
Why Electrode Storage Matters More Than You Think
Many beginners overlook electrode storage, not realizing how dramatically it affects weld quality. E7018 and other low-hydrogen rods absorb moisture from the air, causing hydrogen-induced cracking. Store them in a rod oven maintained at 250-300°F, and use within hours of removal. Severely compromised rods require re-drying for two hours minimum before use.
Organize your electrode inventory by type and size to prevent wasting time searching mid-project. Keep E6013 rods accessible for practice and general work, with E7018 reserved for critical structural applications. Proper storage extends electrode life and ensures consistent performance—never leave rods sitting out overnight in humid conditions.
Maintain Your Stick Welder for Reliable Performance
Post-weld maintenance prevents 70% of equipment failures. After each session, wipe spatter from your electrode holder and ground clamp with a wire brush. Inspect cables for cuts or frayed insulation that create shock hazards and inconsistent current delivery. Tighten all connections and clean contact surfaces to maintain optimal electrical flow.
Store your welder covered in a clean, dry location to prevent dust accumulation in cooling vents. Verify your cooling fan operates correctly—listen for its sound when powering on and check airflow from vents. Blocked cooling passages cause thermal overload shutdowns that damage internal components over time. Simple maintenance extends your welder’s lifespan by years.
Mastering how to use a stick welder begins with these fundamental techniques practiced consistently on scrap metal. Start with E6013 electrodes in the flat position, focusing on smooth arc starts and consistent travel speed before advancing to joints and challenging positions. Proper technique matters more than expensive equipment—many professionals produce exceptional results with basic machines by mastering electrode control. As your skills develop, gradually incorporate E7018 rods for higher-strength applications and expand into vertical and overhead welding. With dedicated practice and attention to these essential fundamentals, stick welding becomes a reliable skill for countless fabrication and repair projects, delivering strong, durable welds even in challenging conditions where other methods fail. The key isn’t expensive gear—it’s understanding how to control the arc, maintain proper technique, and troubleshoot issues before they compromise your work.
Leave a Reply