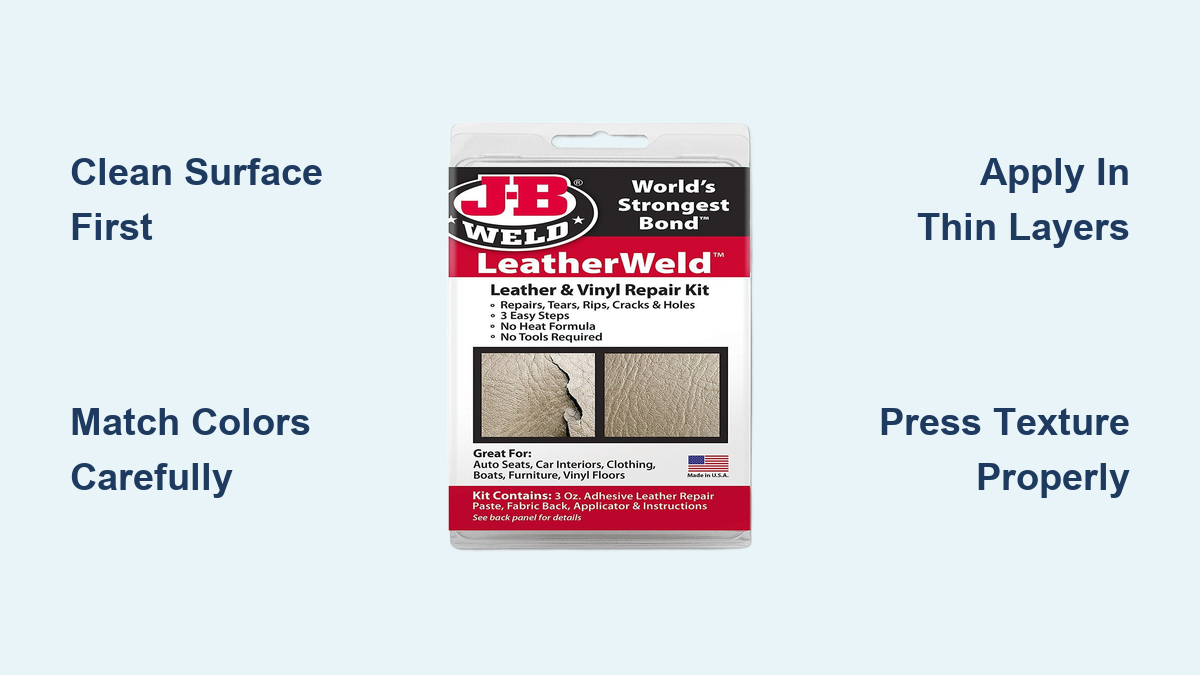
That unexpected tear in your favorite leather chair or the growing crack in your car seat can ruin your day. JB LeatherWeld offers a straightforward solution for fixing damaged leather and vinyl surfaces without requiring heat tools or professional expertise. This no-heat repair kit lets you restore chairs, car seats, shoes, and other leather items with professional-looking results right in your home. Whether you’re dealing with a small tear in your favorite leather couch or a crack in your vehicle’s interior, understanding the proper technique makes all the difference between a repair that blends seamlessly and one that remains visible. This comprehensive guide walks you through every step of the process, from initial surface preparation through final curing, ensuring you achieve the best possible results with your LeatherWeld kit.
The kit’s innovative air-dry formula eliminates the complexity and safety concerns associated with traditional heat-cure leather repair systems. You won’t need heating irons, heat guns, or electrical outlets during application, making the process safer and more accessible for DIY users. With seven blendable color compounds included, you can match virtually any leather or vinyl shade, while the backing fabric and grain-paper tools help create repairs that maintain the authentic texture of surrounding surfaces. At just $19.99, this complete kit provides exceptional value for common household repairs that would otherwise require expensive professional services.
Confirm Your Damage Fits JB LeatherWeld’s Repair Parameters
Before starting any repair project, you need to confirm that JB LeatherWeld can address your specific damage type and size. The formula works effectively on both leather and vinyl surfaces, making it versatile enough for furniture, automotive interiors, footwear, bags, and marine applications. However, the product operates within defined size limitations that determine whether your damage falls within the repairable range.
The LeatherWeld system handles tears up to 2 inches in length and 1/2 inch in width. Damage exceeding these measurements typically requires professional repair services or alternative methods. The compound works optimally on clean cracks and minor tears where the backing fabric can provide adequate structural support. Surface scratches, scuffs, and small punctures within these dimensions respond well to the treatment, while larger gouges or heavily damaged areas may not achieve satisfactory results.
Understanding these limitations from the outset prevents wasted time and materials. Measure your damage carefully before opening the kit, and if your tear falls outside the specified parameters, consider consulting a professional leather repair service. For damage within the acceptable range, proceed with confidence knowing the product was specifically designed for your situation. Common applications include repairing rips in sofa arms, cracks in car seat bolsters, tears in leather jackets, and damage to motorcycle seats.
Identify Every Component in Your LeatherWeld Kit

Familiarizing yourself with every component in your LeatherWeld kit before beginning the repair ensures smooth workflow and prevents mid-process interruptions. The kit arrives complete with all necessary tools and materials, eliminating the need for additional purchases or substitutions.
The seven air-dry repair color compounds form the core of the kit, providing the pigmentation needed to match your specific leather or vinyl shade. These blendable compounds allow you to create custom colors by mixing different ratios, achieving close matches for everything from basic black and brown to more specialized tones. The mixing bottle serves as your workspace for combining these compounds, while the precision spatula enables controlled application of the repair compound onto damaged areas.
Structural support comes from the backing fabric, which you insert beneath the tear to create a stable foundation for the compound. This reinforcement prevents the repair from collapsing into the void created by the damage and distributes stress evenly across the repaired area. The grain-paper packet contains specialized paper that imprints realistic leather texture onto the compound once it begins curing, helping the repair blend with surrounding surfaces.
Finally, the practice vinyl sample provides an invaluable opportunity to test your color matching and application technique before working on your actual item. This practice material lets you refine your approach without risking visible mistakes on your prized leather possessions. Before you begin, lay out all components and ensure you understand each one’s purpose—this preparation saves time and frustration during the actual repair process.
Clean and Prepare Your Leather Surface Thoroughly
Surface preparation determines the success or failure of your repair more than any other factor. Contaminants like dirt, oils, body lotions, and general grime interfere with the compound’s adhesion, creating weak bonds that may fail prematurely. Taking time to clean thoroughly before application pays dividends in repair longevity.
Begin by cleaning the damaged area with a mild leather cleaner or isopropyl alcohol diluted with water. Avoid harsh chemicals, ammonia-based products, or abrasive cleaners that could damage surrounding surfaces or leave residues. Work the cleaner into the area gently with a soft cloth, ensuring you remove all visible dirt and any accumulated oils from skin contact. Pay particular attention to the edges of the tear, where debris often accumulates.
After cleaning, allow the surface to dry completely before proceeding. Moisture trapped beneath the repair compound compromises adhesion and may cause bubbling or delamination as it evaporates. A hair dryer on the lowest, coolest setting can speed drying, but ensure the area returns to room temperature before applying the compound. The backing fabric also needs to be clean and dry, as any contamination transfers to the repair site.
Inspect the surrounding area while preparing, noting any additional damage you might have overlooked and checking that your color selection will work for the entire affected region. Rushing through preparation to begin application almost always produces inferior results that require correction later. This is the stage where professional results separate from amateur attempts.
Perfect Your LeatherWeld Color Matching Technique
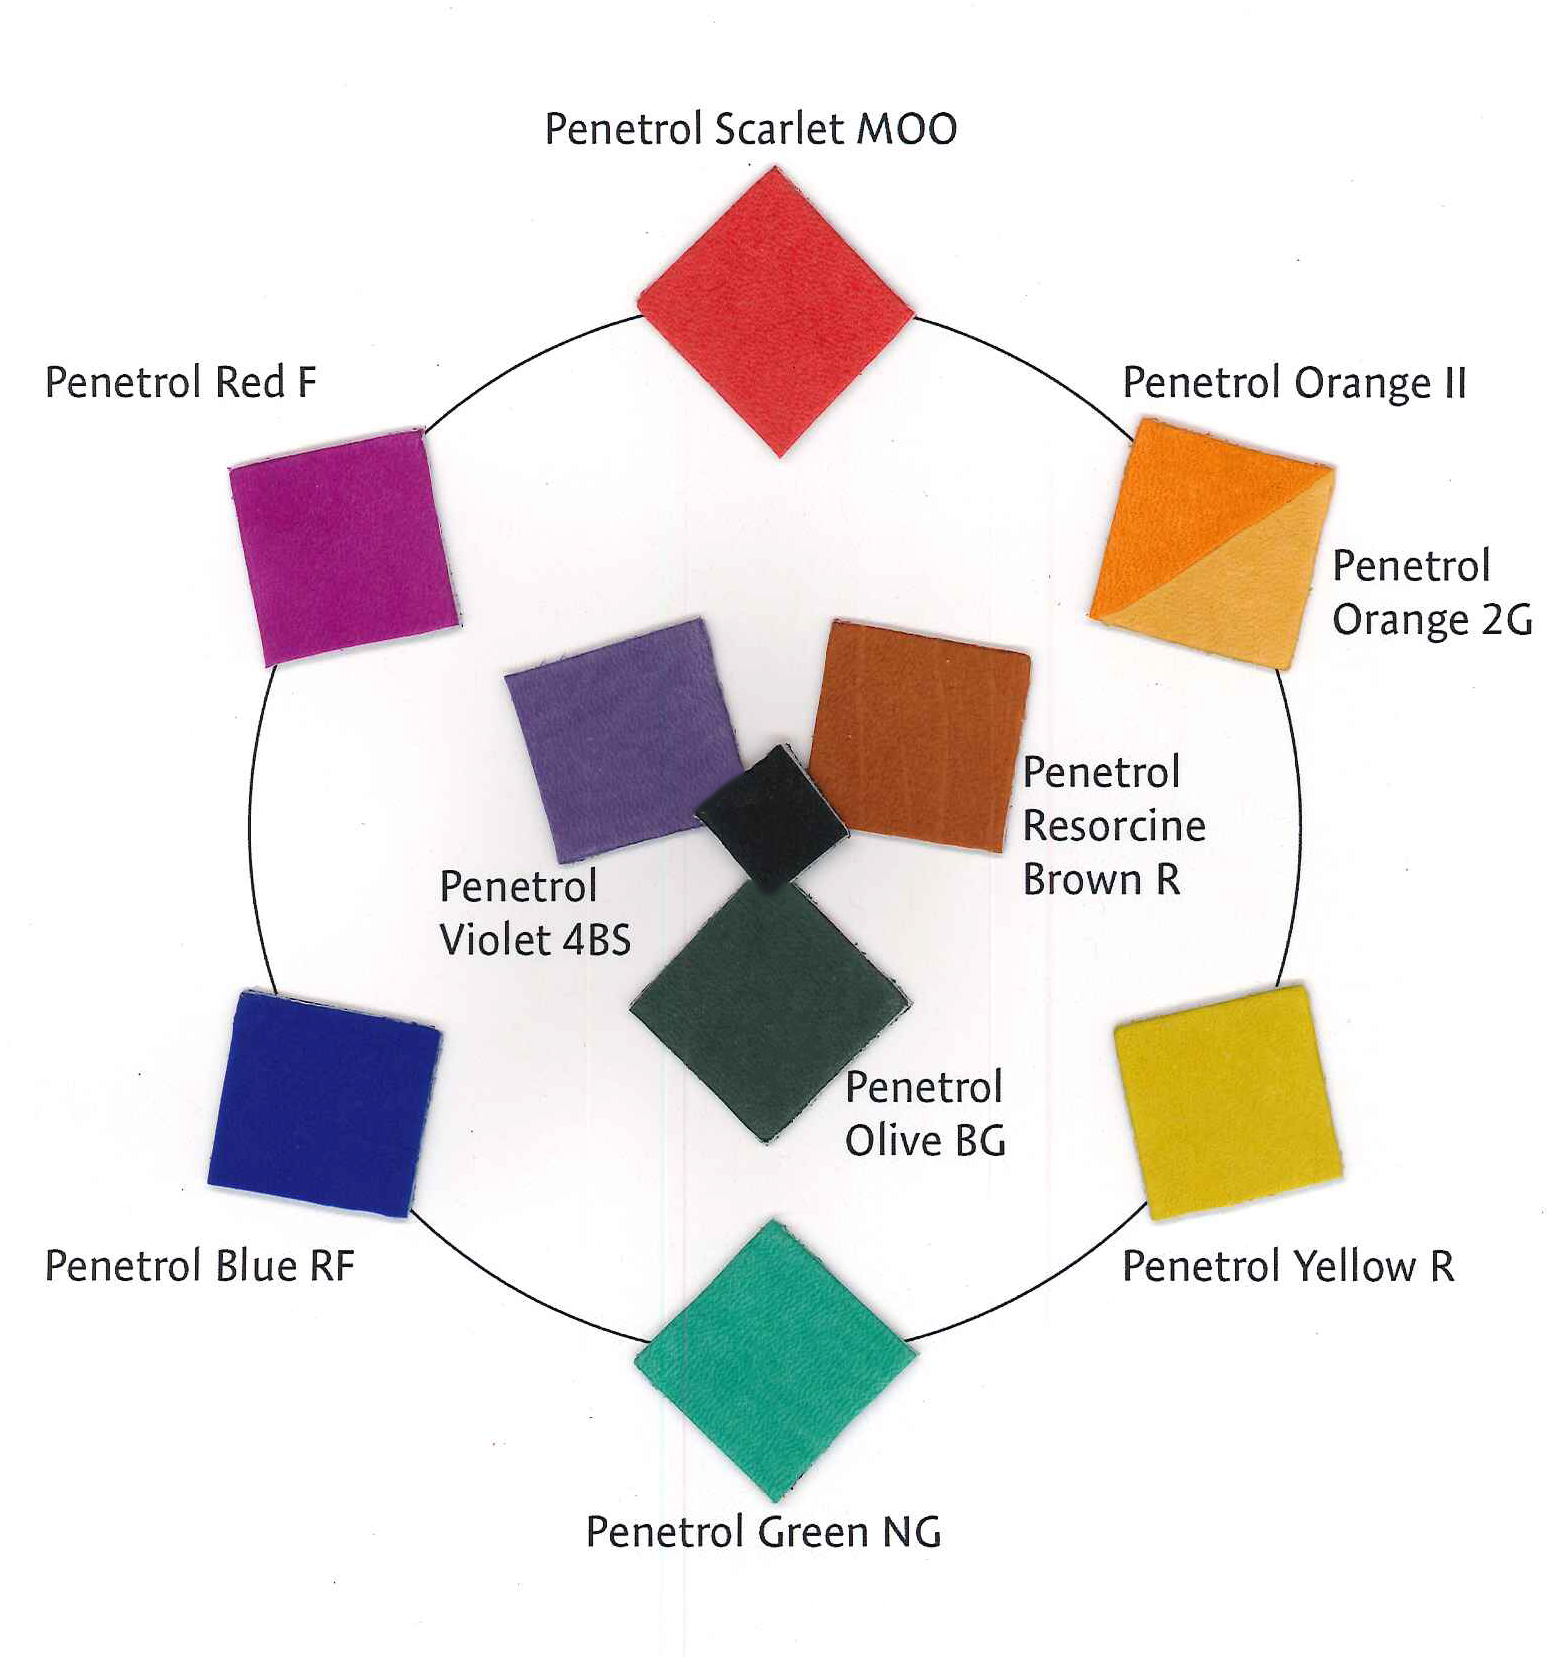
Color matching represents the most challenging aspect of LeatherWeld repairs and requires patience and experimentation. The seven compound colors allow for extensive customization, but achieving an exact match demands systematic testing rather than guesswork.
Start by examining your damaged item under multiple lighting conditions, as colors appear differently under natural daylight, incandescent lighting, and fluorescent fixtures. The final repair will be viewed under various lights, so your match should work across conditions rather than looking perfect in one setting and wrong in another. If possible, compare your compounds to the item in natural daylight near a window.
Apply small test patches of potential color combinations onto the practice vinyl sample, recording your ratios and the resulting tone. Remember that wet compound appears darker than its dry state, so allow test patches to dry completely before evaluating color accuracy. This drying period also reveals whether your combination will remain stable or shift tones as it cures.
For complex colors or multi-tone surfaces, you may need to layer different compounds or accept that perfect matching isn’t achievable. In these cases, aim for the closest reasonable approximation rather than spending excessive time pursuing an exact match that may not exist. Slight color variations often become less noticeable once the repair develops a natural patina and accumulates normal wear. Keep notes of successful color recipes for future repairs on similar items.
Apply JB LeatherWeld Compound with Precision
With your surface prepared and colors matched, you’re ready to begin the actual repair process. Work methodically and resist the temptation to rush, as proper application technique directly influences both immediate appearance and long-term durability.
Begin by cutting a piece of backing fabric slightly larger than the tear but small enough to fit through the opening. Using the spatula or a pair of tweezers (not included), carefully insert the fabric beneath the damaged area, positioning it to provide full support across the entire tear. The fabric should lie flat without bunching or folding, creating a smooth foundation for the compound.
Mix your selected color compounds in the mixing bottle according to package directions, blending thoroughly until you achieve a consistent color throughout. The compound should have a thick but spreadable consistency—too thin and it won’t hold shape, too thick and it won’t penetrate the tear properly. If your mixture seems off, consult your practice test notes and adjust ratios accordingly.
Apply the compound using the spatula’s edge, working it carefully into the tear and across the backing fabric. Build the repair in thin layers rather than applying a single thick coat, as this promotes better adhesion and reduces the risk of cracking during curing. Each layer should fully dry before applying the next, typically requiring 15-30 minutes depending on environmental conditions. Continue adding layers until the compound sits slightly proud of the surrounding surface, as some shrinkage occurs during curing.
Press Realistic Texture Using Grain-Paper
The grain-paper transforms a flat, obvious repair into a textured surface that convincingly mimics genuine leather. This step requires timing and technique, as you must apply the texture while the compound remains workable but has developed enough body to hold the impression.
Check the compound’s readiness by pressing your spatula gently onto the surface. It should feel firm but still slightly yielding, similar to modeling clay at room temperature. If the compound remains soft and tacky, wait longer; if it has hardened completely, you’ve missed the window for texturing and may need to apply a fresh thin layer.
Cut or tear a piece of grain-paper slightly larger than your repaired area. Place the textured side of the paper against the compound and apply firm, even pressure across the entire surface. You can use your spatula, a clean cloth, or even your finger wrapped in the cloth to press the paper into the compound. Hold pressure for several seconds to ensure the texture transfers completely.
Lift the paper straight up and away from the compound, being careful not to smudge or shift the texture while it sets. Examine the results—if some areas lack definition, you can reapply the paper to those spots while the compound remains workable. Multiple applications typically improve texture depth and clarity, so don’t hesitate to press the grain-paper several times for optimal results.
Monitor Complete Cure Without Rushing
The no-heat formula cures naturally through air exposure, but this process requires patience and the right conditions. Rushing to use or move your repaired item before complete curing compromises the repair’s integrity and may necessitate starting over.
Environmental factors significantly influence drying and curing times. Low humidity accelerates the process, while high humidity extends it considerably. Temperature also matters—warmer conditions speed curing while cooler environments slow it down. In ideal conditions (room temperature around 70°F with moderate humidity), the surface typically dries within a few hours, but full internal cure may require 24-48 hours.
During the initial curing period, avoid touching the repair, placing objects on it, or exposing it to direct sunlight or heat sources. The compound remains vulnerable to impressions, smudges, and damage until it fully cures. If you must move the repaired item, support it carefully from beneath, avoiding any contact with the repaired surface.
After the recommended curing period passes, inspect the repair carefully. The compound should feel firm throughout, with no soft spots or tackiness. Lightly press on the edges of the repair to confirm adhesion, and examine the color for any changes that occurred during curing. If the repair looks good and feels solid, you can return the item to normal use, though avoiding heavy stress on the area for the first week provides additional security.
Extend Repair Longevity with Proper Maintenance
Once your repair completes, proper maintenance extends both the repair’s lifespan and the overall condition of your leather or vinyl items. Regular care prevents future damage and helps repairs blend more naturally over time.
Clean repaired areas with the same gentle products used for the rest of the item, avoiding harsh chemicals or abrasive tools. Condition leather regularly with quality leather conditioner to maintain suppleness and prevent the cracking that leads to future damage. For vinyl, periodic cleaning with appropriate vinyl protectants prevents drying and deterioration.
Inspect repaired areas periodically for any signs of separation or wear. Early intervention when problems develop prevents small issues from becoming major repairs again. If you notice any lifting at the edges or surface degradation, address it promptly before it worsens.
Remember that repairs, however well executed, represent areas of previous damage that may never be as strong as original material. Avoid placing excessive stress on repaired spots, particularly on furniture where people sit or lean heavily. Distributing weight and use across the entire surface rather than concentrating it on repaired areas significantly extends repair longevity. With proper technique and maintenance, your JB LeatherWeld repair can remain virtually invisible for years to come.
Leave a Reply