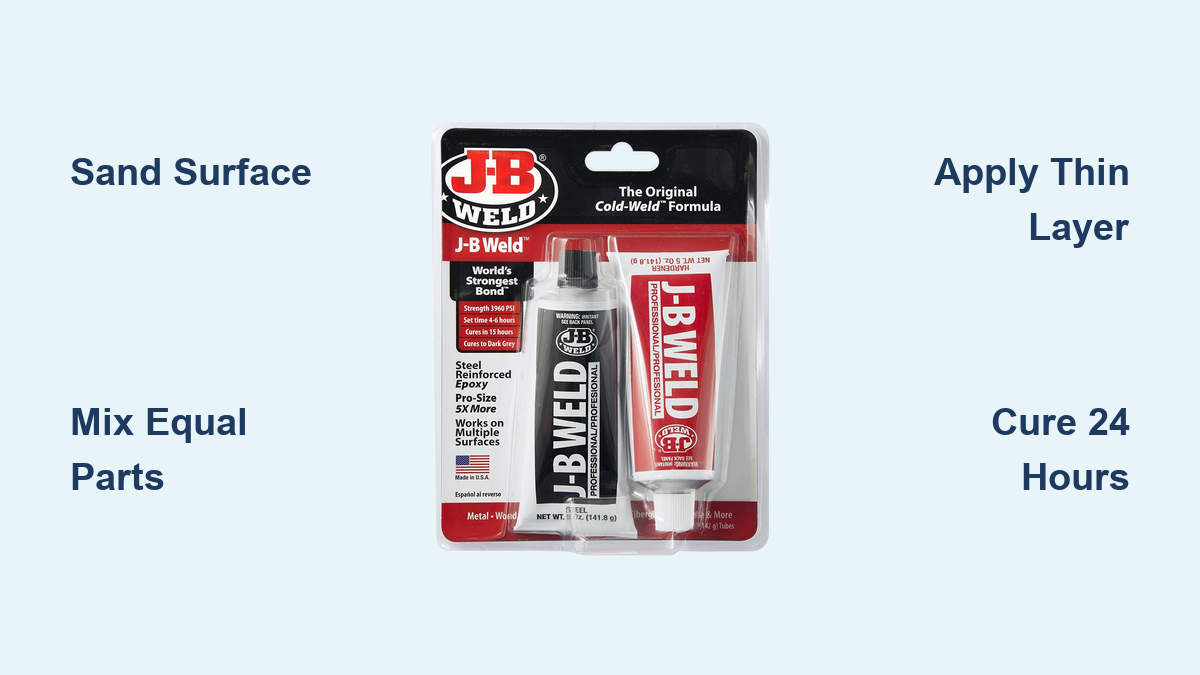
When your engine block cracks mid-road trip or your fuel tank springs a leak miles from the nearest service station, knowing how to use J-B Weld properly can save your vehicle from being towed and your wallet from costly repairs. This two-part epoxy adhesive creates bonds rated at 3960 PSI that withstand temperatures up to 600°F while resisting gasoline, oil, and battery acid—making it the go-to solution for repairs that seem impossible. Originally developed for machine shop applications over 20 years ago, J-B Weld has transformed from a professional mechanic’s secret to a household staple for DIY repairs.
Most failed J-B Weld repairs stem from skipping critical preparation steps rather than product failure. Learning how to use J-B Weld correctly means mastering surface preparation, precise mixing technique, proper application methods, and understanding curing conditions—skills that turn this humble tube of epoxy into a versatile repair system capable of saving you hundreds in replacement costs. This guide walks you through every step of the J-B Weld process with specific techniques for automotive, plastic, and general repairs that actually work.
Why Your J-B Weld Repair Failed (And How to Fix It)
Most J-B Weld failures occur before you even squeeze the tube—improper surface preparation accounts for 90% of repair failures regardless of how perfectly you mix and apply the epoxy. The chemical bonding process depends entirely on direct contact between the epoxy and mounting surface, meaning any dirt, grease, or smooth finish prevents molecular-level attachment that gives J-B Weld its remarkable strength.
The #1 Mistake in Surface Preparation That Causes Bond Failure
Skipping the sanding step is the most common error that leads to failed repairs. Many users clean the surface but skip creating proper texture, resulting in epoxy that peels off like paint rather than forming a permanent bond. Always sand repair areas with 80-120 grit sandpaper to create microscopic peaks and valleys that the epoxy flows into, essentially locking the material in place once cured. For cracks, sand along the entire length to ensure epoxy penetrates the complete damaged section.
After sanding, wipe away all dust and debris with a clean cloth—never skip this step. Residual dust creates weak points that compromise the entire repair. If you’re working on plastic, avoid alcohol-based cleaners that might melt certain plastics; instead, use the J-B Weld Clean And Prep product designed specifically for plastic surfaces.
How Temperature Affects Your J-B Weld Cure Time
Ambient temperature dramatically impacts how to use J-B Weld effectively. At 77°F (standard room temperature), J-B Weld achieves initial set in 4-6 hours, but many users attempt to use the repair too soon, especially in colder environments. Below 50°F, cure time doubles or triples, while temperatures above 90°F significantly reduce working time before the epoxy begins thickening.
For critical repairs in cold conditions, warm the repair area to at least 60°F using a heat gun or hair dryer before applying J-B Weld. Conversely, in hot environments, work in shade and mix smaller batches to maximize your 4-6 minute working window. Never apply heat above 300°F to accelerate curing—while technically possible, uneven heating creates internal stresses that weaken the final bond.
Essential Surface Prep Steps for Maximum Bond Strength
Surface preparation represents the single most critical factor determining whether your J-B Weld repair succeeds or fails. Even the highest-quality epoxy cannot create a strong bond on contaminated or improperly prepared surfaces. Invest 15-20 minutes in proper preparation to avoid redoing the repair later.
How to Clean Metal Surfaces for J-B Weld That Won’t Fail
Begin by removing all dirt, grease, and oil from the repair area using one of these methods:
- Commercial degreaser followed by thorough drying
- Soap and water for light contamination
- For stubborn grease, use acetone (not on plastic)
- J-B Weld Clean And Prep product for all surfaces
Critical warning: Never skip the drying step—moisture trapped beneath the epoxy creates weak points that compromise the entire repair. After cleaning, ensure the surface dries completely before proceeding to sanding.
Why 80-120 Grit Sandpaper Is Non-Negotiable for Repairs
Coarse sandpaper creates the mechanical anchoring points J-B Weld needs to grip effectively. Fine sandpaper (above 200 grit) won’t provide enough texture, while extremely coarse grit leaves deep scratches that may not fill completely. The ideal preparation creates a uniform “tooth” across the entire repair area.
For best results:
– Sand in multiple directions to create cross-hatch pattern
– Extend sanding 1-2 inches beyond visible damage
– Remove all loose material and rust flakes
– Wipe with compressed air or dry cloth to remove dust
How to Identify Contamination That Will Ruin Your Bond
Some contaminants aren’t visible to the naked eye but will prevent proper bonding. If your surface appears clean but J-B Weld still fails, consider these hidden problems:
- Silicone-based sealants that migrated to the repair area
- Residual mold release agents on new plastic parts
- Corrosion inhibitors on galvanized metal
- Previous failed adhesive residues
When in doubt, clean the area with acetone on a white cloth—if the cloth shows discoloration, continue cleaning until it remains clean.
Mix J-B Weld Perfectly Every Time
J-B Weld’s two-part system—one containing fine steel suspended in liquid base, the other serving as activator—requires precise mixing to achieve maximum bond strength. Deviations in ratio produce incomplete curing and significantly weaker results.
The Exact Equal Ratio Technique That Prevents Weak Cures
Squeeze equal portions of both components onto a non-porous surface such as cardboard or plastic mixing pad. Use the notches on the tube nozzle as your guide—squeeze until both components reach the same level. Never estimate by eye; inaccurate ratios cause the most common mixing failures.
Mix thoroughly for at least 30 seconds until the color becomes completely uniform gray with no visible streaks. The mixed material should have consistent texture throughout—any marbling indicates incomplete mixing that will compromise bond strength.
Why Metal Mixing Surfaces Ruin Your Epoxy Bond
Mixing J-B Weld directly on metal surfaces introduces microscopic contaminants that interfere with the chemical reaction. Always use a disposable non-porous surface like:
- Cardboard scrap
- Plastic lid from food container
- Dedicated plastic mixing card
- Aluminum foil (if no other option)
Metal particles from the surface can dramatically reduce the final bond strength, so this simple precaution ensures maximum performance from your epoxy.
How to Mix Fast Enough for J-B Kwik’s 4-Minute Window
J-B Kwik’s faster curing time requires efficient technique. Prepare your workspace completely before opening the tubes—have mixing surface, applicator, and clamps ready. Squeeze both components simultaneously using two hands to save crucial seconds.
Mix in broad, sweeping motions rather than small circles to blend components faster. Work quickly but thoroughly—rushing the mixing process creates weak spots in the cured epoxy. If you’re new to J-B Kwik, practice the mixing motion with two different colored clays first to build muscle memory.
Apply J-B Weld Like a Professional Mechanic
With mixed epoxy in hand, you have roughly 4-6 minutes before the material begins thickening significantly. This working window requires efficient technique, particularly for repairs requiring precise alignment.
The Two-Surface Application Method for Stronger Bonds
For strongest bonds, apply a thin, even layer of mixed epoxy to both surfaces being joined, then allow the material to become slightly tacky (about 60 seconds) before pressing the pieces together. This approach ensures maximum contact and penetration into surface irregularities created during preparation.
When joining pieces:
– Align them carefully along fracture lines
– Apply firm, even pressure to eliminate air pockets
– Rotate slightly to spread epoxy evenly
– Wipe excess with gloved finger before it sets
How to Repair Cracked Gas Tanks Without Draining First
For gasoline container repairs:
1. Clean area with J-B Weld Clean And Prep
2. Sand 1-2 inches around crack in multiple directions
3. Apply thin layer of J-B Weld to both sides of crack
4. Press metal patch over crack (soda can works in emergency)
5. Seal edges with additional J-B Weld
6. Allow 24 hours cure before refilling
Critical tip: Never attempt to fill large holes with epoxy alone—always use a backing patch for structural integrity.
Why You Should Never Fill Large Holes With Epoxy Alone
Attempting to fill holes larger than 1/4 inch with J-B Weld alone creates weak points that will fail under pressure. Instead:
– Bond a metal patch over the hole first
– Apply J-B Weld over the patch edges
– Use wire mesh reinforcement for critical areas
– Allow proper cure time before stressing repair
For container repairs, this layered approach provides far superior strength compared to attempting to fill large holes with epoxy alone. The material can be smoothed with a q-tip before drying or finished through sanding after full cure.
Cure Times That Actually Work (Not What’s on the Tube)
Understanding the curing process ensures your repair achieves maximum strength. J-B Weld cures through a chemical reaction occurring at room temperature, with cure speed influenced by environmental factors.
How to Accelerate Cure Time Without Sacrificing Strength
While heat up to 300°F accelerates curing, improper heating creates internal stresses that weaken the bond. For safe acceleration:
– Use hair dryer on low setting 6 inches from repair
– Rotate heat source to avoid hot spots
– Never exceed 250°F surface temperature
– Check frequently for tackiness
For critical repairs, standard room temperature curing produces the most reliable results despite taking longer. The accelerated cure should only be undertaken when absolutely necessary.
Why Full Cure Takes 24 Hours (Even When It Feels Hard)
J-B Weld reaches handling strength in 4-6 hours but requires 15-24 hours for full chemical resistance and maximum strength. During this period:
– Avoid stressing the repair
– Keep away from moisture and chemicals
– Maintain stable temperature
– Don’t attempt to test strength prematurely
Many failed repairs occur because users put the item back into service too soon—patience pays off with permanent results.
Temperature Tricks for Repairing Hot Engine Components
For repairs on components that normally operate at high temperatures:
– Allow engine to cool completely before starting
– Clean area while still warm (not hot) to help evaporation
– Apply J-B Weld at normal operating temperature for best results
– Allow full 24-hour cure before restarting engine
The original J-B Weld formulation withstands temperatures up to 600°F once fully cured, making it ideal for engine repairs that would fail with standard epoxy.
Fix Common Automotive Failures With J-B Weld
Automotive repairs represent J-B Weld’s most famous applications, with users successfully repairing cracked cylinder heads well enough to complete journeys and arrange professional repair later.
How to Repair a Cracked Engine Block in 6 Steps

- Clean crack thoroughly with degreaser and dry completely
- Sand along entire crack length with 80-120 grit paper
- Widen crack slightly with rotary tool for better epoxy penetration
- Mix J-B Weld thoroughly and apply to crack
- Use putty knife to force epoxy into widened crack
- Allow full 24-hour cure before testing
Pro tip: For critical engine repairs, apply heat during cure (150°F for 3-4 hours) to maximize strength.
Why Cylinder Head Repairs Hold Better Than Welding
Unlike welding, which creates heat stress points that can cause additional cracking, J-B Weld bonds without thermal stress. The epoxy actually etches the mounting surface to create superior molecular attachment. Many mechanics prefer J-B Weld for aluminum head repairs where welding would require specialized equipment and risk further damage.
Step-by-Step Fuel Tank Patch That Lasts Years
For punctured gas tanks:
1. Drain tank below repair area
2. Clean area with J-B Weld Clean And Prep
3. Sand 2 inches beyond damaged area
4. Cut metal patch 1 inch larger than hole
5. Apply J-B Weld to both tank and patch
6. Press patch firmly into place
7. Seal all edges with additional J-B Weld
8. Allow 24 hours cure before refilling
Users report these patches lasting for years of subsequent use, far exceeding “temporary” repair expectations.
Repair Plastic Components
Plastic repairs require modified techniques since many plastics cannot tolerate harsh solvents. The slow-drying J-B Weld formulation generally performs better for plastic repairs, providing additional working time.
Safe Cleaning Methods for Different Plastic Types
Use these cleaning methods based on plastic type:
– ABS, PVC: Alcohol-based cleaners
– Polyethylene: Mild soap and water
– Polycarbonate: Dedicated plastic cleaner
– Unknown plastics: J-B Weld Clean And Prep
Never use acetone on plastics—it can cause surface degradation that prevents proper bonding.
Why J-B Weld Works on ABS But Fails on Polypropylene
J-B Weld bonds well to most rigid plastics but struggles with polypropylene and polyethylene due to their non-porous surfaces. For these challenging plastics:
– Use plastic primer before epoxy application
– Create mechanical key with deep scratches
– Apply heat during curing (150°F for 4 hours)
– Consider mechanical fasteners for critical repairs
The “Rebar” Technique for Strong Plastic Repairs
Embed staples, wire mesh, or fiberglass screen into the epoxy before it cures to create a reinforced structure. This approach dramatically increases repair strength and prevents recurrence of failures in high-stress applications. After curing, plastic repairs can be finished using standard techniques including sanding, filing, and painting.
Store J-B Weld Properly to Avoid Wasted Tubes
Proper storage maintains J-B Weld’s effectiveness for future repairs. Many workshop drawers contain dried-out tubes of various adhesives, making proper storage particularly important.
How to Seal Tubes for Years of Future Use
After use:
1. Wipe nozzle clean with paper towel
2. Pierce inner seal with small wire
3. Replace cap tightly
4. Store upright in cool, dry place
5. Consider placing in zip-top bag for extra protection
Critical warning: Never store J-B Weld in areas with temperature extremes—garages and sheds often experience conditions that degrade the product over time.
By following these specific techniques for how to use J-B Weld properly, you’ll transform this humble epoxy into your most reliable repair solution for everything from cracked engine blocks to broken plastic housings. The key to success lies in proper preparation, precise mixing, and patience during curing—master these steps and you’ll never doubt J-B Weld’s legendary repair capabilities again.
Leave a Reply