When a gear tooth breaks on your machinery, replacement isn’t always the only solution. You can successfully weld a broken gear tooth back to functionality if you understand the metallurgical considerations and follow proper procedures. This repair approach saves significant time and money when replacement parts are unavailable, especially for older equipment or custom machinery. Many fabricators have restored gears using welding techniques, with some reporting months or even years of reliable service after the repair.
The key to success lies in understanding your specific gear material, selecting appropriate welding methods, and implementing proper heat treatment protocols. While professional gear manufacturing remains the ideal solution, welding provides a practical alternative when parts sourcing proves difficult. This guide walks you through the entire process—from initial assessment through final verification—so you can restore damaged gears with confidence.
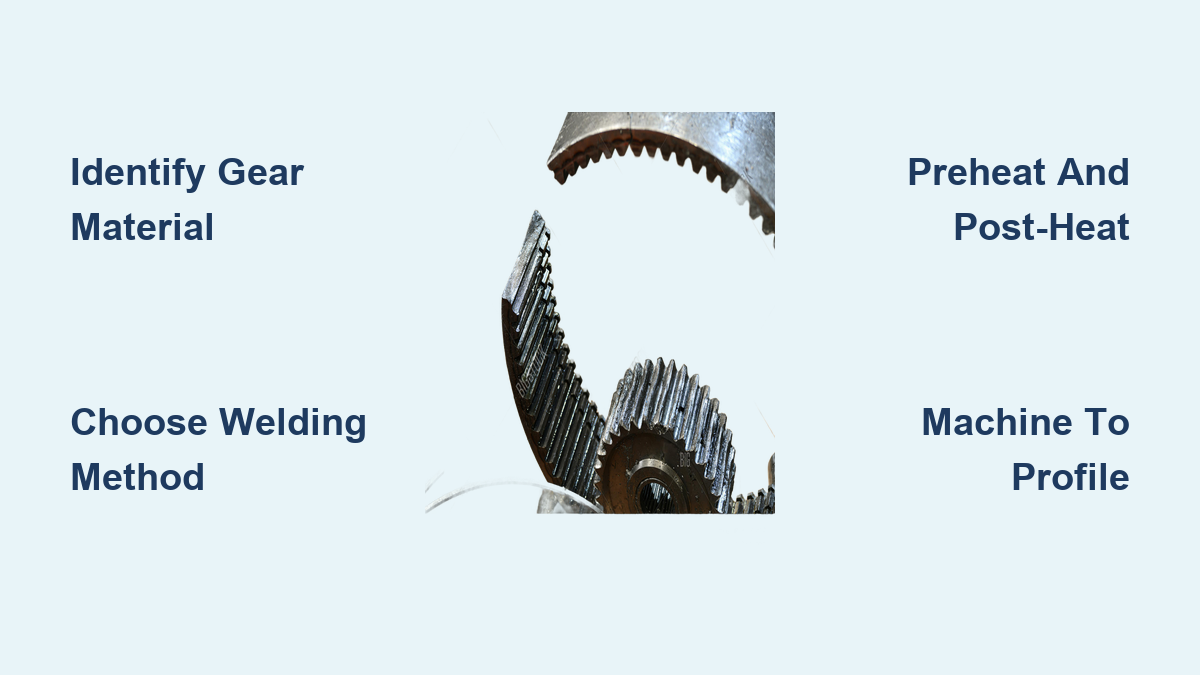
Identify Your Gear Material Before Welding
Before striking your first arc, you must determine exactly what steel your gear is made from. Different materials respond differently to welding heat, and choosing the wrong approach leads to cracking, distortion, or premature failure.
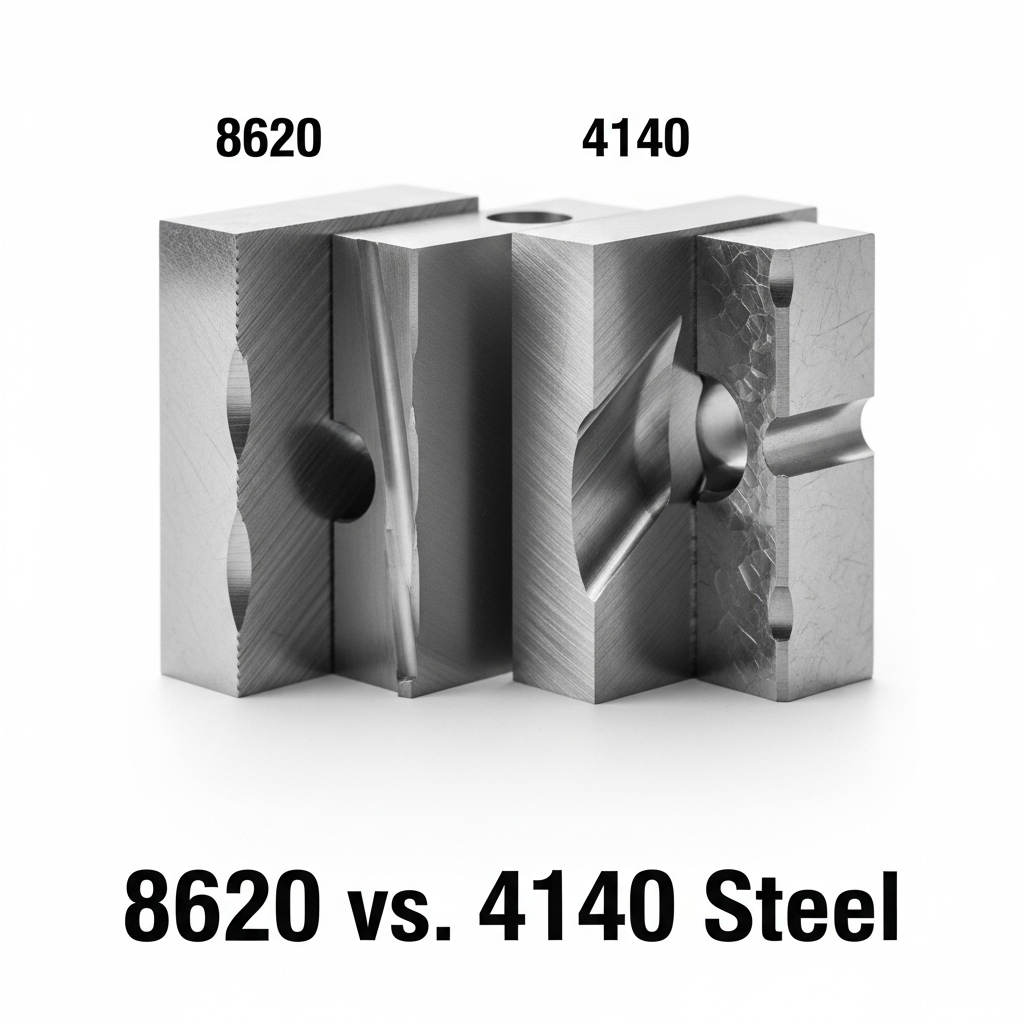
Most industrial gears use specific alloy steels designed to balance hardness, toughness, and wear resistance. 8620 steel appears frequently in automotive and industrial applications. This low-carbon alloy features a case-hardened structure where the outer surface achieves high hardness (60-65 HRC) through carburizing while the core remains softer (30-35 HRC) for impact resistance. Case depth typically ranges from 0.020 to 0.060 inches. One experienced welder noted that 8620 gears have “the outer skin very hard, and the inner part softer with some ductility to it. They are impact resistant and can flex without going to heck.”
4140 steel appears in high-stress applications, offering excellent strength when properly heat-treated. Gears made from 4140 may be through-hardened or case-hardened depending on requirements. This chromium-molybdenum alloy responds well to quenching and tempering procedures that allow you to restore hardness after welding.
Plain carbon steels also feature in less demanding gear applications. These materials weld more easily than alloy steels but may not achieve the same hardness levels without proper heat treatment.
The distinction between fully hardened and case-hardened gears significantly impacts your welding approach:
- Through-hardened gears present greater challenges as welding creates brittleness in the heat-affected zone
- Case-hardened gears require careful management as the hard outer case may crack or spall during welding
Select the Right Welding Method and Equipment
Choosing the appropriate welding process and filler material dramatically affects repair quality and longevity. Two primary methods dominate gear tooth repair applications.
TIG welding (GTAW) offers the highest precision for gear tooth repair, allowing you to deposit small, controlled amounts of filler metal exactly where needed. This minimizes heat input and reduces distortion risk. TIG works well with various filler materials including stainless steel rods and specialized alloys. The recommended approach involves welding a small layer, then allowing the gear to cool partially between passes to keep interpass temperatures down.
Stick welding (SMAW) provides a more accessible alternative for shops without TIG equipment. Several electrode types have proven successful:
- E7018 electrodes produce strong, ductile welds with good impact properties. One successful repair involved building up a gear using 7018 with no preheat or post heat, with the gear performing well for several months.
- E11018 electrodes provide higher strength for rebuilding teeth facing significant service loads. The recommended procedure involves preheating to approximately 500°F, depositing the weld metal, then post-heating to at least 700°F followed by slow cooling.
Filler material selection significantly impacts repair success:
- Type 312 stainless steel filler receives strong recommendations for welding hardened steels. One welder stated 312 stainless is “the most ideal consumable for this job by far,” while another confirmed it “sticks to the hardened steel without cracking.”
- Euroweld 507 (formerly Strata 507) offers 120,000 psi tensile strength in the as-welded condition while remaining easily machinable. One practitioner successfully rebuilt three damaged teeth on a truck gearbox using this material.
Master Critical Heat Treatment Requirements
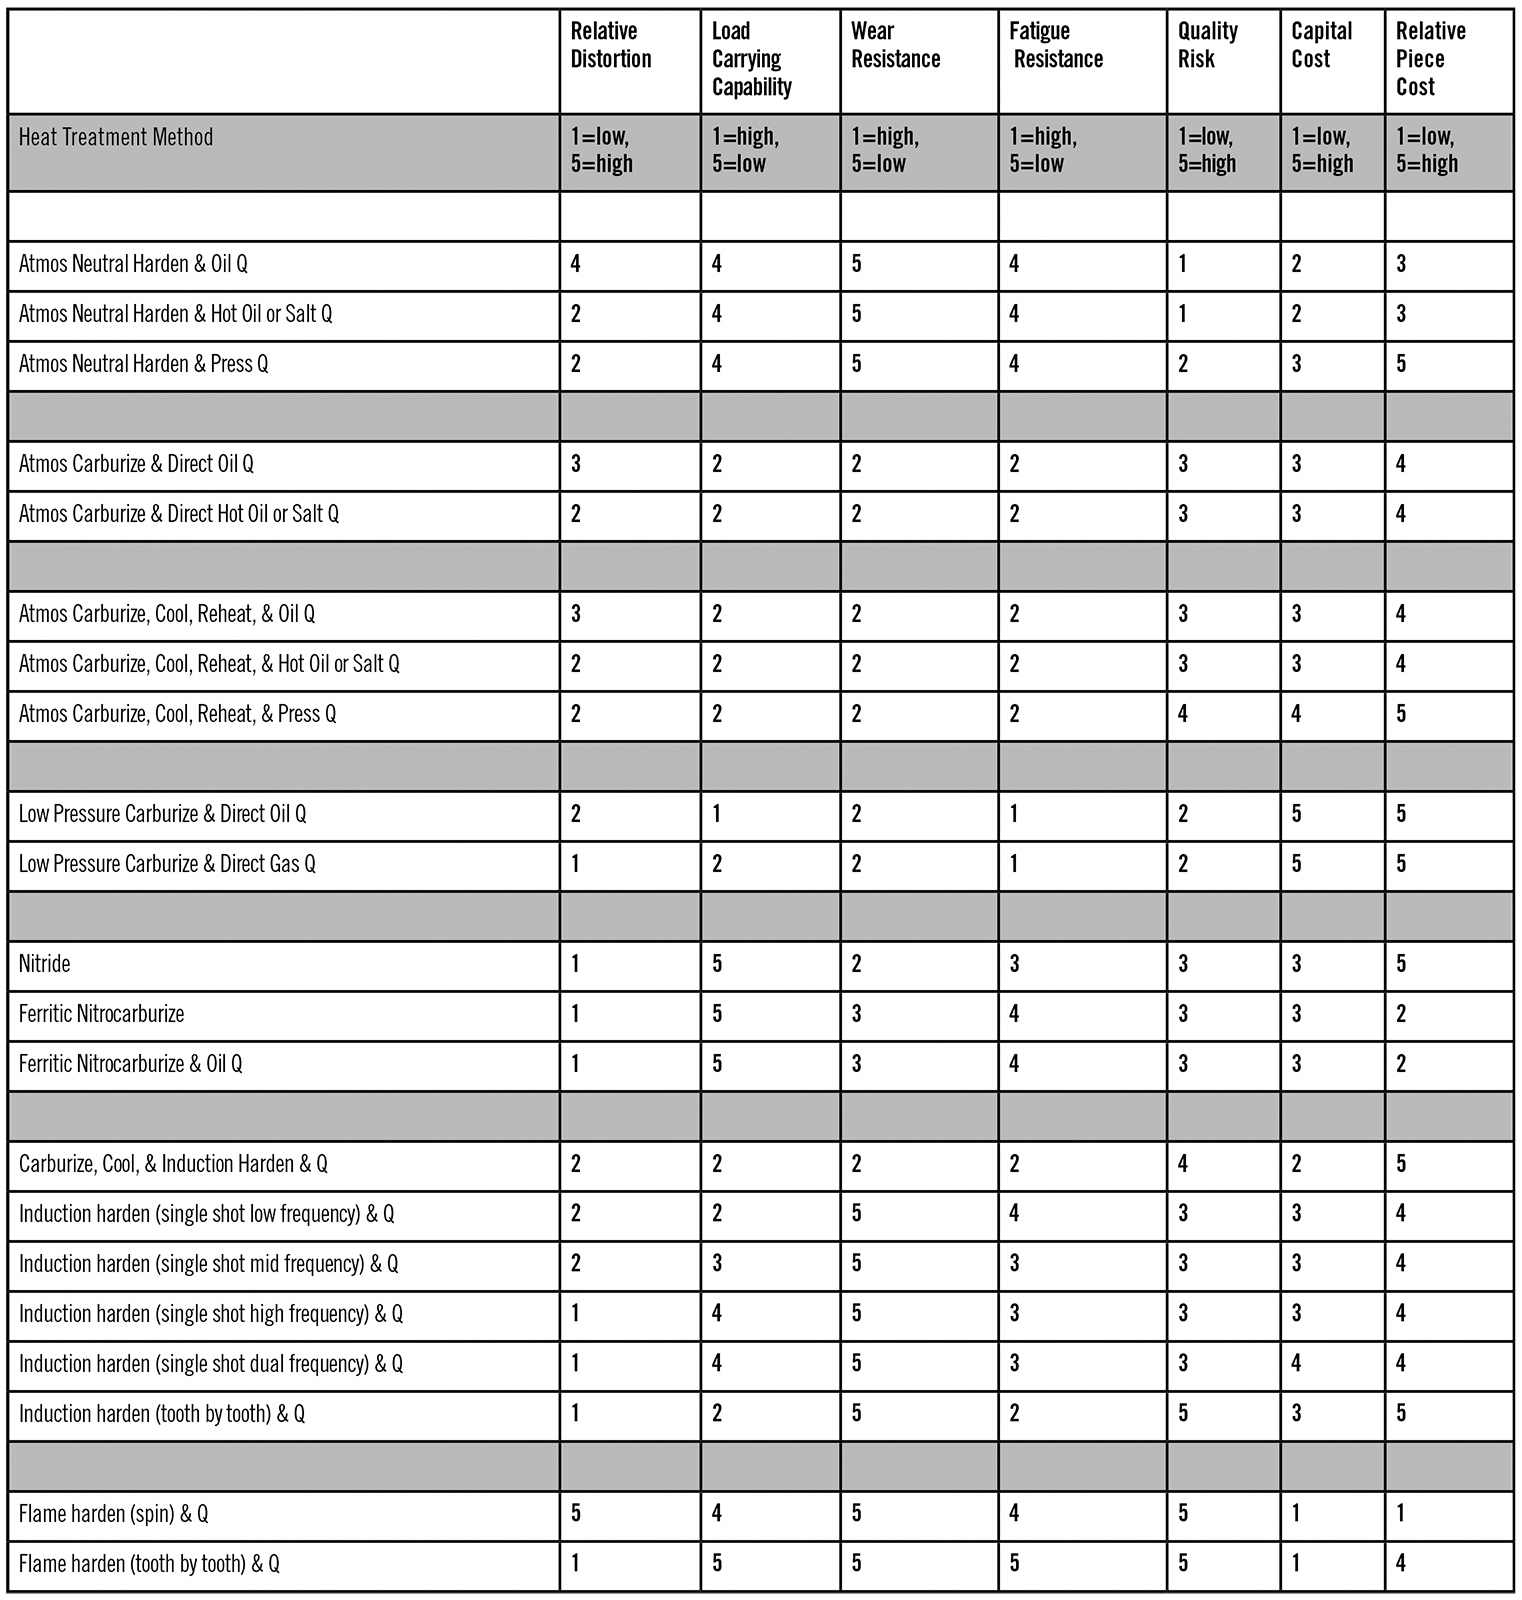
Heat treatment protocols often determine whether your gear tooth repair succeeds or fails. Proper preheating and post-weld heat treatment prevent cracking and reduce residual stresses.
Preheating serves multiple critical functions:
– Slows cooling rate of weld and heat-affected zone
– Reduces thermal shock and cracking risk
– Allows hydrogen to diffuse out of weld metal
– Minimizes distortion in the gear blank
For 8620 and similar low-carbon alloy steels, preheat temperatures of 350-400°F typically suffice. Higher carbon or alloy steels may require preheat approaching 500°F. One detailed procedure recommended preheating teeth to about 500°F, building up weld with 11018 electrode, then post-heating to at least 700°F and slow cooling with a fire-retardant blanket.
Post-weld heat treatment helps restore metallurgical properties:
– Full stress-relief involves heating to 1100-1200°F, holding for one hour per inch of thickness
– Slow cooling in furnace or with insulating blankets prevents thermal stresses
– Re-hardening may be necessary when original surface hardness must be matched
Execute the Repair with Precision Steps
Follow this systematic procedure for consistent results when you weld a broken gear tooth:
Prepare the Repair Area Properly
Begin with thorough documentation—photograph the broken tooth from multiple angles before beginning. Measure tooth thickness at the pitch line and tooth depth from undamaged teeth to guide your rebuilding process.
Clean the repair area completely using solvent or wire brushing to remove oil, grease, rust, and contaminants. Pay particular attention to the tooth root area where the broken tooth meets the gear body. These contaminants cause porosity and cracking if allowed in the weld pool.
Create an accurate template of the tooth profile:
– Cardboard method: Wrap cardboard around adjacent undamaged teeth and trace the profile
– Lead mold technique: Make a three-sided mold against a healthy gear section and pour molten lead
– Use engineer’s blue on undamaged teeth to transfer profile to paper
Build Up the Tooth Profile Correctly
Preheat the gear to the appropriate temperature based on your material analysis. Maintain this temperature throughout the process using insulating blankets or torch heating.
Build up the tooth profile using your chosen filler material:
– Start at the tooth root and work upward
– Deposit successive layers slightly oversizing final dimensions
– Control heat input with short passes and cooling between passes
– Clean between passes with wire brush to remove slag and ensure good fusion
Allow proper cooling after welding completes. For critical applications, follow a full stress-relief cycle by heating to 1100-1200°F, holding for one hour per inch of thickness, then slow cooling.
Machine the Rebuilt Tooth to Specification
After cooling, machine the weld deposit to restore the correct tooth profile:
- Initial shaping: Use angle grinders to remove excess weld metal quickly
- Accurate profiling: Milling provides precise geometry when gear can be mounted on indexer
- Fine adjustment: Die grinders with various bit shapes allow detail work in tooth profile
- Final refinement: Files and abrasive slipstones ensure smooth surface finish
Verify critical parameters before returning to service:
– Tooth thickness at pitch line matches undamaged teeth
– Tooth profile matches template or mating gear pattern
– Backlash when meshed with pinion falls within specification
– Runout of tooth profile is minimal to prevent vibration
– Consider dye penetrant inspection for hidden cracks
Explore Practical Alternative Solutions
Welding isn’t always the right answer. Before committing to a repair:
- Professional gear cutting represents the ideal solution when available, though gear shops invest millions in specialized equipment
- Exhaust replacement part options through original equipment manufacturers, aftermarket suppliers, or salvage yards
- Consider VFD alternatives for workshop machinery where mechanical speed control isn’t essential
- Work around damaged gears when damaged teeth see limited use during normal operation
Understand Realistic Risks and Durability Expectations
Welding gears involves inherent risks that must be understood:
- Heat-affected zone brittleness creates hard, brittle microstructures that may crack under load
- Distortion from welding heat affects gear geometry beyond the repair area
- Cracking may develop in weld metal, heat-affected zone, or base metal
- Reduced fatigue life occurs as welded joints become stress concentration points
Several factors influence repair success:
– Lightly loaded gears have higher success rates than heavily loaded applications
– Proper preheat, appropriate filler selection, and controlled heat input directly impact longevity
– Understanding whether your gear is through-hardened or case-hardened enables proper procedure selection
– Workshop equipment repairs often tolerate lower confidence than vehicle transmission repairs
Quick Reference Repair Summary
For minor tooth wear or small chips:
– Clean the damaged area thoroughly
– Preheat to 300-400°F based on material
– Build up with E7018 or similar mild steel electrode
– Allow slow cooling or light post-heat
– Machine to profile using files, grinders, and slips
– Verify mesh and operation
For missing teeth or major damage:
– Fabricate tooth profile template
– Preheat to 500°F minimum
– Build up in multiple passes with E11018 or specialized alloy
– Post-heat to 700°F minimum and slow cool
– Machine to final profile using milling or grinding
– Consider re-hardening if surface wear is expected
– Verify all dimensions and mesh condition
– Test under light load before full service
Remember: For critical applications where failure would cause significant damage or safety concerns, obtaining a professional replacement gear remains the safest option. However, when parts are unavailable or cost-prohibitive, welding a broken gear tooth can provide months or even years of reliable service when executed properly. The key lies in understanding your specific material, selecting appropriate procedures, and implementing proper heat treatment protocols throughout the repair process.
Leave a Reply