Welding a car chassis properly separates hobbyists from professionals in automotive restoration. Unlike simple body panel repairs, chassis welding directly affects vehicle safety and structural integrity—every weld you place becomes responsible for the car’s ability to withstand stress, vibration, and potential collision forces. When done incorrectly, weak chassis welds can lead to catastrophic failures that compromise passenger safety and render your restoration worthless. This guide reveals the exact techniques professional fabricators use to ensure every chassis weld meets structural requirements, from selecting the proper welding method to protecting your work against corrosion.
Before you strike your first arc, understand that chassis welding carries serious legal implications. An experienced welder once shared advice from an industry veteran: “There are two things you should never weld—car frames and gas tanks.” The warning stems from liability concerns—you become personally responsible for every weld’s performance for the vehicle’s entire lifespan. If a poorly executed chassis weld fails and causes an accident, you could face significant legal consequences. This isn’t meant to discourage you, but to emphasize that chassis welding demands respect, proper preparation, and honest assessment of your skills.
Select the Optimal Welding Method for Your Chassis Project

Choosing the right welding process determines whether your chassis repairs will stand the test of time or fail under stress. The metal thickness, frame material, and intended vehicle use all influence which method will deliver structurally sound results.
Why MIG Welding Dominates Automotive Chassis Repairs
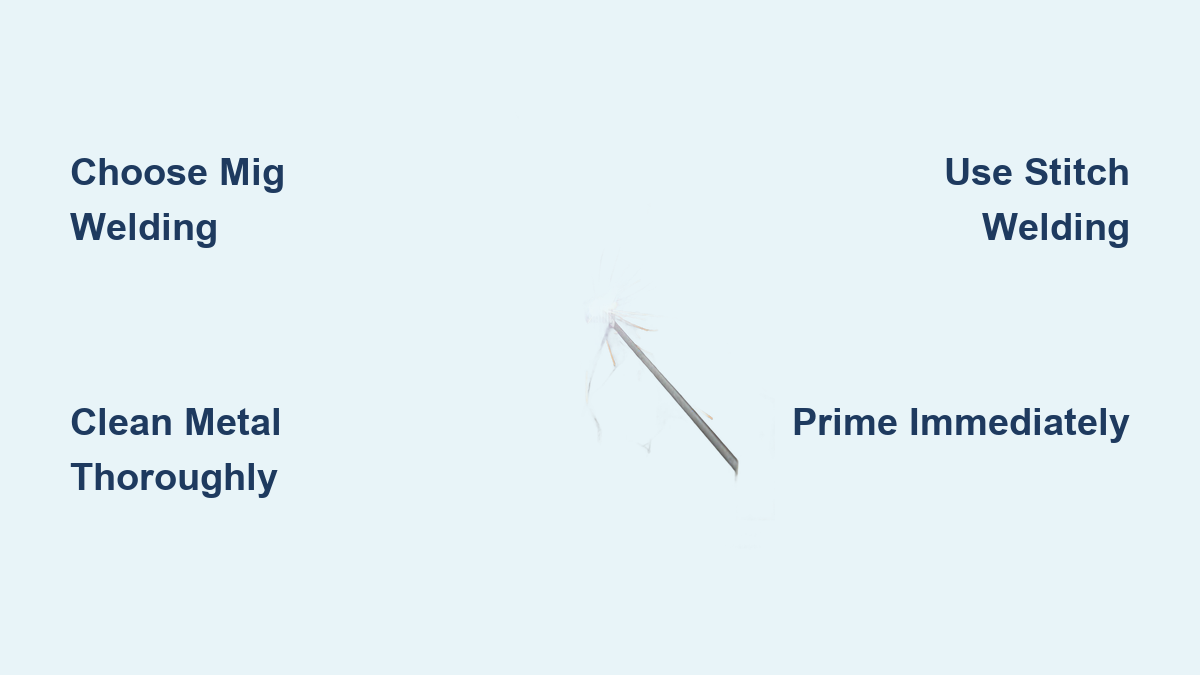
MIG welding delivers the best balance of speed, strength, and accessibility for most chassis projects. As a one-handed process, it leaves your other hand free to maneuver materials in tight spaces—critical when working inside frame rails or around suspension points. Modern MIG machines like the Hobart Handler 140 (around $500 without gas) provide sufficient power for 110v operations on typical automotive steel while offering dual-voltage capability for more demanding jobs.
MIG’s controllability on thin sheet metal (1/16 to 1/8 inch) makes it ideal for automotive applications where precision matters. The ability to adjust wire speed and voltage allows you to achieve full penetration without burning through material—a crucial factor for chassis integrity. When working with Japanese steel, some professionals recommend specialized wires like JW Harris “Twenty Gauge” that reportedly produce cleaner welds than standard ER70S-6 wire on certain Asian vehicles.
When TIG Welding Becomes Necessary for Critical Areas
TIG welding shines for precision work on chrome-moly tubing or heat-sensitive high-alloy steels found in performance vehicles. Its concentrated heat input creates less thermal distortion than MIG, preserving the structural integrity of thin chassis metals. While TIG has a steeper learning curve, modern affordable units like the PrimeWeld TIG200-D ($450) offer dual-voltage capability that makes this precision technique accessible to serious hobbyists.
TIG’s primary advantage for chassis work lies in its ability to produce high-quality welds on intricate frame geometries common in racing applications. The foot pedal heat control allows precise management of the weld pool, preventing burn-through on thin sections while ensuring full penetration. Though slower than MIG, TIG’s superior control justifies the extra time investment for critical suspension mounting points or roll cage installations.
Why Stick Welding Often Fails for Automotive Chassis
Using a 110v stick welder for chassis work risks cold laps and inadequate penetration on thin automotive steel. While stick welding doesn’t require shielding gas and has an easier learning curve, its limitations become apparent when working with the 1/16 to 1/8 inch metals typical in car frames. Experienced fabricators consistently advise against using stick welding for chassis repairs due to its high susceptibility to burn-through and poor penetration on thin materials.
If stick welding is your only option, rod selection becomes critical. The American Welding Society doesn’t consider 6013 rods suitable for dynamically loaded structures because they lack Charpy-V-Notch ratings. For any chassis work, use 7018 rods or a combination of 6011 for root passes followed by 7018 for cover passes. This provides both the penetration needed for sound root fusion and the strength required for structural integrity.
Prepare Your Chassis for Successful Welding
Rushing preparation guarantees weak welds and potential failure under stress. Proper preparation takes significant time but prevents costly mistakes that compromise structural integrity.
Remove All Contaminants Before Welding
Weld only to clean, shiny metal—any rust, paint, or contamination creates weak points that fail under stress. Start by using a stiff twisted wire brush on an angle grinder to remove approximately 90% of paint and seam sealer. Then burn off remaining residues with a propane or MAP gas torch, as hidden seam sealer and body wax will drip from between body seams during welding, causing porosity and weak joints.
Be aware that tar and sealer inside chassis members will catch fire during preparation, filling your workspace with toxic smoke. Proper ventilation and fire suppression capability are essential safety measures. After burning, quickly run the grinder over the area again to remove soot, then clean with isopropyl alcohol to ensure a contamination-free surface. Inspect all weld joints under good lighting before proceeding—any remaining contamination compromises weld quality.
Create Accurate Templates Using Cardboard
Cardboard pizza boxes make ideal template material because they resist bending into compound curves like actual sheet steel. Before cutting replacement sections, position existing damaged areas properly and use clamps to hold components in their correct positions. A carpenter’s square helps position new components at proper angles—for example, positioning a new sill at a right angle to the top of the chassis.
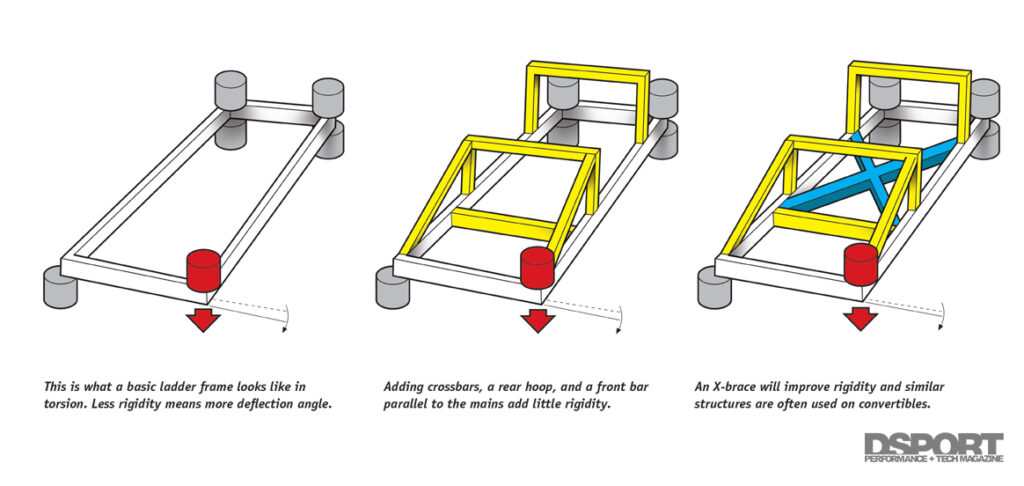
Chassis jig usage becomes essential when positioning suspension mountings. One fabricator learned this lesson the hard way when welding suspension mountings on a Renault 4 without a jig—while everything initially appeared aligned, the car later sagged to one side. The solution required using a jig to re-drill holes and achieve proper alignment, proving that shortcuts during positioning create problems far more difficult to correct later.
Execute Proper Welding Techniques for Structural Integrity
With preparation complete, applying the correct welding techniques separates strong chassis repairs from dangerous weak spots.
Apply Strategic Tack Welding Before Final Passes
Place tacks at 2-inch intervals to maintain alignment while allowing access for final welding passes. Progress systematically across the joint when tack welding, checking alignment after each series of tacks. Once the repair section is fully tacked, remove it from fixturing to allow welding from angles that would be impossible with clamps in place.
The tack weld size should match the material thickness—too small and the tack burns through; too large and it creates stress concentrations that can crack. Practice on scrap material of the same thickness to develop a feel for appropriate tack size before working on actual chassis components. This simple step prevents misalignment that could compromise the entire repair.
Implement Stitch Welding to Prevent Distortion
Never lay continuous beads longer than 1 inch when welding chassis components—use stitch welding instead. Lay quarter-inch stitches every 2 inches, or 2 inches of weld on 6-inch centers depending on the application. After each short weld section, skip at least 6 inches before starting the next weld. This spacing allows heat to dissipate, reducing cumulative distortion that occurs when continuous beads cause repeated heating and cooling cycles.
Continuous beads induce warp from overheating followed by cooling contraction, creating a crooked chassis that can never be fixed once the metal cools in its distorted position. For critical structural areas, use a three-pass technique: 6011 or 6013 for the root pass to ensure full penetration, followed by 7018 cover passes for maximum strength and toughness.
Protect Against Corrosion Immediately After Welding
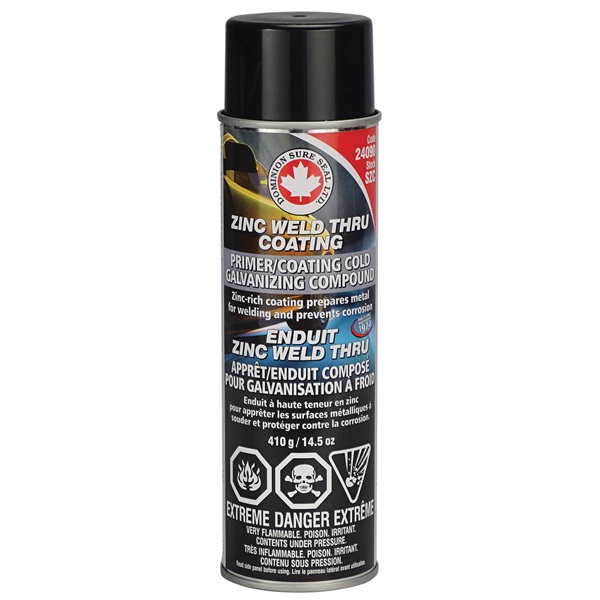
Every weld begins rusting within an hour if not protected—clean and prime as soon as the weld cools. Wire brush the weld area after it cools to remove oxidation, then apply self-etching primer before the cleaned area can re-oxidize. Working efficiently through this sequence prevents surface contamination from compromising primer adhesion.
Apply epoxy or etch prime to all freshly welded areas plus any bare metal exposed during preparation. The harsh reality of chassis work is that any unprotected steel rusts quickly, undermining structural integrity over time. Consider applying cavity wax to the inside of chassis sections where access for painting is limited—these products provide long-term corrosion protection in otherwise impossible-to-coat areas.
Understand the Legal Implications Before You Start
Welding car frames carries significant legal liability that every DIY fabricator must acknowledge. You become personally responsible for the structural integrity of every weld placed—if a weld fails and causes an accident, you may bear legal and financial responsibility. Professional chassis shops carry extensive insurance and operate under strict quality controls that individual hobbyists typically cannot match.
If you’re uncomfortable with the responsibility, consider whether the car will become “display only” rather than driven on public roads. Practice on similar material before attempting actual chassis work—cross-section beads to examine penetration and bend test samples to evaluate strength. If you cannot achieve satisfactory results on test pieces, professional help might be the responsible choice for critical structural work.
Welding a car chassis demands respect for the complexity of the work and the consequences of failure. By selecting the proper welding method, preparing thoroughly, applying correct techniques, and protecting against corrosion, you can create chassis repairs that provide years of safe, reliable service. Remember that when it comes to chassis welding, quality always trumps speed—take the time to do it right the first time, because your safety and others’ depend on it.
Leave a Reply