Welding a fuel tank represents one of the most dangerous repair operations you’ll ever attempt. The physics of fuel vapor combustion transforms what seems like a simple patch job into a potential explosive hazard—even tanks that appear completely empty contain dangerous vapor concentrations. According to HSE guidelines, it takes just one tablespoon of combustible fuel in a 45-gallon drum to create an explosive atmosphere. Tragically, people have died attempting this repair, and even experienced professionals have suffered severe injuries when seemingly adequate preparation failed. Before you consider how to weld a fuel tank, you must understand that a single mistake can be fatal—not just to you, but to everyone who depends on you.
This comprehensive guide covers every critical aspect of safely welding fuel tanks, from understanding the fundamental dangers to executing proper preparation techniques and selecting the right welding approach. Whether you’re working on a steel diesel tank, an aluminum motorcycle fuel cell, or a small ATV tank, the principles remain consistent: either remove all fuel or displace all oxygen before applying heat. We’ll examine multiple preparation methods, compare welding techniques, explore safer alternatives, and provide the technical specifications needed to complete this dangerous task as safely as possible.
Why Fuel Tank Welding Causes Explosions (Not Just Fires)
The primary danger when attempting to weld a fuel tank stems from fuel vapors rather than liquid fuel itself. While liquid fuel burns, fuel vapors explode with tremendous force when mixed with air in the right proportions and ignited by welding heat. A tank that appears empty still contains vapor-filled residues coating interior surfaces, trapped in seams and crevices, or absorbed into rust and scale. When welding heat is applied, these residues vaporize and mix with available air, creating an explosive mixture that requires only a spark or heat source to detonate.
Many people mistakenly believe diesel or oil are safer to work with than gasoline—a deadly misconception. Regardless of what hydrocarbon product the tank has contained—diesel, motor oil, hydraulic fluid, or gasoline—the heat from welding will vaporize any remaining residue. This vapor mixes with air to form an explosive atmosphere that welding sparks or heat can easily ignite. Even apparently clean tanks harbor dangers, as fuel vapors become trapped in seemingly insignificant locations: seams, rivet holes, pipe fittings, and the countless “nooks and crannies” that exist inside any fuel tank structure.
Documented cases of fuel tank explosions reveal a chilling pattern: experienced professionals and careful operators have been killed despite taking what seemed like adequate precautions. One professional welder died at a reputable operation where safety protocols were supposedly followed. Another individual lost a thumbnail ripped off through heavy welding gloves when a small soap tank—smaller than a human hand and apparently clean—exploded during welding. These incidents share a common lesson: no tank should ever be treated as safe without verified preparation, and even then, inherent risks remain.
Positioning and Safety Equipment for Fuel Tank Welding
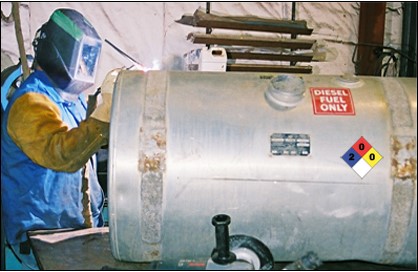
Your personal positioning represents your first line of defense against explosion injuries when you weld a fuel tank. Always position the tank away from your body, and never stand directly in front of any tank opening. If an explosion occurs, the force follows the path of least resistance, which typically means projecting away from the operator. By keeping your body to the side of the tank rather than in front of openings like fuel caps or drain plugs, you dramatically reduce your exposure to blast and flame.
Fire suppression equipment must be immediately accessible throughout the entire welding process. A BC or ABC fire extinguisher should be positioned within arm’s reach of your work area, and you should know how to operate it before you begin welding. Additionally, having a helper present who can respond to emergencies provides an essential safety layer, though this helper must also position themselves safely away from the tank and out of the potential blast zone.
Standard welding personal protective equipment applies here, but with added emphasis on coverage. Your welding helmet with appropriate shade lens protects your face and eyes from both arc glare and potential blast debris. Flame-resistant welding gloves protect your hands, while flame-resistant clothing covers your arms and legs. Steel-toed boots protect your feet from dropped tools or hardware. Some professionals recommend additional protection like flak jackets and enhanced eye protection, though these measures may exceed what most hobbyist applications require.
Emptying and Cleaning Fuel Tanks Before Welding
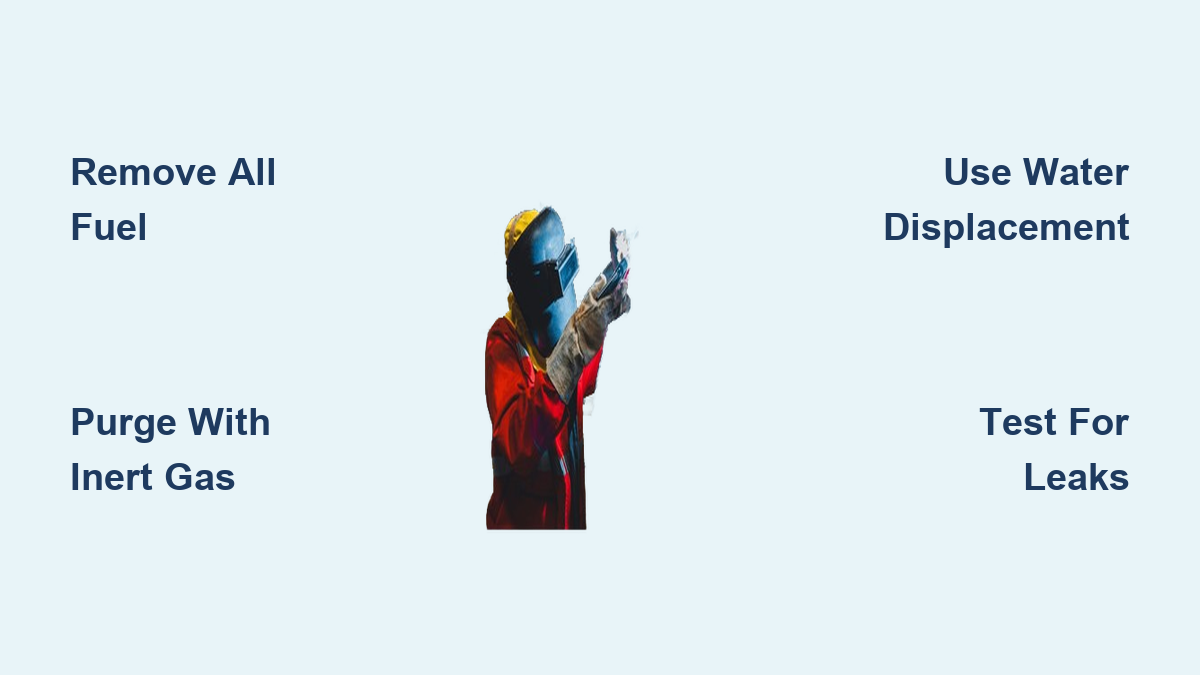
Proper preparation determines whether your fuel tank welding project succeeds or ends in disaster. The fundamental principle is straightforward but critical: you must eliminate the explosive atmosphere inside the tank before applying heat. This means removing either 100% of the fuel or 100% of the oxygen from inside the tank. Neither goal is easy to achieve completely, which is why multiple preparation methods exist and why professionals debate their relative effectiveness.
Begin by completely draining all accessible fuel through the tank’s drain petcock or by removing the tank from the vehicle entirely. For tanks that cannot be easily removed, siphon all fuel possible and position the tank to drain any remaining liquid. Once drained, the interior cleaning process begins. Hot soapy water works effectively to rinse fuel residues from interior surfaces—agitate the water by rocking or rotating the tank to loosen stubborn deposits. Multiple rinse cycles may be necessary, with each cycle using fresh clean water.
After rinsing, completely drain all water from the tank. The next step depends on which preparation method you choose: water displacement, inert gas purging, dry ice sublimation, or exhaust gas displacement. Each method has advocates and critics, and each carries specific risks and requirements that we’ll examine in detail. Regardless of which method you select, the goal remains consistent: ensure that no explosive atmosphere exists when you strike your first arc.
Water Displacement Method: When It Works and When It’s Dangerous
Filling a fuel tank with water to displace vapors represents the most commonly discussed preparation method, though experienced welders debate its safety vigorously. The basic procedure involves draining all liquid fuel, then filling the tank with water to a level above the leak point. For tanks with holes that need welding, positioning the hole upward prevents water from draining out during the repair. Some practitioners recommend using 6010 welding rods to seal the leak while water is still bleeding out, then topping up the water level to ensure complete coverage before completing the repair with 7018 low-hydrogen rods.
The water displacement method carries a serious and documented danger: water turns to steam when heated, and steam takes up significantly more volume than liquid water. This rapid expansion can cause an explosive rupture even when the tank appears open. One documented incident involved an instructor who blew up a jerry can after leaving it open for a week, steam cleaning it twice, and filling it completely with water. Despite the tank being open, steam generation exceeded the escape rate, causing catastrophic failure.
Proponents of the water method argue that attempting to weld water-filled tanks usually ends in failure rather than explosion because water simply won’t steam effectively under concentrated welding heat—the key factor being that the tank must remain completely open and not pressurized. They contend that trying to weld a closed tank or pipe containing water, oil, or paint will invariably cause problems as expanding steam pressurizes the vessel, but an open tank allows steam to escape. If you choose this method, ensure the tank remains fully open throughout the welding process and never weld on any sealed section.
Inert Gas Purging: The Professional’s Safest Approach

Professional fuel tank welding operations universally recommend inert gas purging as the safest method for removing explosive atmospheres from fuel tanks. The fundamental principle is unambiguous: you must purge either 100% of the fuel or 100% of the oxidizer—completely, with no residue, vapor, or remaining oxygen. Argon is the preferred inert gas for this purpose, though CO2 also serves effectively as a purge gas.
The procedure involves flowing pure argon into the tank through the gas cap opening or another inlet while ensuring the tank can vent displaced air. For effective purging, professional guidelines suggest exchanging the tank volume with inert gas at least six times. This requires calculating the tank volume and determining how long to flow gas based on the flow rate (CFM) of your supply, then doubling or tripling the calculated time to compensate for blending of the purge gas with residual air.
Both argon and CO2 are heavier than air, so tank openings need positioning at or near the top to allow lighter air to escape as the heavier purge gas displaces it. Calculate your purging time by dividing tank volume (in cubic feet) by gas flow rate (in CFM) to get the time for one volume exchange, then multiply by six for complete exchange, and multiply by 2-3 again to account for gas blending with residual air. For example, a 2 cubic foot tank with 10 CFM gas flow requires approximately 2.4 to 3.6 minutes of continuous purging for adequate preparation.
Nitrogen generates disagreement among experts—some sources list it as an acceptable purge gas while others explicitly state that nitrogen is not inert and will compromise weld quality. The safest recommendation is to use true inert gases like argon or CO2 rather than nitrogen.
Dry Ice Sublimation Technique for Home Fuel Tank Repairs
Dry ice sublimation offers an alternative purging method that has gained popularity among hobbyists who lack specialized gas equipment. The process involves washing the tank with warm soapy water and rinsing thoroughly with clear water, then inserting dry ice pellets through the filler neck. As the dry ice sublimates, it converts directly from solid to gas, displacing oxygen with CO2. Since CO2 is heavier than oxygen, it settles in the tank and eliminates fire risk by creating an inert atmosphere.
This method appeals because it doesn’t require specialized gas equipment beyond obtaining dry ice, which is available from ice cream shops and some grocery stores. However, some experts caution that dry ice can cause thermal stress that may warp or crack the tank, especially on older or weakened metal. The process should be conducted carefully, and consultation with professionals is recommended for those unfamiliar with the technique.
Using diesel engine exhaust to purge fuel tanks represents a traditional method employed for decades, particularly in motorcycle and automotive applications. The procedure involves running a pipe from a vehicle exhaust into the tank opening and allowing exhaust gases to flow through for 10-15 minutes. However, this method carries significant risks that experienced welders emphasize. Carbon monoxide can itself serve as fuel under certain circumstances, and documented stories exist of explosions even when exhaust was used as purge. If you use this method, keep exhaust flow moderate and consider it a supplement to rather than replacement for other preparation techniques.
Choosing the Right Welding Process for Your Fuel Tank
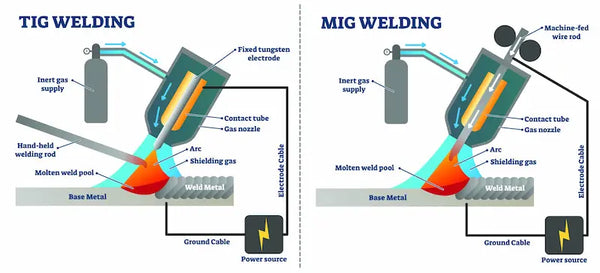
Selecting appropriate welding equipment depends primarily on the tank material and your available resources. Steel fuel tanks respond well to both MIG (Metal Inert Gas) and TIG (Tungsten Inert Gas) welding, while aluminum tanks typically require TIG welding due to the metal’s properties and the precision needed for thin aluminum construction.
For steel tanks, MIG welding offers speed and relative simplicity. One effective approach involves filling the tank with MIG shielding gas (typically 75% argon, 25% CO2) since both gases are heavier than air and create an inert atmosphere. The same gas used for welding serves the dual purpose of purging the tank and protecting the weld. Calculations based on tank volume and gas flow rate determine purging time, with extra time factored in for gas blending with residual air.
Many practitioners recommend starting fuel tank repairs with 6010 welding rods to establish a strong initial bond, particularly when dealing with leaking tanks where water or residual vapors may be present. The 6010 rod’s aggressive penetration helps establish fusion even under challenging conditions. For completion, 7018 low-hydrogen rods provide a high-quality, ductile weld that resists cracking. This combination of aggressive penetration from 6010 and the strength of 7018 creates a reliable repair for steel fuel tanks.
Aluminum Fuel Tank Repair: Special Considerations
Aluminum fuel tanks require TIG welding for most repair applications. The same fundamental rules apply—complete removal of fuel and oxidizer is essential before beginning. For aluminum, the procedure involves removing all fuel, rinsing thoroughly with Dawn dish soap and hot water, agitating to clean interior surfaces, then drying thoroughly before purging with inert gas. Aluminum’s higher thermal conductivity requires higher heat input and faster travel speeds, while the oxide layer that forms on aluminum must be cleaned immediately before welding to ensure proper fusion.
Before attempting to weld an aluminum fuel tank, assess the condition of the metal. Aluminum tanks are often constructed from thinner material than steel tanks, increasing burn-through risk. If the tank shows widespread corrosion or multiple problem areas, replacement may be safer than repair. For small pinholes in sound aluminum, TIG welding with proper preparation provides the most reliable permanent repair option.
Step-by-Step Steel Fuel Tank Welding Procedure
Executing the actual weld requires attention to technique, heat management, and continuous safety awareness throughout the process. Before striking your arc, verify that your preparation remains effective—purging gas should continue flowing throughout the welding process to maintain the inert atmosphere. For tanks prepared with water, ensure the water level remains above the weld area and that the tank remains fully open to prevent steam pressure buildup.
For steel tanks with the water displacement method, position the hole upward so water remains in place. Begin welding with 6010 rod to establish initial fusion while water bleeds out from the weld pool—this outward flow helps prevent any vapor from reaching the heat zone. As you progress, periodically check water levels and top up as needed. Complete the primary repair with 7018 rod for a stronger, more ductile final weld.
For inert gas purged tanks, maintain continuous gas flow throughout the entire welding process. The weld zone remains protected by the heavy inert gas blanket, but any interruption in gas flow allows air to re-enter and potentially create an explosive atmosphere. Complete your welding in a single session when possible, and continue gas flow for several minutes after welding completes to ensure the weld pool solidifies under protection.
Critical warning: Watch for warning signs during welding—unusual sounds, hissing, or unusual behavior in the weld pool may indicate steam generation or vapor ignition. If any concerning symptoms develop, stop immediately and reassess your preparation. The weld doesn’t need to be perfect on the first attempt—you can always clean up and reweld, but there’s no second chance after an explosion.
When NOT to Weld a Fuel Tank: Critical Warning Signs
The professional consensus is unambiguous: fuel tank welding carries inherent risks that should not be undertaken lightly. If you’re not confident in your preparation and technique, consider purchasing a new tank, taking the tank to an experienced professional, or using non-welding repair methods. No repair is worth sacrificing your life or health.
Certain conditions indicate that welding a fuel tank is particularly dangerous or ill-advised:
- Multiple leaks or widespread rust: If the tank has multiple problem areas, you’ll likely chase cracks from one spot to another, with each repair potentially creating new failure points
- Thin, deteriorated metal: Tanks with significant corrosion have weakened structural integrity that welding heat may further compromise
- Integrated components: Tanks with sediment bowls, baffles, or other internal structures create hidden spaces where fuel vapor can accumulate
- Lack of proper equipment: Without adequate purging equipment, safety gear, or welding experience, the risk becomes unacceptable
- Time pressure: Rushing the preparation process increases the likelihood of missing critical steps
When tank deterioration has progressed to the point where multiple repairs are needed, replacement becomes the safer and more economical choice. Keep your tank as full as possible during periods of inactivity to minimize condensation and reduce vapor space where explosive atmospheres can develop.
Non-Welding Alternatives: Epoxy and Patch Kits That Actually Work
If the risks of fuel tank welding seem unacceptable, multiple alternative repair methods exist that eliminate explosion danger entirely. These approaches won’t create the permanent mechanical bond that welding provides, but they can extend tank service life significantly without applying heat to potentially explosive atmospheres.
Fuel tank epoxy sealants offer the primary non-welding alternative. Products like J-B Weld and specialized fuel tank sealants have demonstrated long-term reliability when properly applied. One user reported success with Eastwood gas tank sealer on a tractor tank with small pinholes, with the repair remaining leak-free after a year. Another reported that a 50-gallon diesel tank bottom repair using a commercial kit was still holding after 15 years. The primary advantage of epoxy repairs is complete elimination of explosion risk—no heat reaches the tank interior.
Commercial tank repair kits are available at auto parts stores and contain patch material plus fuel-resistant epoxy suitable for fuel exposure. These kits typically include fiberglass or metal patches with fuel-safe epoxy, providing a middle ground between temporary epoxy-only repairs and permanent welding. For external pinholes, patch material plus epoxy provides straightforward application. For internal rust-through or larger holes, interior coating systems may be more appropriate.
For emergency temporary repairs that get a vehicle operational immediately, sheet metal screws with washers and fuel-resistant sealer can provide immediate sealing of pinholes. For larger holes, a small patch can be secured with multiple sheet metal screws using sealer between the patch and tank. These temporary repairs should be considered stopgap measures only, with proper welding or tank replacement planned as soon as possible.
Testing Your Repaired Fuel Tank for Safety and Integrity
After completing any fuel tank repair, thorough testing verifies that the fix is sound before the tank returns to service. For welded repairs, visually inspect the entire weld seam for cracks, porosity, or incomplete fusion. Run your finger over the weld (wearing a glove) to detect any surface irregularities that might indicate internal problems.
Pressure testing provides the most reliable verification of welded repair integrity. Seal all tank openings except one, then introduce low-pressure air—typically 3-5 PSI—while applying soapy water to all weld seams and the repair area. Bubbles indicate escaping air and reveal areas requiring additional attention. Never pressure test with compressed air at high pressure, as this creates dangerous stored energy if the repair fails.
For epoxy and sealant repairs, allow full curing time according to product specifications before introducing fuel. Many epoxies require 24 hours or more to achieve full cure. After curing, pressure test as described above. Fill the tank with a small amount of fuel and monitor for leaks before returning it to full service. If the tank develops any leak symptoms, address the issue immediately rather than risking fuel spills on hot surfaces like exhaust systems.
When you weld a fuel tank successfully, proper maintenance extends its service life. Regular inspection of tank exteriors catches rust and corrosion before they penetrate through the tank wall. Pay particular attention to areas around fuel line connections, tank mounts, and the bottom of the tank where moisture and road debris collect. Addressing surface rust promptly with wire brushing and protective coating prevents the progression to through-wall corrosion that requires major repair.
Leave a Reply