Welding a hole closed is a common repair task that requires proper technique, equipment, and safety precautions. Without the right approach, you risk creating weak welds, damaging the base material, or even causing safety hazards. Many DIY enthusiasts and professionals alike face challenges when attempting to seal holes in metal surfaces, whether they’re repairing automotive panels, fixing machinery, or restoring metal structures. This guide provides the essential information you need to understand the welding process for hole closure while emphasizing critical safety considerations that must never be overlooked.
Before attempting any welding project, it’s crucial to recognize that welding involves significant risks including electric shock, intense ultraviolet radiation, fire hazards, and exposure to harmful fumes. Proper personal protective equipment (PPE) isn’t optional—it’s mandatory for anyone working with welding equipment. The specific techniques for welding holes closed vary significantly depending on the metal type, hole size, thickness, and your available equipment, making proper preparation absolutely essential for successful results.
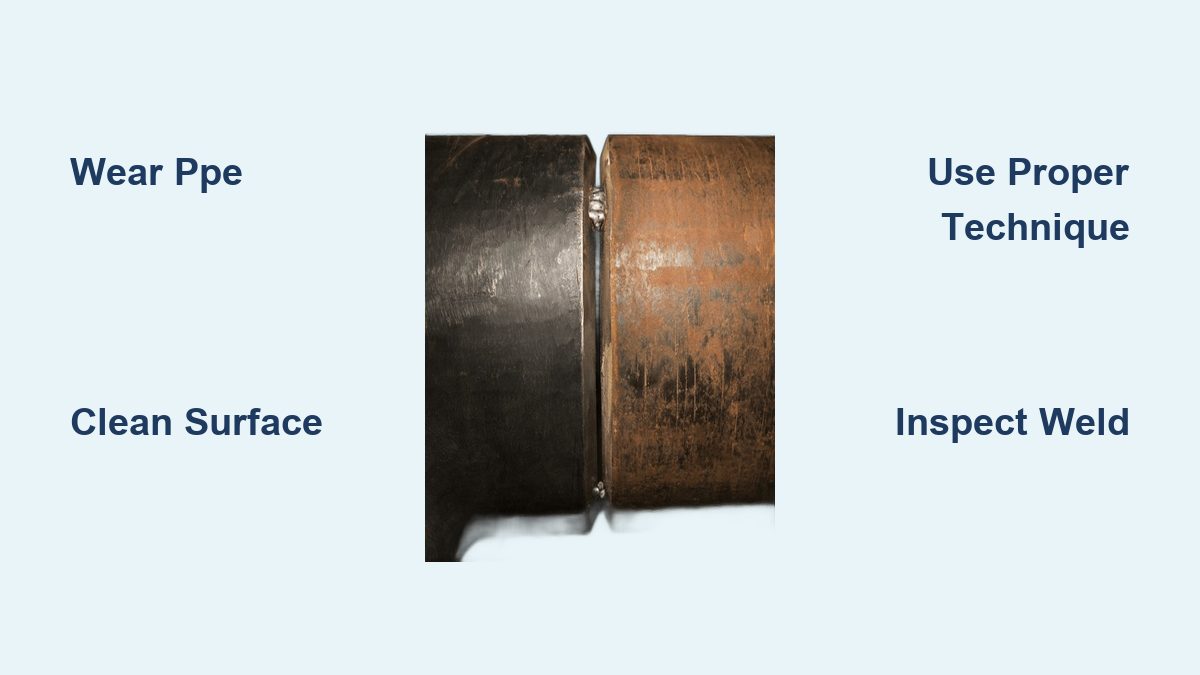
Critical Safety Preparations Before Welding

Essential Protective Gear You Must Wear
Welding without proper protection puts you at serious risk of injury. You must wear:
– Auto-darkening welding helmet with appropriate shade setting for your welding process
– Fire-resistant clothing (leather or heavy cotton—never synthetics that can melt)
– Welding gloves rated for your specific welding process and amperage
– Safety glasses worn underneath your helmet for eye protection when not actively welding
– Steel-toed boots to protect against falling objects and electrical hazards
Critical Warning: Never attempt welding in confined spaces without proper ventilation. Welding fumes contain hazardous metal oxides that can cause serious respiratory issues or metal fume fever. Always work in a well-ventilated area or use appropriate extraction systems.
Workspace Preparation Checklist
Before striking your first arc, ensure your workspace is properly prepared:
1. Remove all flammable materials within a 35-foot radius of your work area
2. Place fire-resistant welding curtains or screens around your workspace
3. Keep a properly charged fire extinguisher rated for electrical fires within immediate reach
4. Verify your welding machine is properly grounded and electrical connections are secure
5. Clean the metal surface thoroughly to remove paint, rust, oil, or other contaminants
Pro Tip: Lay down fire-resistant welding blankets under and around your work area to catch sparks that could otherwise ignite materials below your workspace.
Selecting the Right Welding Process for Hole Repair
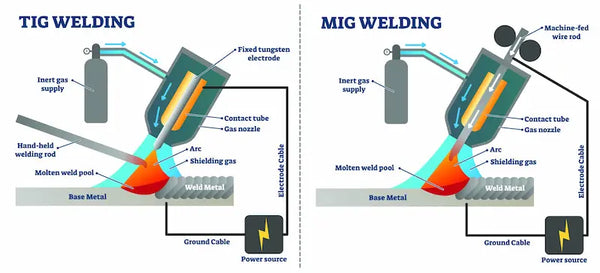
MIG Welding for Common Steel Repairs
MIG (Metal Inert Gas) welding is often the most accessible method for beginners attempting to weld holes closed in mild steel. This process works well for holes up to 1/4 inch in diameter in materials 18 gauge to 1/4 inch thick. The continuous wire feed allows for relatively smooth, consistent welds that can effectively bridge small gaps.
Key technique for MIG hole repair: Use a slight weaving motion rather than a straight bead when welding across the hole. Start on solid metal, move across the hole with a slight pause in the center, then continue onto the solid metal on the opposite side. This helps deposit enough material to fill the void without burning through.
TIG Welding for Precision Hole Closures
TIG (Tungsten Inert Gas) welding offers superior control for welding holes closed, especially in thinner materials or non-ferrous metals like aluminum. The separate filler rod allows you to add precisely the right amount of material needed to fill the hole without excessive buildup.
Expert Note: When TIG welding holes closed, preheat the surrounding area slightly to help the weld pool flow evenly across the gap. Use small dots of filler metal around the perimeter of the hole before attempting to fill the center.
Step-by-Step Hole Welding Procedure
Preparing the Hole for Successful Welding
- Clean thoroughly: Remove all contaminants with a wire brush, solvent, or grinder
- Bevel the edges (for holes larger than 1/8 inch): Create a 30-45 degree bevel around the hole to provide better weld penetration
- Clamp securely: Use welding magnets or clamps to prevent movement during welding
- Tack weld strategically: Place small tacks around the perimeter to maintain alignment
Common Mistake: Trying to weld a hole closed without proper edge preparation leads to poor penetration and weak welds that may fail prematurely.
Welding Small Holes (Under 1/8 inch)
For tiny pinholes or small imperfections:
– Use a lower amperage setting than normal
– Employ a tight, consistent travel speed
– Use a whip or circular motion to control heat input
– Deposit just enough filler to bridge the gap without excessive buildup
– Allow cooling between passes to prevent burn-through
Welding Medium Holes (1/8 to 1/4 inch)
For medium-sized holes:
1. Start welding from one side of the hole toward the center
2. Pause briefly over the hole to deposit additional filler
3. Continue to the opposite side, ensuring complete fusion
4. Make multiple overlapping passes if needed
5. Peen each pass lightly (except the final pass) to relieve stress
Time Estimate: Allow 2-3 minutes of cooling time between passes for medium holes in 1/8 inch steel to prevent warping.
Welding Large Holes (Over 1/4 inch)
For larger holes requiring significant repair:
– Cut a patch plate slightly larger than the hole
– Bevel both the hole edges and patch plate edges
– Tack the patch in place at multiple points
– Weld around the perimeter using multiple passes
– Alternate welding directions to minimize distortion
Critical Step: Always back purge stainless steel or aluminum repairs to prevent oxidation on the underside of the weld.
Post-Welding Treatment and Inspection
Proper Cooling and Stress Relief
Never quench hot welds with water—this creates brittleness and potential cracking. Allow welds to cool naturally in still air. For critical repairs or thicker materials, consider controlled cooling by covering with insulating blankets to slow the cooling rate and reduce residual stresses.
Inspecting Your Weld Quality
After welding and cooling, inspect your repair for:
– Complete fusion with no gaps or cracks
– Consistent bead appearance without porosity
– Adequate penetration through the material
– Smooth transition between weld and base metal
– No undercutting along the weld edges
Pro Tip: For critical applications, perform a simple dye penetrant test by applying penetrant fluid, waiting the recommended time, then using developer to reveal any surface cracks you might have missed.
When NOT to Attempt Hole Welding Yourself
Situations Requiring Professional Assistance
Certain welding repairs should always be handled by certified professionals:
– Structural components on vehicles or buildings
– Pressure vessels or containers that hold liquids/gases
– Aluminum or stainless steel repairs on critical systems
– Any hole larger than 1/2 inch in thin materials
– Repairs requiring specific welding certifications
Safety Reminder: If you’re uncertain about your ability to perform a safe, effective weld, stop and consult a professional welder. A poorly executed weld could fail catastrophically, causing injury or significant property damage.
Essential Maintenance to Prevent Future Holes
Protective Coatings After Welding
Once your repair is complete and inspected:
1. Remove all slag and spatter from the weld area
2. Apply appropriate corrosion-resistant primer
3. Finish with a durable top coat matching the surrounding area
4. Consider adding extra protective coating inside cavities
Regular Inspection Schedule
Implement a routine inspection protocol:
– Check repaired areas monthly for the first 3 months
– Inspect annually thereafter for signs of corrosion
– Pay special attention to areas exposed to moisture or chemicals
– Address minor surface rust immediately before it penetrates
Prevention Strategy: Apply seam sealers to vulnerable joints and edges to prevent future corrosion that could lead to new holes forming.
Welding holes closed successfully requires proper preparation, technique selection, and safety awareness. While small repairs can often be handled by skilled DIYers, larger or more critical repairs should always be entrusted to certified professionals. Remember that safety must be your top priority throughout the entire welding process—never compromise on protective equipment or proper workspace preparation. By following these guidelines and knowing your limitations, you can successfully address many common hole repair scenarios while minimizing risks and ensuring durable results. For complex repairs or when working with specialized materials, always consult with a professional welding service to ensure your repair meets necessary safety and quality standards.
Leave a Reply