Nothing ruins your mowing day faster than discovering cracks in your lawn mower deck that threaten to send it crashing to the ground. Instead of shelling out $300-$500 for a replacement deck, you can perform a durable repair with basic welding equipment and the right technique. Most steel mower decks range from 18-gauge to 14-gauge thickness (0.035-0.075 inches), presenting unique challenges where too much heat burns through the metal while too little creates weak bonds. This comprehensive guide shows you exactly how to weld a lawn mower deck properly, from selecting the right rods to applying protective coatings that prevent future corrosion. Whether you’re repairing a John Deere, Cub Cadet, or other brand, these proven techniques will restore structural integrity and extend your deck’s service life for years.
Identify Critical Damage Areas on Your Mower Deck
Before striking your first arc, conduct a thorough inspection to understand the scope of your repair. Focus on high-stress zones where cracks commonly develop: mounting brackets, tension spring eyelets, and support arms that absorb constant vibration during operation. Walk around the deck with a flashlight, checking both top and underside surfaces for hairline fractures that might not be immediately visible. Pay special attention to areas where the deck connects to hanger brackets—these mounting points experience tremendous stress that often leads to failure.
Measure the thickness of your deck metal using calipers if possible, as this directly impacts your welding approach. Most residential mower decks use 18-gauge steel (approximately 0.048 inches thick), while commercial models may use slightly thicker 14-gauge material. If you notice rusted-through sections rather than simple cracks, you’ll need to cut out the damaged area and weld in a replacement patch. Take multiple photos documenting each damage point to reference during your repair process, and note whether you’re dealing with structural cracks, broken mounting points, or tension spring failures—each requires a slightly different welding approach.
Rent or Purchase the Right Welding Equipment
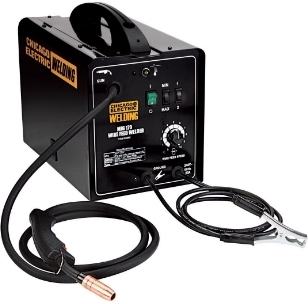
Your equipment selection makes or breaks a successful mower deck repair. For most DIYers, renting a stick welder (SMAW) from a local hardware store provides the best balance of affordability and control for thin metal work. When renting, specify you need a machine capable of running at 60-110 amps—the sweet spot for thin deck repairs. Alternatively, consider purchasing an entry-level MIG welder like the Harbor Freight 160 if you anticipate future welding projects; this $200 investment typically pays for itself after two deck repairs.
Your essential welding kit includes:
– Electrodes: Bring home both 5/64-inch and 1/8-inch diameter rods
– Cleaning tools: Wire wheel attachment for your drill and angle grinder with flap disc
– Clamping system: Spring clamps and C-clamps for securing patches
– Safety gear: Auto-darkening welding helmet, heavy-duty gloves, and flame-resistant jacket
Pro Tip: Before leaving the rental counter, ask for a scrap piece of similar thickness metal to test your settings. Most rental centers have cutoffs you can take for free—this practice material prevents costly mistakes on your actual deck.
Select Optimal Welding Rods for Thin Deck Metal

Choosing the right electrode prevents the two most common deck welding failures: burn-through and weak bonds. For most residential mower decks, 5/64-inch 6013 rods deliver the perfect balance of penetration and control. The cellulose-potassium coating on 6013 rods creates a soft, forgiving arc that bonds well with thin steel without excessive heat buildup. These rods work exceptionally well on 18-gauge deck material (0.048 inches) common in John Deere, Troy-Bilt, and other major brands.
While 1/8-inch rods can work for thicker deck sections or structural reinforcements, they require significantly more skill on thin metal. If you must use larger rods, reduce amperage and move quickly across the joint. Experienced welders might opt for 7014 or 7018 rods at 75 amps for critical structural repairs, but beginners should stick with 6013 for their first deck project. Remember: smaller diameter rods (5/64-inch) give you more control on thin materials, while larger rods (1/8-inch) generate more heat that risks burning through.
Configure Precise Amperage Settings for Deck Repairs
Amperage settings separate successful deck welds from disastrous failures. For 5/64-inch 6013 rods on typical 18-gauge deck metal, set your welder between 60-75 amps—the lower end of this range for smaller cracks, higher for structural repairs. If using 3/32-inch rods (common for 1/8-inch repair plates), increase to 75-110 amps depending on joint configuration. Never skip the test weld step: use your scrap metal to create practice beads until you achieve these critical characteristics:
- Smooth, consistent arc without excessive spatter
- Even ripples in the weld bead
- Complete fusion with base metal
- No burn-through on the underside
If your test weld shows deep undercutting or holes forming, reduce amperage by 5-10 amps. If the rod sticks frequently or the weld appears “ropey” with poor penetration, increase slightly. The ideal setting creates a weld pool that flows smoothly without overwhelming the thin deck material.
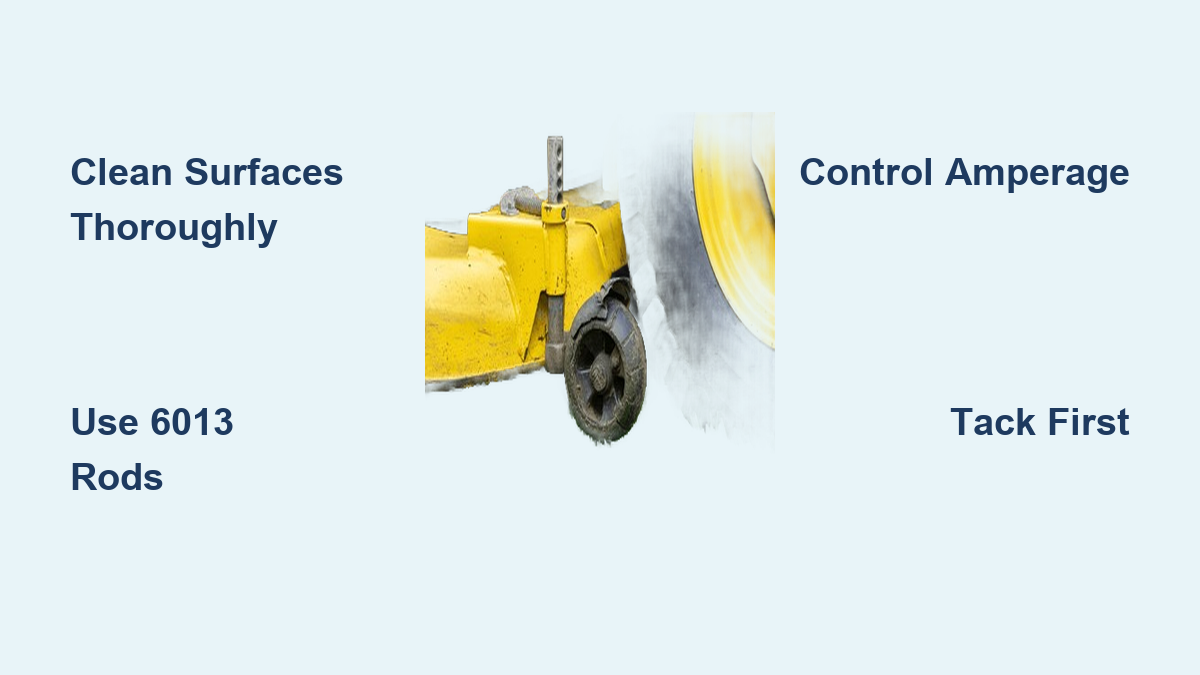
Prepare Metal Surfaces for Maximum Weld Strength
Surface contamination causes 80% of failed deck welds—don’t skip this critical step. Start by wire-wheeling the entire repair area until you reach bright, shiny metal on both sides of the crack. For deep cracks, use a grinding wheel to create a slight V-groove (about 45 degrees) that gives the weld material space to penetrate fully. Remove all rust, paint, and oil residue with acetone or dedicated metal prep solution—any contamination between the rod and base metal creates weak spots that fail under stress.
Critical Warning: If welding near rubber components or plastic parts, protect them with a wet rag or remove them entirely. Sparks travel further than you expect, and damaged components create additional problems. For curved deck sections, you’ll need to hammer-form your patch material to match the contour—attempting to weld a flat patch onto curved metal creates gaps that weaken your repair.
Secure Patches with Proper Clamping Techniques
When repairing rusted-through sections, your patch material must extend at least one inch beyond the damaged area in all directions. Cut patches from 1/8-inch steel plate—this thicker gauge provides reinforcement that compensates for material loss. Dry-fit the patch first, checking for gaps larger than 1/16 inch. High spots should be ground down; low spots require additional metal or reshaping.
Clamp the patch securely using spring clamps along edges and C-clamps for larger sections. Position clamps strategically so they won’t interfere with your welding path—you don’t want to stop mid-weld to reposition a clamp. A properly secured patch should remain tight against the deck surface even when you drag the electrode across it. Pro Tip: Apply anti-spatter gel to clamps to prevent them from welding to your deck—this saves frustrating cleanup time later.
Execute Perfect Tack Welds Before Full Repair
Tack welds hold your patch in position during the final welding process. Start by placing 1/4-inch tacks at all four corners, then add additional tacks every 3-4 inches along each edge. Use quick, controlled bursts of the electrode—touch, establish arc, create small weld pool, then pull away. On thin metal, linger no longer than 1-2 seconds per tack to prevent burn-through.
Inspect each tack carefully before proceeding. Good tacks show complete fusion with both patch and deck, with no cracking or holes. Any questionable tacks should be ground out and redone immediately—don’t risk having them fail during your full weld. If a tack burns through, reduce amperage by 5-10 amps before trying again.
Complete the Final Weld with Controlled Technique
With your patch securely tacked, begin the final weld at one corner and work continuously around the perimeter. Maintain a consistent travel speed—moving too fast creates weak welds, too slow risks burn-through. Hold the electrode at a 15-20 degree angle in the direction of travel, with a 1/8-inch arc length. For decks with significant damage, consider welding the underside first (if accessible), then flipping and welding the top to distribute heat evenly.
After completing the perimeter, inspect for pinholes or inclusions. Small defects can be touched up, but large voids require grinding out and rewelding. A successful structural repair shows complete fusion throughout with no gaps, maintaining the deck’s original rigidity.
Apply Protective Coatings to Extend Repair Life
Welding completes the structural repair, but proper finishing prevents premature corrosion. Start by grinding welds smooth with a flap disc until they’re flush with surrounding metal—excessive weld bumps collect moisture that accelerates rust. Apply rubberized undercoating generously to all welded areas on the underside, ensuring complete coverage of the weld bead and nearby bare metal.
For visible surfaces, sand with progressively finer grits (80 to 220) before applying metal primer and matching paint. This finish layer prevents surface rust and makes your repair virtually invisible. Reinstall any components you removed, and your mower deck should provide years of additional service.
Avoid These 4 Costly Deck Welding Mistakes
1. Using excessive heat: Starting with too high amperage burns through thin metal, creating brittle zones around the weld. Always begin at lower settings—you can increase but can’t undo damage.
2. Skipping surface prep: Welding through paint or rust creates porous, weak bonds that fail prematurely. Take time to clean to bare metal on both sides of the joint.
3. Neglecting practice: Without testing settings on scrap metal first, you risk ruining your only patch material. Practice tack and continuous welds until comfortable.
4. Skipping reinforcement: For high-stress areas, adding 1/8-inch steel backing plate dramatically extends repair life—especially important for decks used on rough terrain.
With proper preparation, correct settings, and careful technique, welding a lawn mower deck becomes a manageable DIY project that saves hundreds while extending your equipment’s life. The key is respecting the thin material with controlled heat input and thorough surface preparation—do this right, and your repair will outlast the mower itself.
Leave a Reply