Your hammer strikes the glowing steel as it arcs from the forge, the molten borax bubbling at the seam where two distinct metals must become one. This critical moment determines whether your pattern-welded sword will display breathtaking contrast or suffer catastrophic delamination. Learning how to weld a sword successfully requires mastering ancient techniques that combine metallurgical science with artistic precision. In this guide, you’ll discover the exact process professional bladesmiths use to create functional, beautiful pattern-welded swords through controlled forge welding—avoiding the common pitfalls that ruin 80% of beginner attempts.
Pattern welding transforms ordinary steel into extraordinary blades by forge-welding multiple layers that reveal stunning visual patterns when etched. This technique, perfected by Viking smiths over a thousand years ago, creates swords that outperform monolithic steel constructions while displaying unique character earned through the welding process. Unlike modern welding methods, pattern welding requires no filler material—just perfectly prepared steel surfaces fused at molecular level through precise temperature control and hammer work. By the end of this guide, you’ll understand exactly how to weld a sword that combines historical authenticity with modern performance.
Selecting High-Contrast Steels for Pattern-Welded Swords
Choosing the right steel combinations dramatically affects both your sword’s appearance and performance. The most effective pairings create maximum visual contrast while maintaining structural integrity through proper heat treatment. For beginners learning how to weld a sword, starting with predictable steel combinations prevents frustration and wasted materials.
Why 1084 and 15N20 Create Perfect Beginner Patterns
1084 high-carbon steel paired with 15N20 nickel steel produces the most reliable high-contrast patterns for newcomers. This combination offers three critical advantages:
- 1084’s consistent 0.84% carbon content ensures predictable hardening
- 15N20’s 2% nickel creates dramatic light/dark contrast when etched
- Both steels forge-weld together cleanly at similar temperatures
When you etch a completed blade made from this combination, the 1084 darkens significantly while the 15N20 remains light, revealing every twist and fold in your pattern. For your first sword, stack 8-12 alternating layers of these steels to create sufficient pattern complexity without overwhelming welding challenges. Avoid higher carbon steels like 1095 until you’ve mastered temperature control with 1084.
L6 Steel: The Secret Weapon for Viking-Style Swords
For authentic Migration Era swords, L6 band saw steel (0.65% carbon with 1-2% nickel) creates exceptional patterns when combined with 1080 steel. This pairing produces the distinctive “ladder” patterns seen in historical artifacts while offering superior toughness. The nickel content in L6 creates bright channels that contrast beautifully against the darkened high-carbon steel after etching.
Critical warning: L6 requires precise heat treatment—overheating during quenching causes cracking. If you choose this combination for your first sword, practice heat treating scrap pieces first to master the exact temperature window. Always oil quench L6 rather than water quench to minimize cracking risk.
Mastering Forge Welding: Temperature, Pressure & Cleanliness Secrets
Successful sword welding depends on three variables working in perfect harmony. Get any one wrong, and your billet will delaminate during forging. Understanding these factors transforms frustrating failures into consistent success when learning how to weld a sword.
Why Your Steel Won’t Weld at “Yellow Heat”
Many beginners fail because they misunderstand steel’s visual temperature cues. High-carbon steel requires welding at bright yellow heat (approximately 2200-2300°F), not the orange heat suitable for general forging. At proper welding temperature:
- Steel surface develops a “sweating” appearance as flux melts
- Light reflection creates a mirror-like surface
- Steel emits a faint vapor (not sparks, which indicate burning)
Pro tip: Hold a piece of charcoal near the steel—if it glows brightly from radiant heat, you’ve reached welding temperature. If sparks fly when striking the steel, you’ve exceeded critical temperature and must reheat more carefully.
The 3-Step Surface Preparation That Prevents 90% of Weld Failures
Incomplete welds almost always trace back to contaminated surfaces. Follow this exact preparation sequence before every welding attempt:
- Grind all contact surfaces with 80-grit belt to remove mill scale
- Immediately apply borax flux slurry to all seams (use 20 Mule Team borax)
- Reheat slowly through the “scaling zone” (1400-1800°F) to prevent oxidation
Hold your prepared billet to a light source—any visible gaps between layers will cause weld failure. Complete darkness between layers indicates proper contact. This preparation takes only 3 minutes but prevents hours of wasted effort when welding a sword.
Building Your First Sword Billet: 3-Billet Viking Construction
The traditional Viking sword uses three separate billets welded together: two twisted central cores surrounded by a U-shaped edge billet. This configuration creates the iconic twisted pattern while providing structural advantages.
Step-by-Step: Creating the Edge Billet for Maximum Pattern Contrast
- Stack 12 alternating layers of 1084 and 15N20 (each layer 1/8″ thick)
- Clamp the stack and secure corners with spot welds
- Heat to welding temperature and forge-weld the entire length
- Draw out to 4 feet while maintaining consistent cross-section
- Clean all surfaces before final welding into the complete sword
Visual cue: When properly drawn out, the edge billet should show distinct layer lines without gaps or distortions. Any visible separation indicates incomplete welding that must be corrected before proceeding.
Welding Sword Billets Together Without Delamination
The most critical moment in sword construction occurs when you forge-weld the three billets into a single unit. This requires precise alignment, consistent temperature, and strategic hammer work to prevent separation.
How to Position the Billets for Perfect Weld Penetration
Place the edge billet in a U-shape around the two central billets, ensuring all contact points align perfectly. Use a steel collar forged to fit snugly around the assembly—it creates tension that holds everything in position during initial welding. Pay special attention to the tip area, where incomplete welding commonly occurs due to rapid heat loss.
Common mistake: Beginners often strike too hard during initial welding, causing the hot steel to spread outward rather than bond inward. Start with light, overlapping strikes near the collar, working toward the tip while maintaining consistent welding temperature.
Heat Treating Your Welded Sword Properly
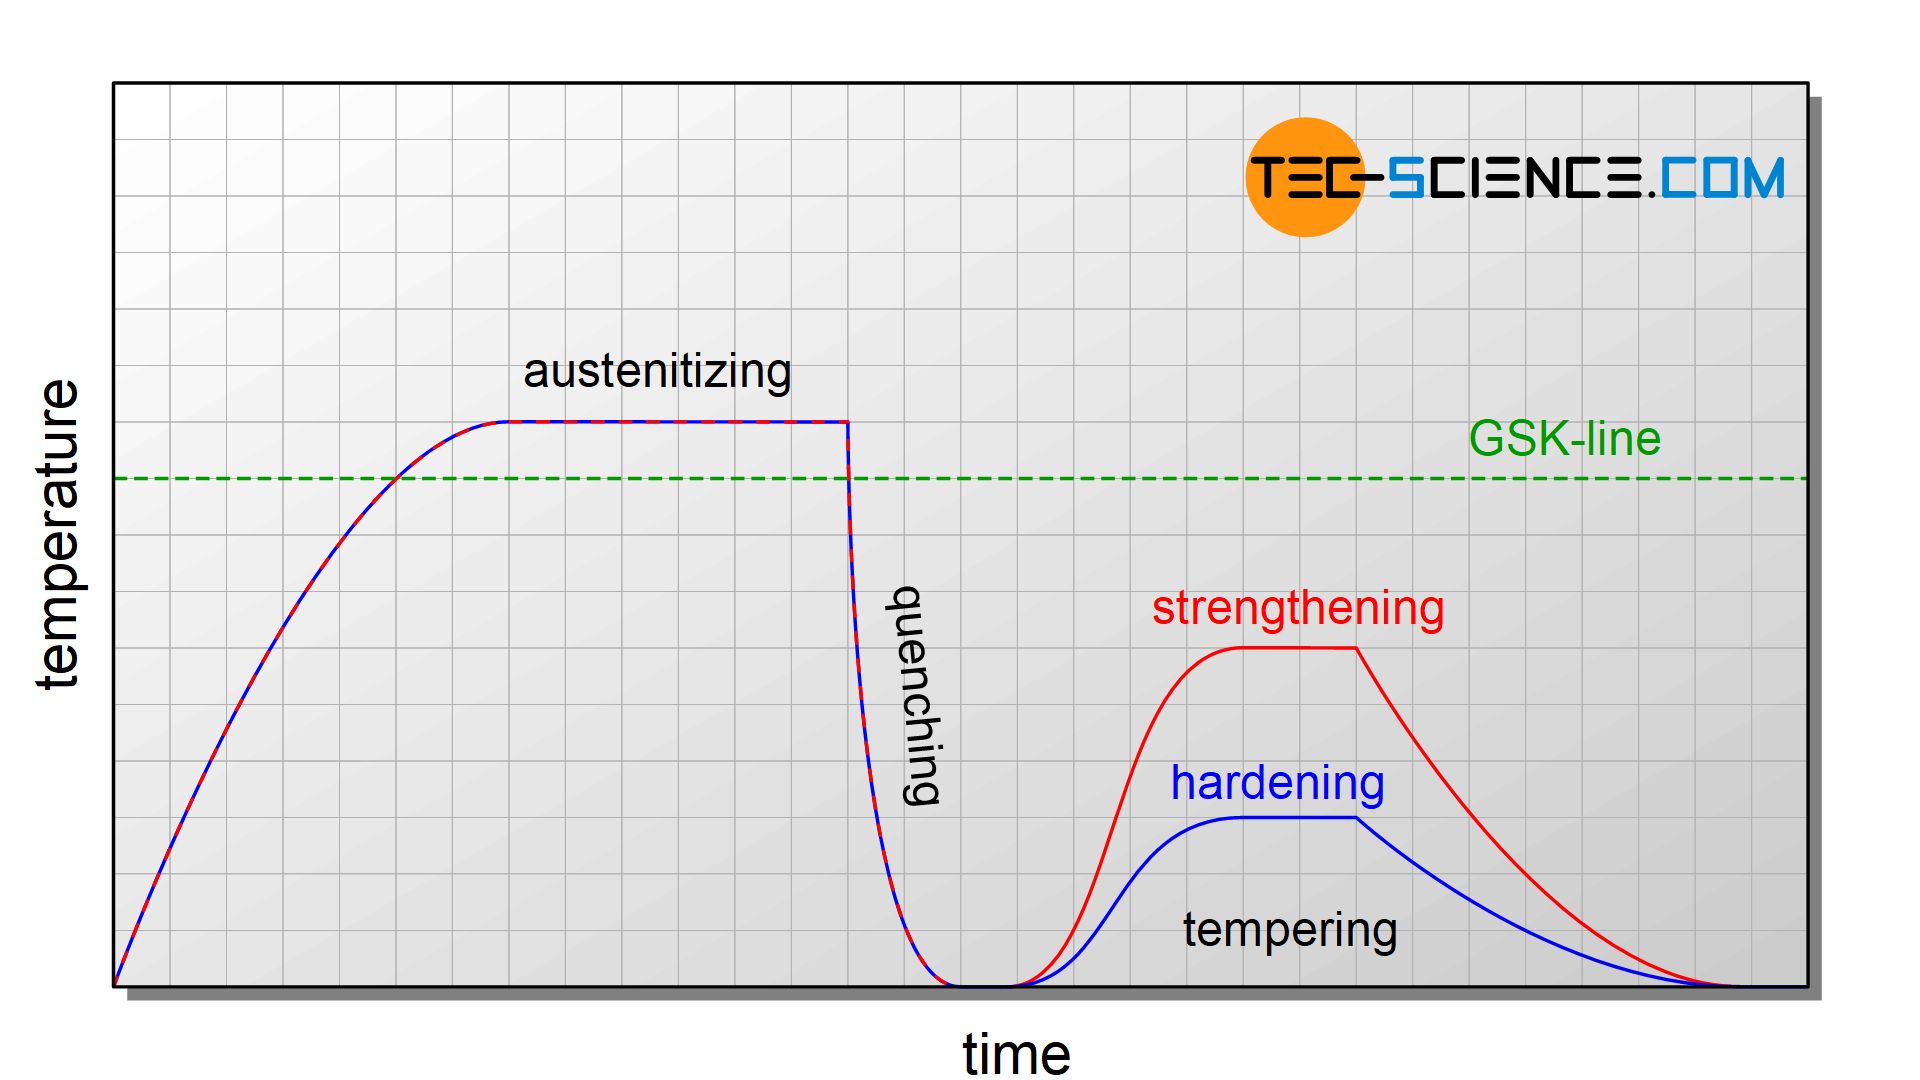
Pattern-welded swords require careful heat treatment to balance hardness and flexibility across multiple steel types. Improper treatment causes cracking or inadequate edge retention.
Oil vs. Water Quenching: Which Saves Your Sword From Cracking?
For your first welded sword, always oil quench rather than water quench. The thermal shock of water quenching often cracks pattern-welded blades at the interface between different steels. Use warm canola or commercial blade oil heated to 120-140°F for optimal results.
Critical timing: After heating to critical temperature (1475-1550°F), hold for exactly 5 minutes per inch of thickness before quenching. Less time causes incomplete austenitization; more time risks grain growth that weakens the blade.
Revealing Sword Patterns Through Controlled Etching
The true beauty of your welded sword emerges only after etching, which highlights the pattern by differentially attacking various steel types.
Step-by-Step: Achieving Maximum Pattern Contrast Safely
- Polish blade to 600-grit finish for even etching
- Submerge in ferric chloride solution (1:1 with water) for 3-5 minutes
- Rinse thoroughly with clean water
- Neutralize with baking soda solution
- Dry completely before evaluating pattern
Pro tip: For dramatic contrast, perform a second etch after applying a thin layer of beeswax to high points—this creates subtle shading that enhances three-dimensionality. Never leave steel in acid longer than 10 minutes, as excessive etching removes too much material.
Beginner’s Path to Successful Sword Welding
Mastering how to weld a sword requires structured progression. Attempting complex swords too soon leads to frustration and wasted materials.
Your 3-Stage Practice Plan Before Attempting a Sword
- Weeks 1-4: Weld mild steel chain links (focus on temperature control)
- Months 2-4: Create pattern-welded knives with 1095/15N20
- Months 5+: Attempt your first sword after 10 successful knife billets
Reality check: Most smiths require 1-2 years of consistent practice before achieving reliable success with sword-length billets. The larger mass creates thermal management challenges absent in smaller projects.
Essential Sword Welding Tools You Can’t Skip
While minimal equipment works for small projects, sword welding demands specific tools for success.
Must-Have Equipment for First-Time Sword Makers
- Gas forge with accurate pyrometer (coal forges lack consistent temperature control)
- 6-pound sledge hammer with cross-peen face for precise drawing
- 1″ belt grinder with 80-120 grit belts for surface preparation
- Hydraulic press (optional but highly recommended for beginners)
Safety note: Always wear a full-face shield during welding—molten borax can cause severe eye injuries. Leather aprons and gloves must cover all exposed skin.
Maintaining Your Pattern-Welded Sword Long-Term
Pattern-welded swords require specific care to prevent corrosion at steel interfaces.
Preventing Delamination Through Proper Storage
- Wipe blade with mineral oil after each handling
- Store in humidity-controlled environment (40-50% RH)
- Never use petroleum-based oils that attract dust
- Inspect weld lines monthly for early corrosion signs
Critical warning: Galvanic corrosion between dissimilar steels accelerates damage at pattern interfaces. At first sign of rust along pattern lines, seek professional conservation—DIY attempts often worsen the problem.
Learning how to weld a sword successfully combines ancient craftsmanship with modern metallurgical understanding. By starting with predictable steel combinations, mastering the three critical welding variables, and following a structured progression from simple to complex projects, you’ll create pattern-welded swords that are both functional cutting tools and enduring works of art. Remember that every failed weld teaches more than successful ones—analyze each problem, adjust your technique, and approach your next attempt with newfound knowledge. The journey to mastering sword welding spans years, but each completed blade brings you closer to creating truly exceptional pattern-welded masterpieces.
Leave a Reply