Welding your own table isn’t just a practical project—it’s a gateway to mastering fundamental metalworking skills while creating functional art for your home or workshop. If your recent attempt at welding a table left you with wobbly legs or uneven surfaces, you’re not alone. Thousands of DIYers struggle with alignment issues and structural weaknesses when they first tackle this common metal fabrication project. This guide cuts through the confusion by providing a proven workflow that transforms raw steel into a sturdy, professional-looking table in under a weekend. You’ll learn the exact sequence for preparing materials, achieving perfect right angles, executing clean welds, and finishing your piece like a seasoned fabricator—without expensive jigs or advanced equipment.
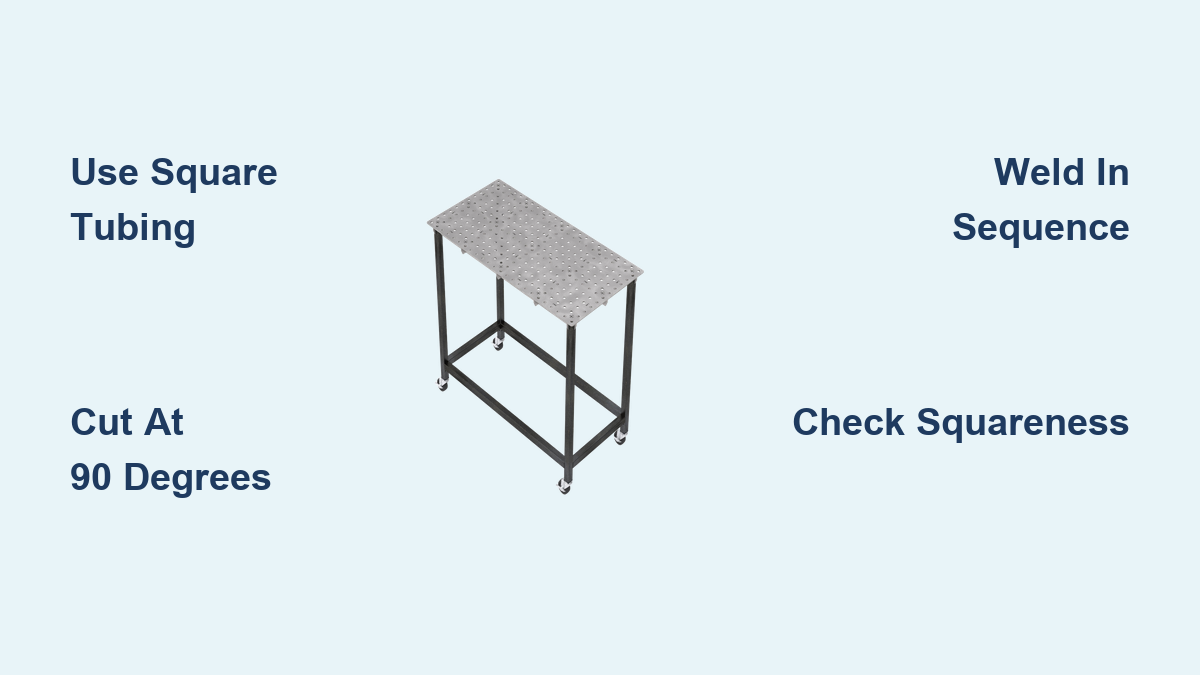
Essential Steel Selection for Stable Table Construction
Choosing the right steel determines whether your welded table will last decades or fail under minimal stress. Square tubing between 1.5″ and 2″ works best for table legs, providing optimal strength-to-weight ratio for most home applications. For the tabletop frame, 1″ to 1.25″ tubing creates sufficient support while minimizing material costs. Always specify A36 mild steel at your metal supplier—it’s the industry standard for DIY projects due to its excellent weldability and predictable behavior under heat.
Why Material Thickness Matters for Load Capacity
Thinner steel might seem cost-effective initially but leads to catastrophic failures. Tables supporting heavy equipment require 14-gauge (1.9mm) or thicker material, while purely decorative pieces can use 16-gauge (1.6mm). Measure your intended tabletop dimensions before purchasing—larger surfaces need thicker frame materials to prevent sagging. For every additional foot of tabletop length beyond 36″, increase your frame tubing thickness by one gauge. When cutting your materials, always add 1/8″ to each measurement to account for the kerf (material loss) from your cutting tool.
Precise Measurement and Cutting Protocol
Accurate measurements separate professional results from frustrating failures in table fabrication. Begin by creating a full-scale layout on your workshop floor using painter’s tape—this visual reference prevents costly mistakes before metal meets torch. Mark all cut lines with a center punch to maintain accuracy during cutting, as pencil marks disappear when heated.
Critical Cutting Mistakes That Cause Alignment Failures
Most wobbly tables stem from inconsistent cuts rather than poor welding technique. When using an angle grinder with cutoff wheel, maintain 90-degree perpendicularity to your mark—angled cuts create compound errors that multiply during assembly. For perfect 45-degree miters on tabletop corners, clamp your workpiece in a vise with a precision square as a guide. Always cut all identical pieces simultaneously by stacking them securely; this ensures uniform length critical for square assembly. After cutting, remove all burrs with a deburring tool—these sharp edges create gaps that compromise weld integrity.
Jig-Free Assembly Techniques for Perfect 90-Degree Angles
Professional fabricators use expensive jigs, but you can achieve identical precision with workshop basics. Create a temporary assembly jig using two perfectly straight 2x4s screwed together at 90 degrees. Clamp your leg and apron pieces against these reference edges—any deviation becomes immediately visible. For tabletop frames, use a large carpenter’s square against your workbench edge as a fixed reference point.
How to Verify Squareness Before Welding
Your table’s stability depends entirely on perfect right angles at this stage. Measure diagonally from corner to corner—the measurements must match within 1/16″. If they don’t, gently tap misaligned sections with a dead-blow hammer while checking with your square. Apply temporary tack welds in alternating positions (top, bottom, left, right) to prevent heat distortion. Never weld continuously around a joint during initial assembly—this guarantees warping. Complete your verification by placing the assembly on a known-flat surface; any rocking indicates uneven leg lengths requiring adjustment.
Optimal Welding Settings and Technique for Furniture
MIG welding produces the cleanest results for table fabrication, but proper settings make all the difference. For 14-gauge steel, use .030″ wire at 18-20 volts with 220-250 cubic feet per hour argon-CO2 mix. Maintain a 1/4″ stick-out and 15-degree travel angle—excessive angles create weak, spattery welds prone to cracking under stress. Move at consistent speed: too slow burns holes, too fast creates weak beads.
Critical Weld Sequence That Prevents Distortion
Welding order determines whether your table remains flat or warps dramatically. Begin with the tabletop frame, welding opposite corners first to balance thermal expansion. Complete 50% of each joint before moving to the next—never finish one joint completely before addressing others. When attaching legs, weld top and bottom connections simultaneously on opposite legs. For heavy-duty tables, add gussets at stress points before final welding. Always allow 30 seconds between passes for heat dissipation—rushing causes cumulative distortion that’s impossible to correct later.
Post-Weld Correction Methods for Imperfect Joints
Even experienced welders encounter distortion—knowing how to fix it separates professionals from hobbyists. For minor warpage, apply strategic heat with an oxy-acetylene torch: heat the convex side of the bend in 2″ diameter circles, allowing natural contraction to pull the metal straight. For severe misalignment, use a hydraulic jack with protective hardwood blocks to gradually bend components back into position while cooling welds provide resistance.
Smoothing Welds Without Compromising Strength
Grinding welds too aggressively creates weak spots that fail under load. Begin with 60-grit flap discs to remove major irregularities, maintaining at least 70% of original material thickness. Switch to 120-grit for final smoothing, following the weld contour rather than grinding perpendicular to the joint. For visible surfaces, finish with 220-grit for paint adhesion. Always wear respiratory protection during grinding—steel dust causes serious health issues with prolonged exposure.
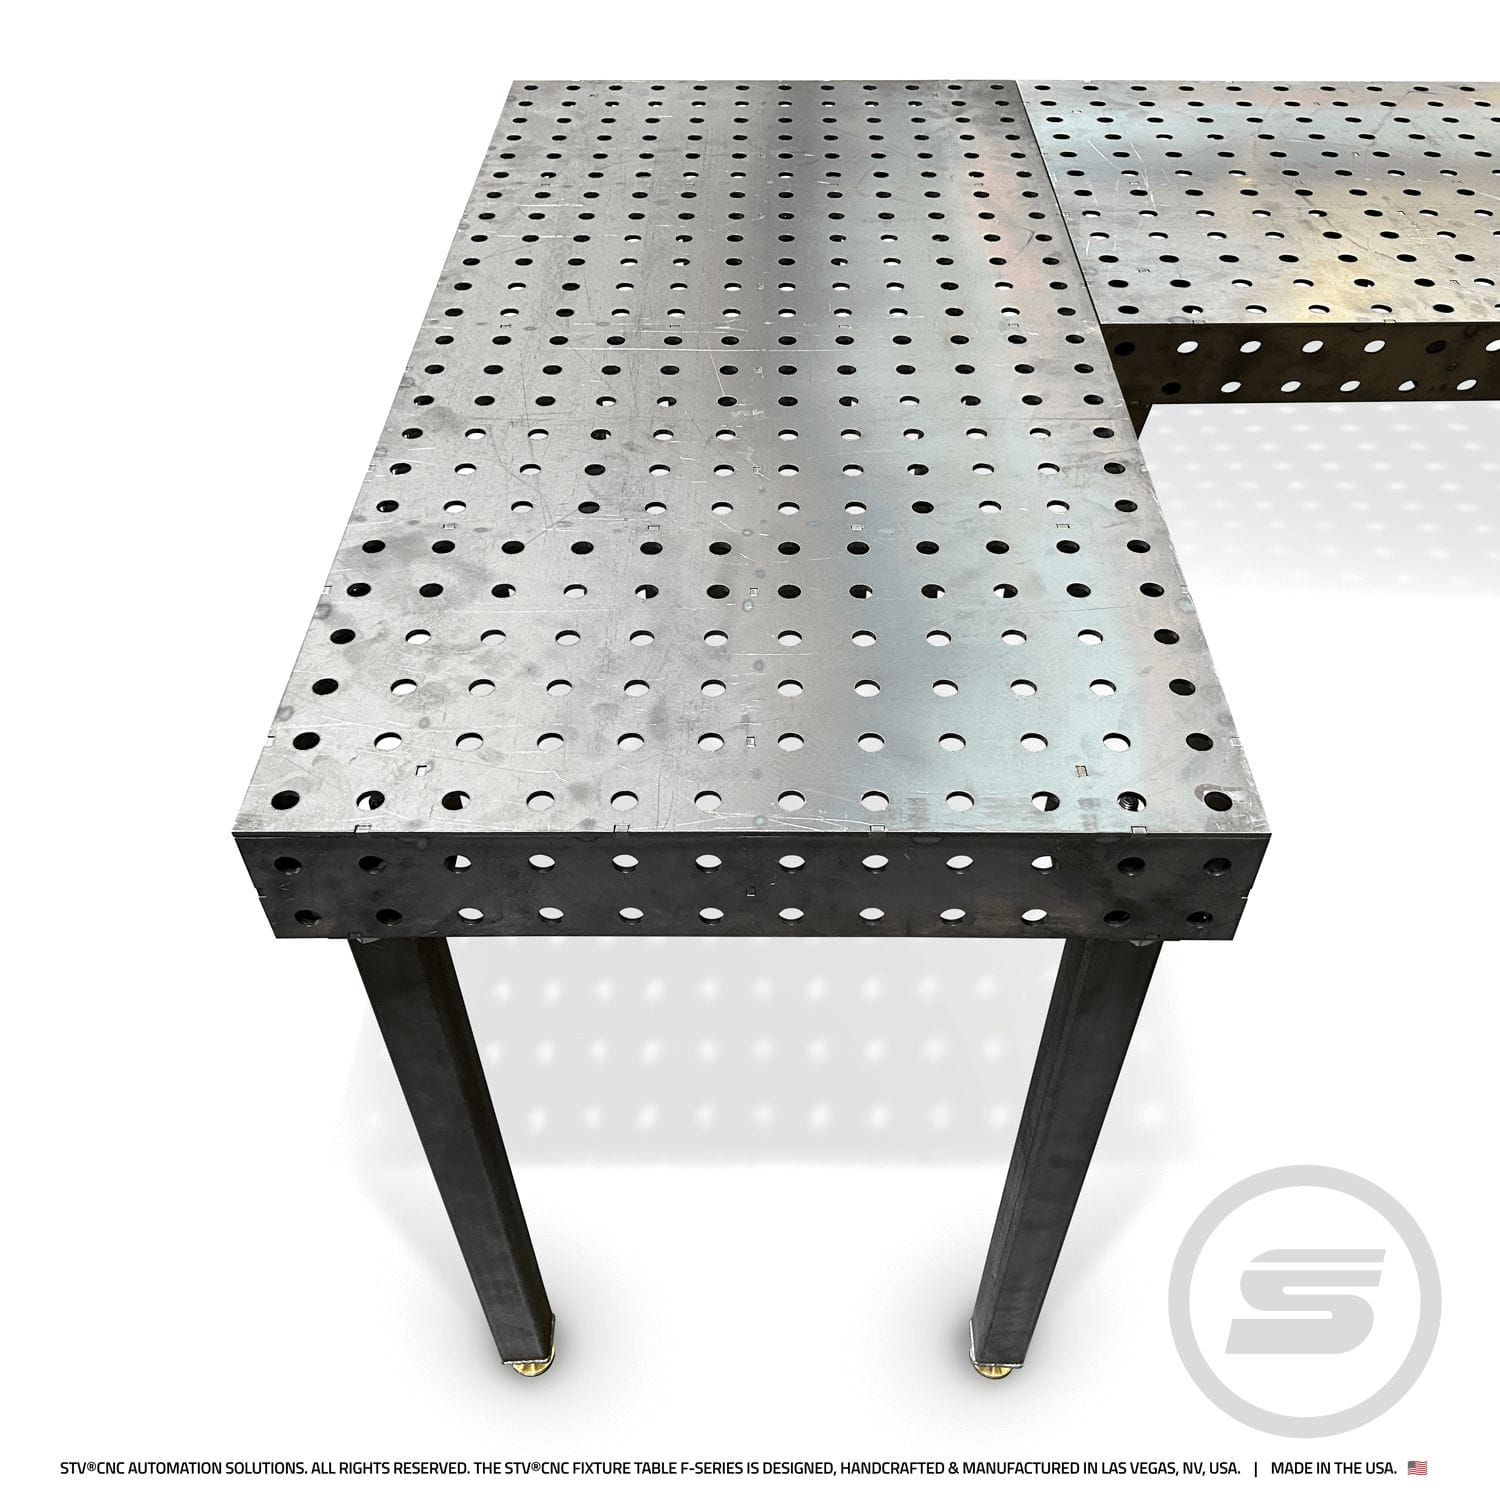
Professional-Grade Finishing for Lasting Protection
Raw steel tables rust rapidly in typical environments, making proper finishing essential for longevity. Begin by removing all mill scale with a stainless steel wire wheel—this provides the mechanical tooth necessary for coating adhesion. Apply cold galvanizing compound to all weld areas before final finishing; these zinc-rich paints provide sacrificial protection at vulnerable points.
Paint System That Withstands Daily Use
Automotive primer creates the ideal base for table finishes. Spray two light coats, allowing 20 minutes between applications for proper curing. For topcoats, two-component epoxy paints provide unmatched durability but require precise mixing ratios. Single-stage urethanes offer excellent protection with simpler application—apply three thin coats rather than one thick layer to prevent runs. Always sand lightly with 320-grit between coats for maximum adhesion. For workshop tables, add non-slip additives to your final coat to prevent tools from sliding.
Load Testing and Reinforcement Strategies
Never assume your welded table can support weight without verification. Gradually apply increasing loads (50%, 75%, then 100% of intended capacity) while checking for deflection. Mark reference points with tape and measure movement with feeler gauges—more than 1/8″ deflection at center indicates insufficient reinforcement. Add triangular gussets at high-stress joints or incorporate cross-bracing for large surfaces.
Maintenance Protocol for Decades of Service
Proper care extends your welded table’s life exponentially. Clean with mild soapy water—avoid acidic cleaners that degrade protective coatings. Inspect welds quarterly for hairline cracks, especially at leg-to-frame connections. Touch up scratched areas immediately with matching paint to prevent rust propagation. For outdoor tables, apply clear wax coating twice yearly to maintain protective barrier against moisture.
Welding a structurally sound table requires attention to material selection, precise fabrication techniques, and proper finishing—each stage directly impacts the final product’s durability. By following this systematic approach, you’ll create furniture that withstands daily use while showcasing your growing metalworking skills. Remember that every table you build improves your technique, so start with simple designs before tackling complex projects. For your next fabrication challenge, consider adding integrated storage solutions or experimenting with mixed materials like wood tabletops on steel bases—skills from this project form the foundation for increasingly ambitious creations. Always prioritize safety by wearing proper PPE and working in well-ventilated areas, as consistent protection ensures you’ll enjoy metalworking for years to come.
Leave a Reply