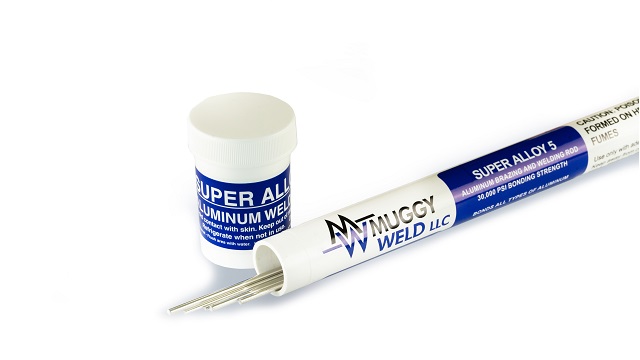
Aluminum air conditioning condensers develop leaks at fittings and seams over time due to vibration, stress, and temperature cycling. Rather than replacing the entire unit—which costs hundreds of dollars and requires professional installation—you can restore functionality with a proper weld repair. Super Alloy 5 provides an accessible solution for repairing aluminum AC components using equipment you likely already have in your workshop. This guide walks you through the complete process of welding AC condenser fittings, from preparation through final cleanup, so you can complete reliable repairs without specialized training or expensive equipment.
Learning how to weld AC condenser fittings opens up a cost-effective alternative to component replacement. The same technique trusted by auto repair shops and HVAC professionals works equally well for residential and commercial systems. With the right approach, you can achieve bonds rated at 30,000 psi—strong enough to withstand normal operating pressures and temperature fluctuations. The entire process requires only a propane torch, the Super Alloy 5 welding rod, and basic safety equipment, making it feasible for most DIYers with minimal welding experience.
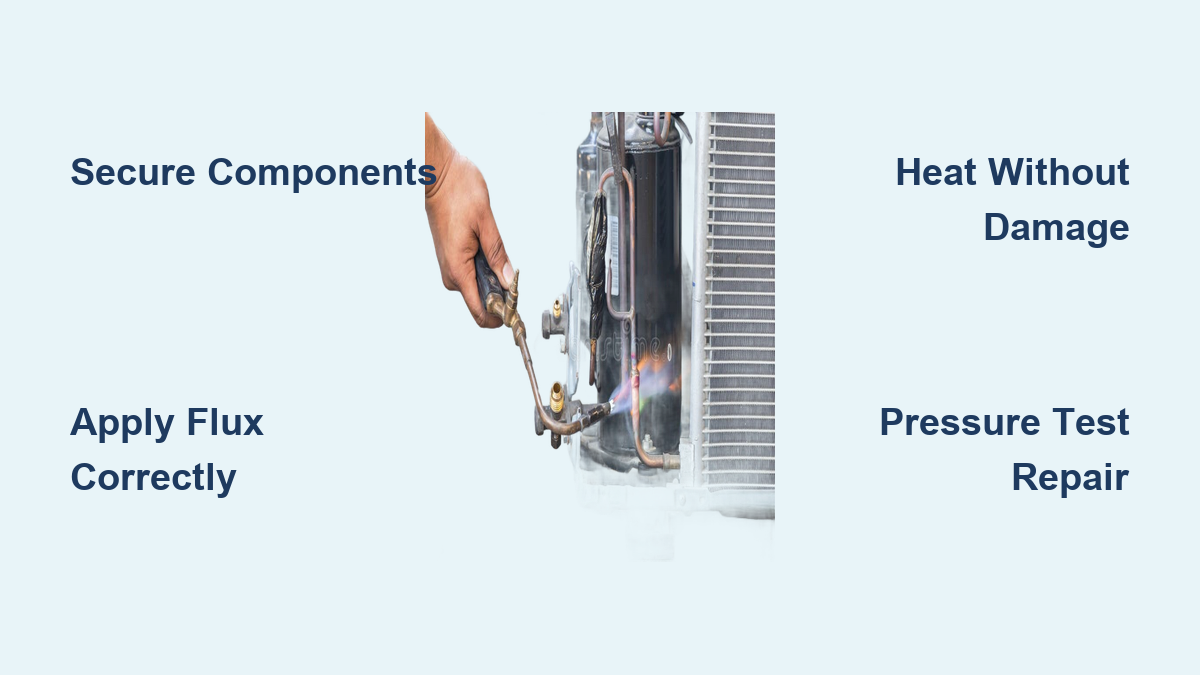
Secure Your AC Condenser Components Before Welding
Before applying heat, ensure your condenser components are properly aligned and firmly secured. Position the male and female fittings together so they sit flush with no visible gaps—this alignment is critical for creating a strong, leak-proof joint. Use vise grips or C-clamps to hold the pieces absolutely stationary during welding, as even slight movement can compromise the integrity of your repair.
Why Proper Alignment Matters for AC Condenser Welds
Aluminum expands significantly when heated, and any movement during the welding process creates stress points that lead to premature failure. When securing components, check that mating surfaces make complete contact throughout the joint area. For cracked condenser tubes, gently open the crack with a small drill bit or grinding tool to create a V-shaped groove that provides adequate space for the welding material to fill.
Common Alignment Mistakes to Avoid
Many DIYers rush this step and pay the price later with weak joints. Never attempt to hold components by hand while welding—this almost guarantees misalignment. Avoid over-tightening clamps on thin aluminum tubing, which can deform the material and create new gaps. If working with brittle or corroded fittings, apply gentle pressure and check alignment frequently as you secure the pieces.
Apply Flux Correctly for Aluminum AC Repairs
Unlike traditional aluminum welding methods, Super Alloy 5’s integrated flux eliminates the need for rigorous pre-cleaning. However, proper flux application remains essential for creating a strong bond. Begin by gently warming your welding rod with the torch for 2-3 seconds, then dip it into the flux container until generously coated—imagine frosting a cake rather than simply dusting the surface.
Optimal Flux Coverage for Condenser Fittings
Apply flux to both sides of the joint interface, covering approximately one inch on either side of where the weld will form. For best results, use a small brush to spread the flux evenly across the mating surfaces, ensuring complete coverage without excessive buildup in crevices. The flux should appear as a thin, even layer that completely coats the aluminum but doesn’t pool in low spots.
Troubleshooting Flux Application Issues
If your flux appears too thick or paste-like, it may contain moisture—gently warm the container before use to restore proper consistency. When working in humid environments, apply flux immediately before welding to prevent moisture absorption. If flux dries out during the welding process, simply reapply to maintain adequate coverage. Remember that insufficient flux leads to poor penetration and oxidation, while excessive flux can interfere with capillary action and create weak spots in your weld.
Heat Aluminum AC Fittings Without Damage
The key to successful AC condenser welding lies in proper heat application. Begin by broadly heating the entire joint area with continuous, sweeping torch motions—never focus heat on a single spot, as thin aluminum tubing can melt through in seconds. Keep the torch moving in slow figure-eight patterns, spending slightly more time on larger fittings that require more thermal energy to reach working temperature.
Recognizing Proper Aluminum Welding Temperature
Watch for visual cues rather than relying on guesswork—when the flux becomes thin and watery, almost translucent, you’ve reached the ideal 600°F working temperature for Super Alloy 5. This change typically occurs within 15-30 seconds of consistent heating. If the flux remains thick or begins to darken, the aluminum hasn’t reached proper temperature yet. Conversely, if the flux disappears completely or the metal starts to warp, you’re applying too much heat.
Adjusting Heat for Different AC Components
Thicker aluminum condenser fittings require more preheating time—spend 30-60 seconds broadly warming the entire component before focusing on the joint area. For thin tubing and delicate fins, maintain a greater torch distance and faster movement to prevent burn-through. When welding near rubber seals or plastic components, use copper heat sinks to draw excess heat away from sensitive areas. If the metal cools below working temperature during welding, simply restart the heating process rather than forcing the rod to flow.
Create Strong Welds on AC Condenser Fittings
Once the aluminum reaches proper temperature, begin feeding the flux-coated rod into the joint while maintaining consistent torch movement. The rod should follow the heat rather than leading it—let the molten aluminum draw the welding material into the joint through natural capillary action. Apply light pressure to keep the rod in contact with the heated area, but don’t force it into the joint.
Diagnosing and Fixing Common Welding Problems
If the welding rod balls up instead of flowing smoothly, the parent metal has dropped below proper temperature—stop adding rod and reheat until the flux becomes watery again. When excessive bubbling occurs, you’re likely overheating the joint—briefly remove the torch to allow some cooling, then resume with faster movement. For uneven weld beads, maintain more consistent torch speed and rod feed rate. Remember that patience yields better results than rushing—take your time to build a smooth, continuous weld that completely fills the joint.
Achieving Leak-Proof Seals on AC Systems
For optimal sealing, make multiple thin passes rather than attempting a single thick weld. Each pass should overlap the previous by about 50% to ensure complete fusion. Pay special attention to the start and end points of your weld, which are common failure locations—overlap these areas slightly to prevent weak spots. The finished weld should have a smooth, slightly rounded profile without gaps, pinholes, or excessive buildup that could restrict refrigerant flow.
Verify Your AC Condenser Repair Quality
After completing the weld, allow the joint to cool naturally for at least 5-10 minutes—never quench with water or compressed air, as rapid cooling introduces stress cracks. Once cooled to room temperature, thoroughly clean residual flux using warm water and a green Scotch-Brite pad. Remove all traces of flux to prevent future corrosion, paying special attention to crevices and hard-to-reach areas.
Pressure Testing Your Welded AC Condenser
Before reinstalling the condenser, perform a pressure test using nitrogen or compressed air at 1.5 times normal operating pressure. Apply a soap bubble solution to the weld area and look for steady bubbling that indicates leaks. For automotive systems, test at 400-500 PSI; for residential HVAC, 300-400 PSI typically suffices. Hold pressure for at least 15 minutes to detect slow leaks that might not appear immediately. Any leaks require reheating and adding additional welding material to the problem area.
Final Inspection Checklist for AC Repairs
Examine your completed weld under bright light to check for continuity and proper fusion. The joint should have a uniform silvery appearance without dark discoloration that indicates overheating. Feel along the weld with a gloved hand to detect any irregularities that might not be visible. Verify that no welding material has flowed into condenser tubes or restricted refrigerant passages. Confirm that all surrounding components remain undamaged from the welding process before proceeding with system reinstallation.
Essential Safety Practices for AC Condenser Welding
Always wear proper personal protective equipment including heat-resistant welding gloves, safety glasses with side shields, and flame-resistant clothing. Aluminum welding produces intense ultraviolet radiation that standard safety glasses won’t adequately block—use a welding helmet with appropriate shade or specialized safety glasses designed for aluminum work. Work in a well-ventilated area to avoid inhaling flux fumes, and keep a fire extinguisher rated for Class B fires within immediate reach.
Preventing Common Welding Hazards
Clear all flammable materials from at least a 10-foot radius around your work area before starting. Never leave a lit torch unattended, even for a moment. Allow all heated components to cool completely before handling—aluminum can retain dangerous heat levels while appearing normal to the touch. When working with AC systems, ensure all refrigerant has been properly recovered before welding, as pressurized refrigerant can cause explosive reactions when exposed to heat.
Emergency Response Planning
Know the location of your nearest emergency shower and eye wash station before beginning any welding project. Keep a bucket of dry sand nearby for smothering small metal fires—water can actually intensify certain metal fires. Familiarize yourself with the symptoms of aluminum fume fever (flu-like symptoms appearing 4-12 hours after exposure) and seek medical attention if you experience them after welding. Always have a second person present when working with high-heat processes in case emergency assistance is needed.
Understanding how to weld AC condenser fittings with Super Alloy 5 transforms what seems like a complex repair into an achievable DIY project. The key lies in respecting the process: proper preparation, patient heating, and adequate cooling produce joints that match or exceed OEM specifications. With practice, complete repairs take under an hour from start to pressure testing—far faster than sourcing and installing replacement components. Keep these steps in mind for your next AC repair, and you’ll save both time and money while building a skill that serves you across countless applications involving aluminum fabrication and repair.
Leave a Reply