
Aluminum’s soft, malleable nature has frustrated countless welders who’ve battled inconsistent wire feeding, bird-nesting, and poor weld quality. The metal’s tendency to stretch and jam standard MIG equipment makes how to weld aluminum with a spool gun a critical skill for fabricators, automotive restorers, and marine technicians. While TIG welding remains popular for aluminum, spool gun MIG welding delivers faster production rates without sacrificing quality when done correctly. If you’ve ever struggled with aluminum wire tangling inside your gun or producing weak, porous welds, mastering spool gun techniques will transform your aluminum welding results.
This guide reveals precisely why conventional MIG setups fail with aluminum and how spool guns solve these problems. You’ll learn the exact parameter settings for different thicknesses, step-by-step setup procedures, and proven techniques that prevent the most common aluminum welding failures. Whether you’re repairing an aluminum boat hull or fabricating custom automotive parts, these methods will help you achieve clean, strong welds consistently.
Why Standard MIG Guns Fail with Aluminum
Aluminum Wire Feeding Problems Explained
Standard MIG welding equipment struggles with aluminum due to the wire’s softness and malleability. When aluminum wire travels through a long cable from the machine spool to the gun, it stretches and bunches against the liner walls—creating bird-nesting that stops welding completely. Unlike steel wire with sufficient stiffness to maintain its shape during feeding, aluminum deforms under tension, binds against sharp edges, and piles up inside the gun housing.
The resulting inconsistent feed rates cause arc instability and poor weld quality. You might experience sudden wire stoppages mid-weld, excessive spatter, or weak welds that fail under stress. These issues waste both time and materials while creating safety hazards from erratic arcs and potential equipment damage.
How Spool Guns Solve Aluminum Feeding Issues
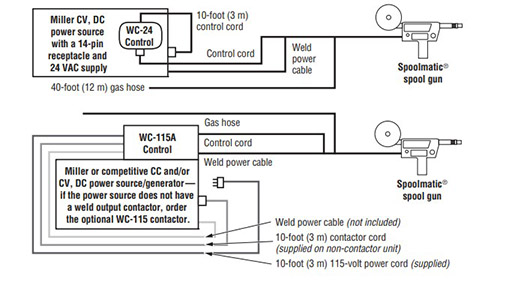
A spool gun eliminates these problems by mounting the wire spool directly in the gun housing, reducing the feed path to just an inch or two. This short distance prevents the stretching and binding that plagues conventional setups. The wire feeds consistently from spool to contact tip without navigating lengthy, friction-filled cables.
Quality spool guns incorporate specific features for aluminum’s challenges: an onboard feed system with calibrated pressure between drive roller and idler wheel, and an essential brake mechanism that stops wire rotation immediately when you release the trigger. Without this brake, momentum would continue feeding wire, causing bird-nesting inside the gun. The reduced friction and precise control mean you maintain steady arc length throughout your weld.
Aluminum Spool Gun Setup Checklist
Wire Selection and Loading Protocol
Choose the right wire diameter based on your material thickness: 0.035-inch wire for thin aluminum (0.062-0.125 inches) and 0.047-inch wire for medium thickness (0.125-0.250 inches). ER4043 provides excellent corrosion resistance for general fabrication, while ER5356 delivers higher strength and better color matching for anodized automotive parts.
When loading wire, follow this sequence:
1. Mount the spool on the spindle ensuring free rotation
2. Adjust the brake tension so the spool stops almost immediately when you release the trigger
3. Thread wire through the gun in a straight path with no sharp bends
4. Set idler pressure to grip firmly without deforming the wire—visible crushing marks indicate excessive pressure
Critical Machine Parameters for Aluminum
Set these parameters before striking your first arc:
- Voltage: 12-20V (60-100A) for thin aluminum; 18-25V (100-150A) for medium thickness
- Gas flow: 20-25 CFH of pure argon (mixed gases won’t work)
- Preflow: 0.1-0.5 seconds to purge air before welding
- Postflow: 0.5-1.0 seconds to protect cooling weld pool
- Trigger mode: 2T for short welds, 4T for continuous beads to reduce hand fatigue
Warning: Never use CO2 or argon/CO2 mixtures—aluminum requires pure argon to prevent oxidation and porosity.
Surface Preparation That Prevents Porosity
Aluminum’s rapid oxide layer formation causes porosity if not properly addressed. Complete this preparation immediately before welding:
- Scrub edges vigorously with a stainless steel brush dedicated solely to aluminum
- Work until metal appears bright and freshly metallic—no gray oxidation visible
- Never touch cleaned areas with bare hands (skin oils contaminate the surface)
- Weld immediately after cleaning—the oxide layer reforms within minutes
Skipping proper surface prep guarantees porous, weak welds regardless of your technique or machine settings.
Aluminum Welding Techniques That Work
Perfect Your Push Technique for Aluminum
Unlike some steel welding applications, always use the push technique with aluminum spool gun welding. Hold the gun at a 10-15 degree angle away from the weld pool, directing the arc and shielding gas ahead of the molten metal. This orientation provides three critical advantages:
- Fresh shielding gas covers the area before the arc arrives
- Arc force pushes the molten pool forward for better penetration
- Superior visibility of the weld pool for precise control
Pulling the torch creates narrower beads with less sidewall fusion and allows oxide to reform on the leading edge of the weld pool.
Travel Speed and Arc Length Control
Maintain consistent travel speed to avoid two common failures:
– Too slow: Causes burn-through on thin materials and excessive heat-affected zones
– Too fast: Results in poor penetration and weak, narrow beads
The optimal speed produces a uniform, slightly convex bead with good sidewall fusion. For arc length, keep the contact tip 1/4 inch (6mm) from the workpiece—any closer risks nozzle damage, while farther distances reduce arc stability and gas coverage.
Troubleshooting Common Spool Gun Failures

Fix Wire Jamming and Bird-Nesting
When wire feeding problems occur, systematically check these components:
- Drive roller tension: Adjust until wire feeds smoothly without visible deformation
- Wire path: Inspect for sharp edges, burrs, or debris causing binding
- Contact tip size: Must match wire diameter precisely (too small restricts feeding)
- Liner condition: Replace if showing wear or accumulated debris
Pro tip: After each use, remove the contact tip and blow compressed air through the liner to prevent buildup.
Eliminate Porosity and Weak Welds
Porosity—small gas pockets within the weld—indicates contamination or inadequate shielding. Fix it by:
- Verifying gas flow with a flowmeter at the nozzle (20-25 CFH required)
- Checking for leaks in gas lines and regulator connections
- Welding in protected areas away from drafts that disrupt gas coverage
- Cleaning base metal immediately before welding with stainless steel brush
Porous welds have significantly reduced strength and will fail under stress—never accept them as “good enough.”
Maintenance That Prevents Costly Downtime
Post-Weld Cleaning Routine
After every welding session, complete this 3-minute maintenance sequence:
1. Remove contact tip and nozzle
2. Clean spatter from tip with a dedicated cleaning tool
3. Inspect tip for enlarged orifice (replace if worn)
4. Wipe down gun body to remove metal dust
5. Store in dry location with tension released
Neglecting this simple routine leads to inconsistent feeding and premature component failure.
Component Replacement Schedule
Track these wear indicators to prevent unexpected failures:
– Drive rollers: Replace when grooves wear smooth or show uneven wear patterns
– Contact tips: Change when orifice enlarges or arc becomes unstable
– Liners: Replace when feeding resistance increases or unusual sounds occur
Warning: Using worn components creates inconsistent welds and damages other parts—replace at first sign of wear.
Aluminum Spool Gun Applications That Shine
Fabrication and Automotive Repairs
Spool guns excel for long, continuous welds on aluminum panels, frames, and structures where TIG would be too slow. Automotive restoration benefits significantly—sheet metal repairs and custom fabrication complete 3-5 times faster than TIG while maintaining adequate strength for non-structural components.
Marine Welding Solutions
Aluminum boats and marine hardware require frequent repairs that spool guns handle efficiently. The portability of many spool gun systems enables on-site repairs impossible with bulkier TIG equipment. For dock repairs or boat hull fixes, the spool gun’s ability to produce acceptable quality welds quickly makes it the practical choice.
Quick Reference Aluminum Welding Settings
| Material Thickness | Voltage Range | Wire Diameter | Amperage Range |
|---|---|---|---|
| 0.062-0.125 inches | 12-20V | 0.035-inch | 60-100A |
| 0.125-0.250 inches | 18-25V | 0.035-0.047-inch | 100-150A |
Critical success factors: Pure argon gas (20-25 CFH), push technique at 10-15° angle, 1/4″ arc length, immediate surface cleaning before welding.
Mastering how to weld aluminum with a spool gun transforms a frustrating challenge into a reliable production process. By understanding the specific requirements of aluminum welding—proper surface prep, exact parameter settings, and consistent technique—you’ll produce clean, strong welds efficiently across fabrication, automotive, and marine projects. Start with these proven settings on scrap material, refine based on results, and soon you’ll weld aluminum with the same confidence as steel. The key is recognizing that aluminum demands different approaches than steel—respect its unique properties, and you’ll achieve professional results every time.
Leave a Reply