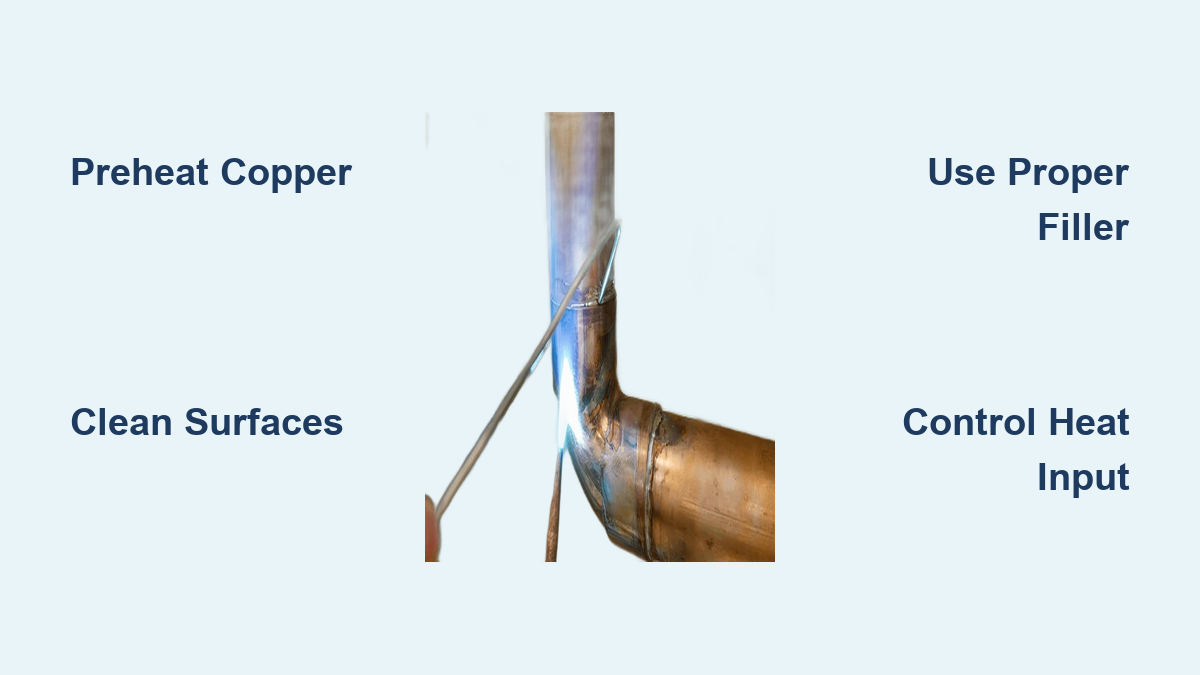
Copper’s exceptional thermal conductivity—eight times higher than steel—makes learning how to weld copper a specialized skill that demands specific techniques. When you attempt to weld copper without proper preparation, heat rapidly dissipates from the weld zone, causing poor fusion, porosity, and cracking. Unlike steel, copper requires preheating up to 650°F for thick sections, specialized filler metals, and precise heat control to overcome its challenging properties. This comprehensive guide reveals the exact methods professional welders use to create strong, clean copper welds regardless of alloy type or thickness. You’ll discover why standard welding approaches fail with copper, which processes actually work (and which to avoid), and step-by-step instructions that transform frustrating attempts into successful copper welds every time.
Why Standard Welding Techniques Fail with Copper
Thermal Conductivity Sabotages Your Weld Penetration
When you weld copper without addressing its thermal properties, heat instantly flows away from your weld zone into the surrounding metal. This rapid dissipation prevents proper fusion, particularly on sections thicker than 1/4 inch. Instead of creating a molten pool that bonds your materials, you end up with weak, incomplete welds that fail under pressure. The solution? Preheat your entire copper workpiece to 200-650°F based on thickness before striking an arc. For pure copper over 1/2 inch thick, aim for 500-650°F preheat to dramatically improve penetration. Use an infrared thermometer to verify temperature across the entire piece—uneven heating causes inconsistent results.
Specific Copper Alloys Require Different Approaches
Not all copper welds behave the same way—your technique must match the specific alloy you’re working with. Pure copper (99.9% Cu) demands the highest preheat temperatures and deoxidized filler rods (ERCu) to prevent porosity. Brass (copper-zinc) creates toxic zinc fumes when welded, so always work in well-ventilated areas and consider silicon bronze filler instead of brass-specific rods. Bronze (copper-tin) requires careful heat control to prevent hot cracking during cooling. Crucially, never attempt to weld “free-machining” copper alloys containing tellurium or selenium—they’ll crack immediately regardless of technique.
Oxidation Creates Hidden Weaknesses in Your Welds
Copper’s affinity for oxygen means oxidation forms rapidly during welding, creating invisible porosity that weakens your joint. You’ll see this as pinholes or spongy texture in the weld bead. Aluminum-copper alloys develop particularly stubborn oxide layers that prevent proper fusion. The fix? Thoroughly clean all surfaces with a dedicated stainless steel brush before welding, then immediately apply flux for oxy-acetylene welding or maintain perfect shielding gas coverage for TIG/MIG processes. For aluminum-copper alloys, use AC TIG with zirconiated tungsten to break down the oxide layer as you weld.
Critical Safety Steps Before You Weld Copper

Mandatory Protective Gear for Copper Welding
Welding copper requires specialized safety equipment beyond standard welding gear. Always wear shade #12-14 lenses in your welding helmet—copper’s reflectivity makes the arc brighter than steel welding. Use 100% cotton or leather clothing; synthetic fabrics can melt from copper’s intense heat radiation. For brass welding specifically, wear a respirator with P100 filters to protect against zinc oxide fumes that cause metal fume fever. Keep a copper-specific fire extinguisher nearby—copper burns at extremely high temperatures that standard extinguishers can’t handle.
Ventilation Requirements You Can’t Skip
Copper alloys release dangerous fumes that require serious ventilation. Set up a cross-draft system with intake on one side of your workspace and exhaust on the opposite side, moving at least 2,000 cubic feet per minute. When welding brass or copper-zinc alloys, position yourself so fumes flow away from your breathing zone—never work downwind of your weld. For confined spaces, use a powered air-purifying respirator (PAPR) with copper-specific filters. Never skip ventilation—even brief exposure to copper fumes causes headaches, nausea, and long-term respiratory damage.
Step-by-Step Copper Welding Process
TIG Welding Copper Like a Professional
TIG delivers the cleanest copper welds but demands precise technique. Start by cleaning the joint with a stainless steel brush dedicated solely to copper—cross-contamination from steel brushes causes weld defects. Set your machine to DCEN polarity with 2% thoriated tungsten (2mm diameter for most applications). For thin copper (<1/8″), use pure argon shielding gas; for thicker sections, switch to 75% helium/25% argon for deeper penetration.
Here’s exactly how to execute the weld:
1. Preheat pure copper to 400-650°F using a rosebud tip (verify with infrared thermometer)
2. Strike the arc 1/2 inch from the joint, then move to starting point
3. Maintain 1/8 inch arc length—copper requires shorter arcs than steel
4. Add deoxidized copper filler (ERCu) only when base metal melts
5. Use stringer beads without oscillation—side-to-side motion exposes molten metal to oxygen
6. Keep travel speed fast enough to prevent burn-through but slow enough for full fusion
For multi-pass welds on thick copper, clean each pass with stainless brush before continuing—oxide buildup between passes causes porosity.
MIG Copper Welding for Faster Results
MIG welding copper works best for thicker sections (1/4″+) where speed matters more than perfect appearance. Use DCEP polarity with U-knurled drive rolls to prevent copper wire from kinking. For pure copper, select ERCu copper wire with 75% helium/25% argon gas. For copper alloys, silicon bronze wire (ERCuSi-A) with pure argon produces stronger, more corrosion-resistant welds.
Critical MIG technique adjustments for copper:
– Increase voltage 10-15% compared to steel at same thickness
– Use push technique (45° gun angle away from direction of travel)
– Maintain shorter stickout (3/8 inch) than with steel
– Keep travel speed steady—slowing down causes excessive heat buildup
– For vertical welding, use pulsed MIG mode to control the molten pool
Most “MIG welding” on copper is actually brazing—when using silicon bronze filler, the copper base metal doesn’t melt but bonds through metallurgical adhesion. This technique prevents distortion on thin copper while creating strong, corrosion-resistant joints.
Oxy-Acetylene Copper Welding for Maximum Control
Oxy-acetylene remains ideal for copper repairs and ornamental work where electricity isn’t available. Use a neutral flame with acetylene slightly dominant (1/16 inch inner cone extension). Apply copper-specific flux to both base metal and filler rod before welding—this prevents oxidation better than gas shielding.
Professional oxy-acetylene copper technique:
1. Preheat entire workpiece to dull red heat (1000-1200°F)
2. Melt base metal edges without adding filler
3. Dip clean filler rod into molten pool—never melt rod directly with flame
4. Move flame slightly ahead of filler rod to maintain molten puddle
5. Flux back side of joint for double-sided protection
6. After welding, cover joint with insulating blanket for slow cooling
This process creates the most ductile copper welds with minimal stress—critical for pressure vessels and pipes.
Fixing Common Copper Welding Problems

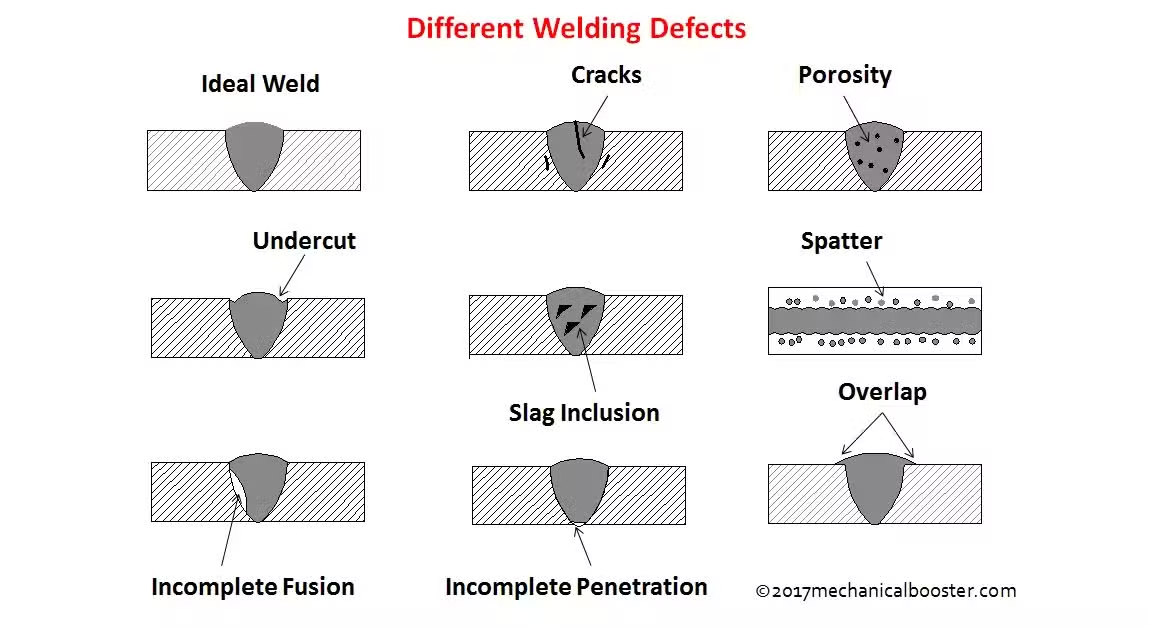
Eliminating Porosity in Copper Welds
Porosity appears as tiny holes in your weld bead and severely weakens copper joints. If your copper weld has porosity, immediately check these three factors:
– Inadequate cleaning: Wipe joint with acetone, then brush with stainless steel brush
– Insufficient shielding: Increase gas flow to 25-30 CFH for TIG, 40-50 CFH for MIG
– Volatile elements: Switch to low-zinc silicon bronze filler when welding brass
For thick copper sections, increase helium percentage in your shielding gas to 90%—this hotter arc reduces time for gas entrapment.
Preventing Copper Weld Cracking
Hot cracking appears as jagged fissures along the weld centerline as it cools. To stop cracking before it happens:
– Preheat copper-nickel alloys to 500-600°F to slow cooling rate
– Use ERCuNi filler specifically for copper-nickel alloys
– Avoid overwelding—excessive heat input increases shrinkage stresses
– Design joints with minimal restraint to allow natural contraction
If you notice cracks after welding, completely remove the weld with a carbide burr, then reweld with higher preheat and slower cooling.
Post-Weld Copper Treatment for Maximum Strength

Proper Cleaning Sequence for Copper Welds
Skip this step and your copper weld will corrode prematurely. Follow this exact cleaning sequence:
1. Allow weld to cool to 200°F (too hot to touch)
2. Brush lightly with stainless steel brush dedicated to copper
3. For oxy-acetylene welds, soak in hot water for 15 minutes to remove flux
4. For TIG/MIG welds, use pickling solution (10% sulfuric acid) to remove oxide
5. Rinse thoroughly with clean water and dry immediately
Never use steel brushes on copper—they embed iron particles that cause galvanic corrosion.
Stress Relief Heat Treatment
For critical copper welds like pressure vessels or structural components, perform stress relief to prevent service failures. Heat the entire assembly to 900-1100°F, hold for 1 hour per inch of thickness, then cool slowly in vermiculite or an insulating blanket. This process reduces residual stresses by 50-80% and significantly improves fatigue resistance.
Essential Copper Welding Checklist
Before you start welding copper, verify these five critical items:
– [ ] Workpiece preheated to proper temperature (200-650°F)
– [ ] Joint cleaned with copper-dedicated stainless steel brush
– [ ] Correct filler metal selected for copper alloy type
– [ ] Shielding gas flow verified (25 CFH for TIG, 40 CFH for MIG)
– [ ] Safety equipment properly worn (helmet shade #12+, respirator for brass)
Mastering how to weld copper requires understanding its unique thermal properties and adjusting your technique accordingly. By preheating properly, selecting the right filler metals, and maintaining strict cleaning protocols, you’ll transform frustrating copper welding attempts into strong, reliable joints. Remember that pure copper demands the most preparation, while copper alloys require specific approaches based on their composition. Start with practice pieces of the same thickness and alloy you’ll be welding, and always prioritize safety when dealing with copper’s high heat and potential fumes. With these techniques, you’ll weld copper successfully on your very next project.
Leave a Reply