Ever struggled with a gate that binds, squeaks, or sags after installation? The problem often traces back to improper hinge welding. When you weld hinges on metal gate structures correctly, you create permanent, heavy-duty installations that outperform bolt-on alternatives by eliminating loosening risks from vibration, weather exposure, and repeated use. Whether you’re fabricating a residential driveway gate weighing 200 pounds or an industrial installation supporting several hundred pounds per leaf, proper hinge welding technique determines whether your gate operates smoothly for decades or fails within months. This comprehensive guide walks you through selecting the right hinges, preparing materials, executing precise welds, and troubleshooting common challenges that even experienced fabricators encounter.
The process requires careful attention to material compatibility, alignment precision, and welding technique selection. Gates constructed from carbon steel, stainless steel, or aluminum each demand different approaches, and choosing the wrong method can result in weak joints, distorted frames, or hinges that bind during operation. Understanding these nuances before starting your project saves time, materials, and frustration while ensuring professional-quality results.
Choose Right Weld-On Hinge Type for Your Gate
Select Standard Heavy-Duty Hinges for Most Applications
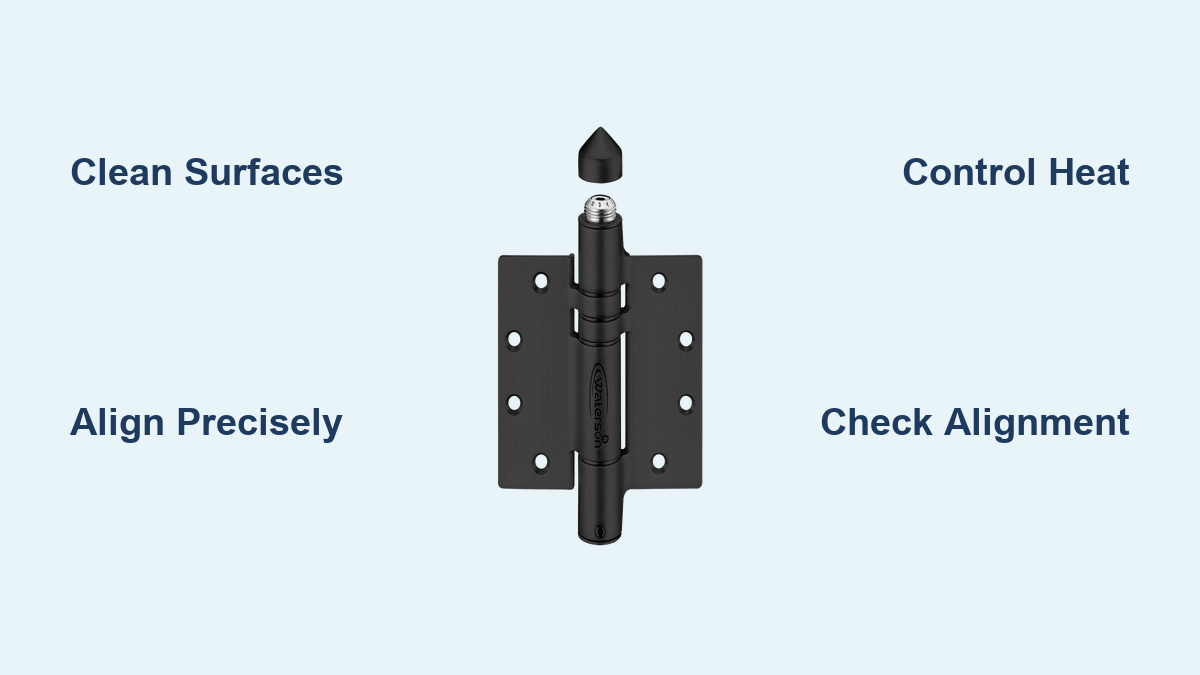
Standard heavy-duty weld-on hinges serve most residential, commercial, and industrial applications with robust barrel construction featuring welded side plates that distribute load across multiple contact points. These hinges accommodate gates ranging from standard pedestrian entrances to large driveway installations, with load-bearing capacity sufficient for several hundred pounds when properly installed. When you weld hinges on metal gate frames using this type, the thickness of steel typically ranges from 1/4 inch to 1/2 inch for mounting flanges, ensuring adequate strength for most applications.
Install Security Weld-On Hinges for High-Risk Locations
Security weld-on hinges address high-risk applications where tampering resistance matters. These specialized hinges incorporate reinforced construction, non-removable pin designs, and hidden mounting points that resist cutting or prying attempts. Correctional facilities, government buildings, and commercial properties requiring restricted access benefit from security hinges that standard installations cannot provide. The additional reinforcement adds cost but delivers significantly improved resistance to forced entry techniques that compromise conventional hinges.
Use Stainless Steel Hinges for Outdoor and Corrosive Environments
Stainless steel weld-on hinges excel in outdoor installations, coastal environments, and any application involving moisture, salt, or chemical exposure. The chromium content forms a protective oxide layer that prevents rust and deterioration even when surfaces are scratched during installation. While pricier than carbon steel alternatives, stainless steel hinges justify their cost through extended service life in harsh conditions and reduced maintenance requirements for decorative applications where appearance matters.
Apply Block-Type Hinges for Aluminum Gates and Masonry
Block-type hinges offer advantages for aluminum gate installations and masonry attachments where standard barrel hinges prove impractical. Unlike barrel hinges that mount on gate edges, block hinges feature flat mounting surfaces that attach directly to gate faces and brick columns. Aluminum gates require material-matched hinges because aluminum possesses different thermal properties and welding characteristics than steel, making block-type designs from compatible alloys the preferred choice for successful welds.
Gather Essential Tools Before Welding Hinges

Select Correct Welding Equipment for Your Material
Welding equipment selection depends primarily on the materials you’re joining. MIG welding (Gas Metal Arc Welding) provides the fastest, most efficient process for carbon steel applications, using continuously fed wire electrode with argon/carbon dioxide shielding gas. Most gate fabrication work favors MIG welding for its speed and quality results, though the process requires external gas supply and performs poorly in windy conditions.
TIG welding (Gas Tungsten Arc Welding) delivers the precision necessary for stainless steel installations and thin materials where heat input must be controlled carefully. Though slower than MIG welding, TIG produces superior aesthetic results with cleaner welds and minimal spatter. For stainless steel weld-on hinges, TIG welding is widely recommended because it creates strong, clean joints while minimizing heat-affected zones that could compromise corrosion resistance.
Prepare Critical Support Equipment for Alignment
Supporting tools prove equally essential for successful hinge installation. Quality clamps and jigs hold hinges in precise position during welding, as any movement creates misalignment causing binding gates. C-clamps, Vise-Grip-style clamps, and specialized hinge positioning jigs serve different purposes in professional installations. Measuring equipment including a quality tape measure, combination square, and level ensures accurate positioning, with the combination square particularly valuable for verifying perpendicular hinge alignment.
Surface preparation equipment such as angle grinders with grinding discs and wire brush attachments removes rust, paint, and mill scale from welding surfaces. Proper preparation directly affects weld quality and long-term durability. For stainless steel applications, dedicated grinding and brushing tools that have never contacted carbon steel prevent cross-contamination that leads to corrosion.
Prepare Metal Surfaces for Strong Welds
Clean Surfaces Thoroughly Before Welding
Thorough surface cleaning establishes the foundation for strong, durable welds that maintain integrity throughout the gate’s service life. Rust, paint, mill scale, oil, grease, and other contaminants interfering with weld penetration must be removed completely from surfaces where hinges contact the gate and post. Contaminants left in place create weak spots and provide pathways for corrosion beneath protective coatings.
Wire wheels mounted on angle grinders efficiently remove loose rust and flaking paint for light cleaning tasks. Heavily corroded surfaces require grinding with coarse-grit discs to remove all affected material down to clean, bright metal. Previously painted surfaces need grinding several inches beyond the hinge footprint to ensure no paint edges remain adjacent to the heat-affected zone, where thermal cycling can cause coating failure.
Mark Hinge Positions Accurately for Perfect Alignment
Accurate layout and marking ensures hinges position correctly before welding begins. Symmetrical positioning creates gates that hang properly and swing evenly. Standard practice places top hinges approximately one-quarter of gate height from the top edge and bottom hinges one-quarter from the bottom edge, with middle hinges at the midpoint when three hinges are used. This distribution creates mechanical advantage reducing load on any single hinge while preventing sag over time.
Pro tip: Use a square to verify perpendicular alignment from multiple angles—viewing from a single angle can miss angular errors that cause binding gates. Mark clearly with a center punch at critical points to maintain reference during clamping.
Position and Clamp Hinges Before Welding
Align Hinges Perfectly Before Securing
Placing hinges in their final position and securing them for welding requires patience and meticulous attention to detail. Even small positioning errors produce gates that bind, sag, or fail to close properly. The hinge barrel must face the direction the gate will swing, with the hinge pin positioned so the pin axis aligns with the post hinge for smooth rotation.
Slide the hinge into its marked position and use a square to verify the mounting flange is perfectly perpendicular to the gate edge. Check from multiple angles to catch angular errors that viewing from a single angle misses. Clamps secure the hinge in position away from weld areas, avoiding clamp jaws that interfere with the arc and create defects. Temporary spot welds at flange corners can secure hinges for final passes but must avoid interfering with final welds or distorting metal through heat concentration.
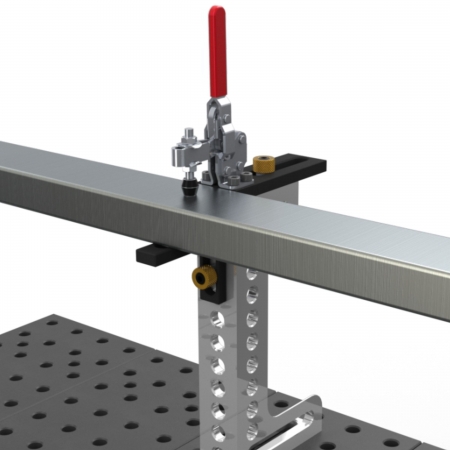
Use Alignment Fixtures for Professional Results
Professional fabricators employ alignment fixtures that mount temporary hinges on square tubing spanning between gate and post positions. Adjusting this tubing ensures alignment hinges are parallel and correctly spaced, allowing actual gate hinges to match this reference. While adding setup time, this approach virtually eliminates binding problems occurring when hinges are set individually without mutual reference.
For gates attaching to brick columns or masonry, block hinges offer advantages through flat mounting surfaces providing more contact area and forgiveness for minor alignment errors. However, block hinges present their own challenges when mounting surfaces aren’t perfectly flat or masonry positions vary.
Execute Proper Welding Technique for Your Material
Weld Carbon Steel Hinges with MIG Process
MIG welding dominates carbon steel gate fabrication through speed, ease of use, and quality results. The process uses continuously fed wire through the welding gun, with the operator controlling only torch position and travel speed. This simplicity makes MIG accessible to beginners while producing professional results for experienced welders.
Correct voltage and wire feed settings produce stable arcs with appropriate penetration and bead shape. Low parameters create shallow penetration causing wire stubbing, while excessive parameters produce wide, concave welds with poor root penetration. For hinge flange welding on typical gate materials one-quarter to one-half inch thick, successful settings emerge through test piece experimentation before proceeding to actual installation.
Apply Correct Technique for Stainless Steel Hinges
Stainless steel requires particular heat control because excessive temperatures cause chromium carbide precipitation at grain boundaries, depleting adjacent areas of chromium and compromising corrosion resistance. Using lowest amperage providing adequate penetration, maintaining tight arc lengths, and limiting interpass temperatures prevent sensitization problems. Critical stainless steel installations may need post-weld heat treatment or passivation restoring full corrosion resistance.
Critical warning: Use dedicated tools throughout stainless steel work to prevent carbon contamination that destroys corrosion resistance. Grinding wheels, wire brushes, and handling gloves used for stainless steel must never contact carbon steel.
Manage Thermal Distortion During Welding
Prevent Warping Through Proper Technique
Thermal distortion represents one of welding’s most significant challenges when mounting hinges on metal gates. Intense arc heat causes metal expansion, and differential heating and cooling rates create stresses twisting or bending gate frames. Distortion often becomes apparent only after welding completes and metal cools, by which time hinge alignment may be incorrect.
Experienced fabricators report that even careful clamping cannot prevent all binding after welding, as thermal cycles affect entire gate structures beyond immediate hinge areas. Multiple hinge welding compounds alignment errors cumulatively. Understanding this behavior helps practitioners anticipate problems and plan approaches accordingly.
Control Distortion with Strategic Welding Sequence
Strategies minimizing distortion include lowest heat input producing adequate welds, sequences distributing heat evenly, and adequate cooling between passes. Critical applications benefit from fixtures clamping gates flat during welding. Prevention remains superior to correction for warping issues.
Weld along flanges in consistent patterns ensuring complete fusion without excessive heat buildup. Starting at one corner and welding continuously to the opposite corner distributes heat evenly and prevents warping. Larger hinges with long flanges benefit from alternating sections welded from each end toward the center, allowing cooling before adjacent areas heat and controlling distortion.
Troubleshoot Common Alignment Problems After Welding
Diagnose Binding Issues Systematically
Diagnosing post-welding binding requires systematic evaluation of potential misalignment sources. Binding occurring throughout the entire swing range suggests hinges aren’t perpendicular to gate edges, while binding only at specific positions may indicate non-parallel hinge axes.
Measuring gaps between gates and posts at multiple heights reveals whether gates are parallel or twisted. Significantly varying gaps from top to bottom indicate twisting from inconsistent hinge perpendicularity. Consistent but narrow gaps suggest gates positioned too close, requiring hinge offset adjustment.
Correct Misalignment Without Complete Rewelding
Checking hinge alignment with straightedges or string lines reveals whether barrels are colinear. Deviations from straight lines through hinge barrels cause binding because gates follow curved rather than free-rotating paths. Correcting this condition may require removing and repositioning one or more hinges.
Addressing warping from welding heat requires techniques minimizing thermal distortion. Using lowest adequate heat input, balancing heat across gate frame sides, and allowing cooling between passes all help. When warping occurs, controlled heat application to opposite sides can reverse distortion, though this requires skill avoiding new problems. Minor warping may allow compensation through hinge position adjustments.
Apply Essential Safety Precautions During Welding
Welding produces hazards requiring comprehensive protection. Welding helmets with appropriate shade lenses (typically five to eight for general welding) protect eyes and faces from arc radiation. Auto-darkening helmets have become professional standards, allowing precise positioning while instantly protecting eyes when arcs strike.
Welding gloves made from leather or heat-resistant materials protect hands from sparks, hot metal, and arc radiation. Heavy-duty welding jackets or aprons provide body protection, particularly for overhead welding where molten metal falls onto torsos. Steel-toed work boots with heat-resistant soles protect feet from dropped metal and sparks.
Critical safety tip: Respiratory protection becomes essential when welding galvanized steel, painted metals, or any material releasing toxic fumes. NIOSH-approved respirators appropriate for expected fumes ensure harmful contaminants aren’t inhaled. Always clear combustibles from welding areas and position fire-resistant blankets containing sparks.
Welding hinges onto metal gates succeeds through understanding inherent challenges—particularly thermal distortion and alignment maintenance—and applying proven techniques addressing these challenges. Proper preparation, appropriate equipment selection, and methodical execution produce gates functioning reliably for years or decades with minimal maintenance. The investment in quality tools, proper technique, and adequate preparation pays dividends through reduced callbacks, improved reputation, and satisfied customers across residential, commercial, and industrial applications.
Leave a Reply