Picture this: sparks flying in rhythmic patterns as your hands guide molten metal into shape, transforming cold, lifeless steel into a dynamic sculpture that captures light and imagination. Learning how to weld metal art opens a world where technical skill meets creative vision, allowing you to craft everything from intricate wall hangings to functional furniture that tells a story through every weld bead. Unlike traditional welding focused solely on structural integrity, metal art welding celebrates the visible process—where weld lines become intentional design elements rather than hidden necessities.
The path from complete beginner to confident metal artist begins with understanding that welding isn’t just about joining metal—it’s about expressing your unique creative voice through a demanding but rewarding medium. Many successful metal artists started with no formal training, discovering their artistic potential only after picking up a welding torch. What separates hobbyists from professionals isn’t innate talent but consistent practice, proper technique, and strategic equipment choices that transform raw materials into gallery-worthy pieces. This guide reveals exactly what you need to know to start creating impressive metal art, even if you’ve never touched a welding machine before.
Essential Equipment Checklist for Your First Metal Art Welding Project

MIG Welder Setup for Beginners Creating Metal Sculptures
Your first welding machine determines what types of metal art you can create, making this decision critical for beginners. MIG (Metal Inert Gas) welders represent the most practical starting point because they offer straightforward operation and versatility sufficient to handle diverse artistic projects. A quality 110-volt MIG welder combined with an angle grinder enables creation of an extraordinary range of art pieces—think abstract wall sculptures or garden art—without breaking the bank. The YesWelder MIG-205DS-B exemplifies an ideal beginner machine, successfully welding steel, stainless steel, and aluminum while providing the tolerant operation new artists need.
MIG welding produces consistent, clean welds that require relatively minimal cleanup compared to stick welding, making it particularly suitable for artistic applications where appearance matters. Pro Tip: Start with mild steel projects up to 1/4-inch thickness before advancing to more challenging materials—this thickness covers most beginner metal art projects while allowing you to develop technique without frustration.
Must-Have Cutting Tools for Precision Metal Art Fabrication
Beyond your welding machine, metal art creation requires an array of supplementary tools that enable precise cutting and shaping. An angle grinder serves as your most versatile tool, performing multiple functions including material cutting through cutoff wheels, smoothing with sanding disks, and texturing with wire cup brushes. This single tool handles 90% of your preparation needs, eliminating the need for expensive specialized equipment when starting out.
For artists working with pre-designed patterns or creating geometric compositions, a plasma cutter becomes essential. The YesWelder Cut-55 Pro delivers sufficient cutting power for typical metal art projects while remaining accessible to hobbyists. Critical Warning: Always wear shade 5 safety glasses when plasma cutting—this specialized protection shields your eyes from intense radiation that standard sunglasses cannot block.
Selecting the Right Welding Process for Your Metal Art Vision

Why MIG Welding Is Best for Starting Metal Art Projects
MIG welding provides the most accessible entry point for beginners learning how to weld metal art, offering a balance of ease-of-use and versatility that suits diverse project requirements. The gas metal arc welding process feeds consumable wire through a welding gun while inert gas shields the weld pool, producing clean joins that require minimal cleanup. This combination makes MIG welding the foundation upon which most metal artists build their skills.
The 110-volt MIG welders designed for home workshops handle most metal art projects involving steel up to approximately one-quarter inch thickness. Learning to weld with MIG develops understanding of fundamental techniques including travel speed, wire feed rate, and torch angle—skills that transfer to other welding processes as you advance. The relative forgiveness of MIG welding allows beginners to achieve acceptable results more quickly, maintaining motivation during the crucial early learning period.
When to Upgrade to TIG for Colorful Metal Art Welding
As your skills develop and ambitions expand, TIG (Tungsten Inert Gas) welding becomes essential for detailed work and color development that defines professional metal art. TIG allows precise heat application crucial for creating the colorful weld effects that distinguish many metal art pieces. The YesWelder TIG200P AC/DC features built-in pulse settings and foot pedal support that enable artists to create rainbow weld effects impossible with MIG equipment.
Developing TIG proficiency requires additional practice, as the process demands simultaneous control of the torch, foot pedal, and filler rod. However, the artistic possibilities TIG unlocks—including controlled color gradients and delicate work on thin materials—reward the investment in learning this challenging technique. Many successful metal artists eventually operate multiple welding processes, selecting the most appropriate method for each project’s specific requirements.
Non-Negotiable Safety Gear for Metal Art Welding Beginners
How to Avoid Common Welding Injuries While Creating Art

Safety in welding cannot be overstated—the intense light, high temperatures, and flying sparks demand proper protection throughout every session. A quality welding helmet ranks as your most critical safety investment, with the American Welding Society recommending at minimum a shade 10 lens for welding operations. Many artists prefer darker shades between 11 and 13 depending on the specific welding process. The Miller Digital Elite weld hood offers a larger viewing area that reduces neck strain during extended projects while providing reliable protection.
Essential protective equipment includes:
– Flame-resistant welding jacket or apron
– Heavy-duty welding gloves
– Sturdy boots that protect against falling objects
– Jeans or specialized welding pants for lower body protection
– Proper ventilation system to disperse harmful fumes
Critical Warning: Never skip protective gear to “just do a quick weld”—permanent eye damage from arc flash can occur in seconds, and clothing burns from stray sparks happen before you can react.
Designing Your First Metal Art Project Step-by-Step
Choosing Beginner-Friendly Metal Art Projects That Won’t Frustrate You
Selecting your first project determines whether you’ll stay motivated or abandon metal art in frustration. Beginners should start with simple designs such as small sculptures, basic wall art pieces, or uncomplicated functional items like candle holders, avoiding complex projects that require advanced techniques. Mild steel offers ease of welding and relatively low cost, making it ideal for beginners learning techniques without the frustration that more challenging materials cause.
Create a detailed sketch of your intended project with precise measurements before cutting any metal—this transforms abstract ideas into concrete guidance for construction. Effective planning identifies required materials, necessary equipment, and potential challenges before they arise. Pro Tip: Start with geometric designs rather than organic shapes—straight lines and right angles are significantly easier for beginners to execute successfully.
Mastering Welding Techniques That Make Metal Art Stand Out
How to Create Visible Weld Lines That Enhance Your Artwork
Welding art pieces differ from structural welding in their tolerance for visible weld beads, which often become intentional design elements. Artists may choose to emphasize rather than conceal weld lines, creating compositions where the welding process itself contributes to the visual vocabulary of the piece. Regardless of aesthetic approach, welds must provide adequate strength to maintain structural integrity over time.
Develop proficiency in multiple welding positions to expand your creative possibilities—vertical and overhead welding present additional challenges that demand modified techniques. Building these skills requires dedicated practice in each position, treating them as distinct capabilities rather than assuming flat position proficiency transfers automatically. Practice on scrap metal with similar thickness to your project materials before attempting final welds—this builds muscle memory and develops understanding of how different settings affect results.
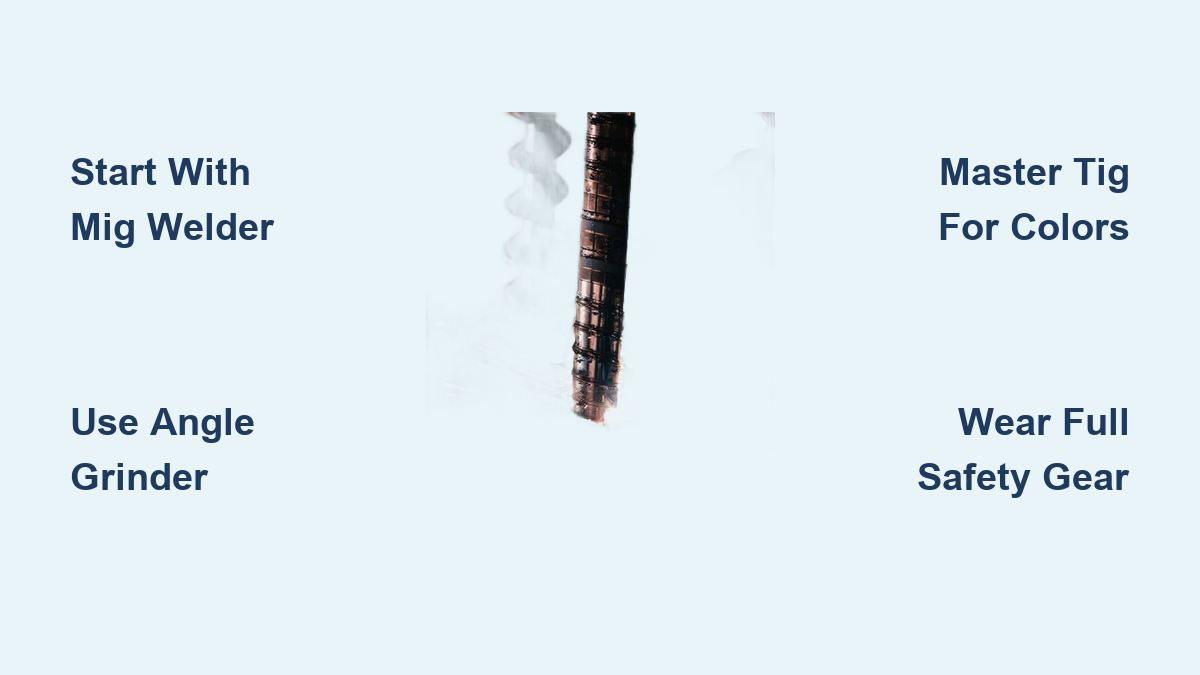
Creating Colorful Weld Effects in Stainless Steel Art
The Exact Temperature Settings for Blue, Purple, and Green Weld Colors
Colorful welds represent one of the most distinctive visual elements in metal art, transforming functional joinery into expressive features. The colors appear due to heat levels causing oxidation of the metal surface during welding. As heat increases, a predictable sequence develops: yellow at lower temperatures, followed by purple, blue, green, and finally brown or gray.
TIG welding provides the precise heat control necessary for intentional color development, with foot pedal control enabling real-time heat adjustment. Machines with built-in pulse functionality offer additional control options for creating distinctive color effects. For specific colors:
– Yellow/Gold: Lowest heat settings (60-80 amps)
– Purple: Medium-low heat (80-100 amps)
– Blue: Medium heat (100-120 amps)
– Green: Medium-high heat (120-140 amps)
Critical Tip: Allow welded pieces to cool slowly and naturally—rapid cooling can negate the careful heat management that produced your desired colors.
Professional Finishing Techniques for Polished Metal Art
How to Preserve Colorful Welds During Final Surface Treatment

Post-weld finishing transforms rough assemblies into polished artistic works through grinding, cleaning, and surface treatment. Grinders remove weld spatter and smooth edges while different grinding wheels produce varying surface finishes—from mirror-polished reflections to textured industrial appearances. The finishing process often reveals weld defects requiring repair before proceeding.
Surface treatments enhance appearance while providing corrosion resistance for pieces facing environmental exposure. Artists pursuing colorful weld aesthetics must apply finishing protocols that preserve oxidation colors. Clear coat finishes protect painted surfaces while allowing underlying metalwork to remain visible, providing durability suitable for indoor display. For outdoor pieces, galvanizing or specialized marine-grade finishes offer the longest protection against weather exposure.
Turning Your Metal Art Welding Hobby into a Profitable Business
Pricing Strategies That Actually Cover Your Time and Materials
Determining appropriate prices for metal art presents significant challenges for new artists, many of whom undervalue their work by failing to account for true costs. Effective pricing considers material costs, consumables, equipment depreciation, electricity, and most importantly—your time investment. Artists must recognize they operate as businesses when selling work, requiring accounting for all expenses involved in maintaining their creative practice.
Price points affect where art can be successfully sold—smaller craft shows typically perform best for items priced between $10-$65, while higher-priced pieces often require art galleries or online sales. Pro Tip: Track every minute spent on a project—many beginners underestimate time investment by 50% or more, leading to unsustainable pricing that cannot support their practice long-term.
Leave a Reply