T joints form the backbone of countless welding projects across fabrication shops and DIY workshops. When you need to attach a vertical piece to the face of a horizontal base—creating that distinctive L-shape—mastering T joint welding becomes essential for structural integrity. Unlike butt joints where surfaces align edge-to-edge, T joints demand specialized techniques to achieve proper penetration and avoid common failures. Whether you’re fabricating furniture frames, automotive components, or industrial equipment, understanding how to weld T joints correctly determines whether your project stands the test of time or fails under stress.
This comprehensive guide delivers actionable techniques for creating strong, reliable T joint welds regardless of your skill level. You’ll discover how to select the optimal welding process for your specific materials, prepare surfaces properly, execute precise welding techniques, and verify weld quality—all while avoiding the most common mistakes that compromise joint strength.
Select the Optimal Welding Process for Your T Joint

Choosing the right welding method forms the critical foundation for successful T joint fabrication. Your material type, thickness, equipment availability, and desired finish quality all influence which process will deliver the best results for your specific application.
MIG Welding T Joints Effectively
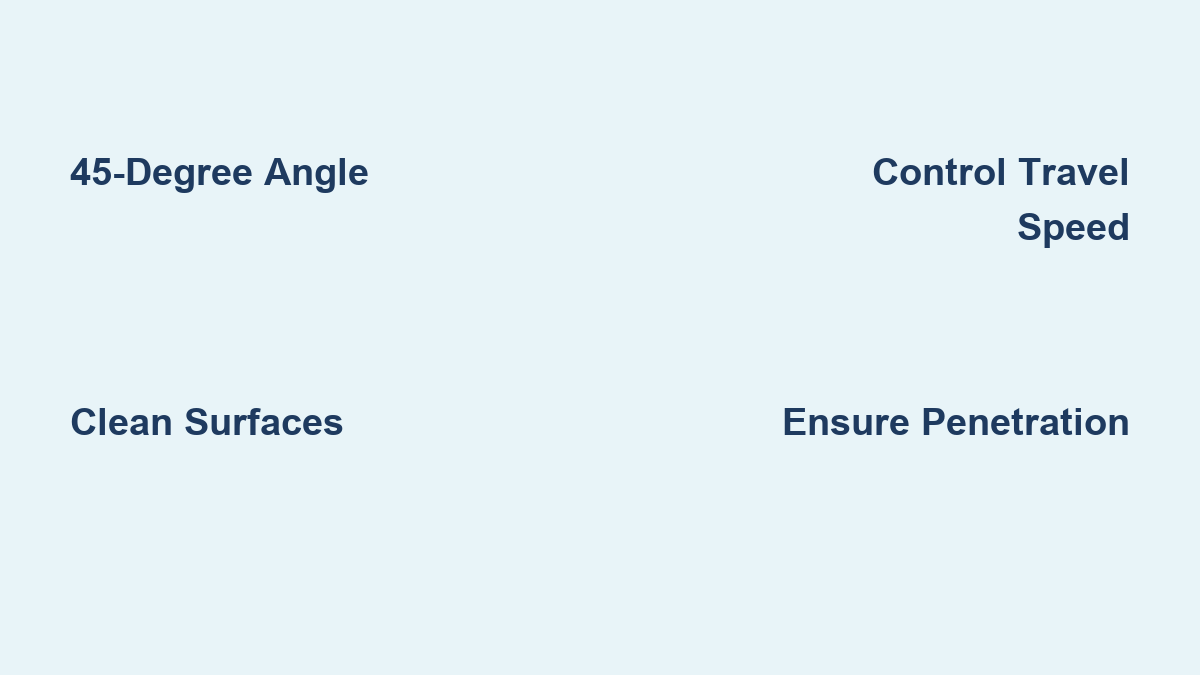
MIG welding stands as the most accessible option for T joints due to its forgiving nature and continuous wire feed. When welding T joints with MIG, position your torch at a precise 45-degree angle pointing directly into the joint corner where the vertical and horizontal pieces meet. This angle allows the weld pool to penetrate both surfaces equally while maintaining consistent travel speed.
For materials between 14 gauge and 1/4 inch thick, maintain a steady push technique with moderate travel speed. Moving too quickly creates shallow penetration that fails to bond properly with both surfaces, while moving too slowly concentrates excessive heat that causes burn-through on the horizontal base. Adjust your voltage and wire speed to produce a bead approximately 1/3 to 1/2 the diameter of your contact tip for optimal results.
Achieve Precision with TIG Welding T Joints
TIG welding delivers superior control for thin materials and applications where appearance matters. When welding T joints with TIG, direct your torch at a 60 to 70-degree angle from the horizontal surface to manage heat distribution effectively. This steeper angle prevents excessive heat concentration in the corner where burn-through commonly occurs on thin materials.
For optimal results, consider using a pulsing current setting if your machine offers this feature. Pulsing alternates between high peak current for fusion and low background current that allows the base metal to cool slightly between cycles. This technique dramatically improves heat control, particularly when joining thin materials under 16 gauge where heat management proves most challenging.
Execute Reliable Stick Welding on T Joints
Stick welding remains valuable for outdoor projects and dirty or rusty materials where other processes struggle. When welding T joints with stick electrodes, maintain a 45-degree angle pointing into the joint corner but use a slightly shorter arc length than you would for flat surfaces. The shorter arc concentrates heat more effectively at the joint root where penetration matters most.
For the initial pass, employ a stringer bead technique—moving straight along the joint without weaving—to establish proper root fusion. Subsequent passes can incorporate a slight weave pattern to cover wider areas, but avoid excessive oscillation that creates a weak, convex bead profile with poor tie-in at the edges. Always chip away slag between passes to ensure clean fusion between layers.
Prepare Materials for Flawless T Joint Welds
Proper preparation separates successful welds from failed joints before you even strike your first arc. Many welding failures originate from inadequate preparation rather than poor technique during the actual welding process.
Clean Surfaces Thoroughly Before Welding
Contaminants like oil, grease, rust, paint, and mill scale create porosity and weak fusion in T joint welds. You must clean both the vertical face of the upright member and the top surface of the horizontal base where they meet. Begin with a wire brush dedicated to your material type—use stainless steel brushes for stainless applications and carbon steel brushes for carbon steel to prevent cross-contamination.
For heavy rust or paint, start with a grinding wheel or flap disc, then finish with wire brushing. Wipe all surfaces with acetone immediately before welding to remove any remaining oils. If working with galvanized steel, grind away the coating at least 2 inches from the joint area on both sides to prevent toxic zinc fume exposure during welding.
Achieve Perfect Fit-Up for Strong Joints
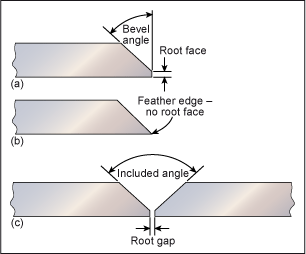
Gaps between your pieces create significant problems in T joint welding. The vertical member must sit flush against the horizontal base with minimal gap—less than 1/16 inch for most applications. Larger gaps require excessive heat to bridge, increasing burn-through risk while compromising penetration.
For thicker materials over 1/4 inch, consider beveling the vertical member’s edge that meets the horizontal surface. A 30-degree bevel angle with a small 1/8-inch flat at the root provides a channel for the weld pool to flow into, ensuring deeper penetration while preventing burn-through during the first pass.
Secure Pieces with Strategic Tack Welds
Apply tack welds at regular intervals before completing your main weld to maintain proper alignment. Place tacks at each end of the joint and at regular intervals along its length—typically every 6-12 inches depending on material thickness. These small welds prevent the joint from opening or shifting as you lay your main beads.
Make tacks slightly larger than your planned weld passes to prevent them from burning through when you weld over them. After placing all tacks, chip or grind the slag from each tack and re-brush the area to remove any contamination introduced during tacking.
Master Essential T Joint Welding Techniques
With your materials prepared and process selected, focus on the specific techniques that produce strong, clean T joint welds with complete penetration.
Maintain Precise Torch or Electrode Angle
Angle control separates competent welders from exceptional ones. For T joints, maintain a consistent 45-degree angle pointing directly into the joint corner throughout the entire weld bead. This equal distribution of heat to both surfaces ensures proper fusion without concentrating excessive energy on either piece.
Resist the temptation to rotate your wrist as you weld, which commonly pushes heat toward the vertical piece while under-welding the horizontal base. Visualize a line extending from your torch directly into the joint corner and maintain that relationship from start to finish for consistent results.
Control Travel Speed for Optimal Bead Formation
Travel speed directly controls bead width, penetration depth, and overall weld quality. The ideal speed produces a bead approximately 1/3 to 1/2 the diameter of your electrode or contact tip. A narrow, tall bead indicates excessive travel speed; an excessively wide, flat bead suggests moving too slowly.
For T joints, maintain a steady pace that allows the weld pool to wet into both surfaces evenly. Listen for a consistent, steady arc sound—a humming tone indicates proper parameters. Erratic or sputtering sounds signal improper travel speed that compromises weld quality.
Ensure Complete Penetration for Structural Integrity
Penetration depth determines joint strength in T configurations. You need the weld to fuse with both the vertical face and horizontal surface to develop full strength. Insufficient penetration creates a weak joint that may fail under load despite appearing adequate on the surface.
Verify penetration by examining the root of the weld after completion. For materials up to 1/4 inch in thickness, you should see evidence of fusion on both surfaces at the joint corner. If the weld sits on top without bonding into the joint, increase heat input by raising amperage, reducing travel speed, or adjusting your angle to point more directly into the corner.
Avoid Common T Joint Welding Mistakes
Understanding frequent errors helps you prevent them in your own work, saving time and materials while improving quality.
Prevent Burn-Through on Thin Materials
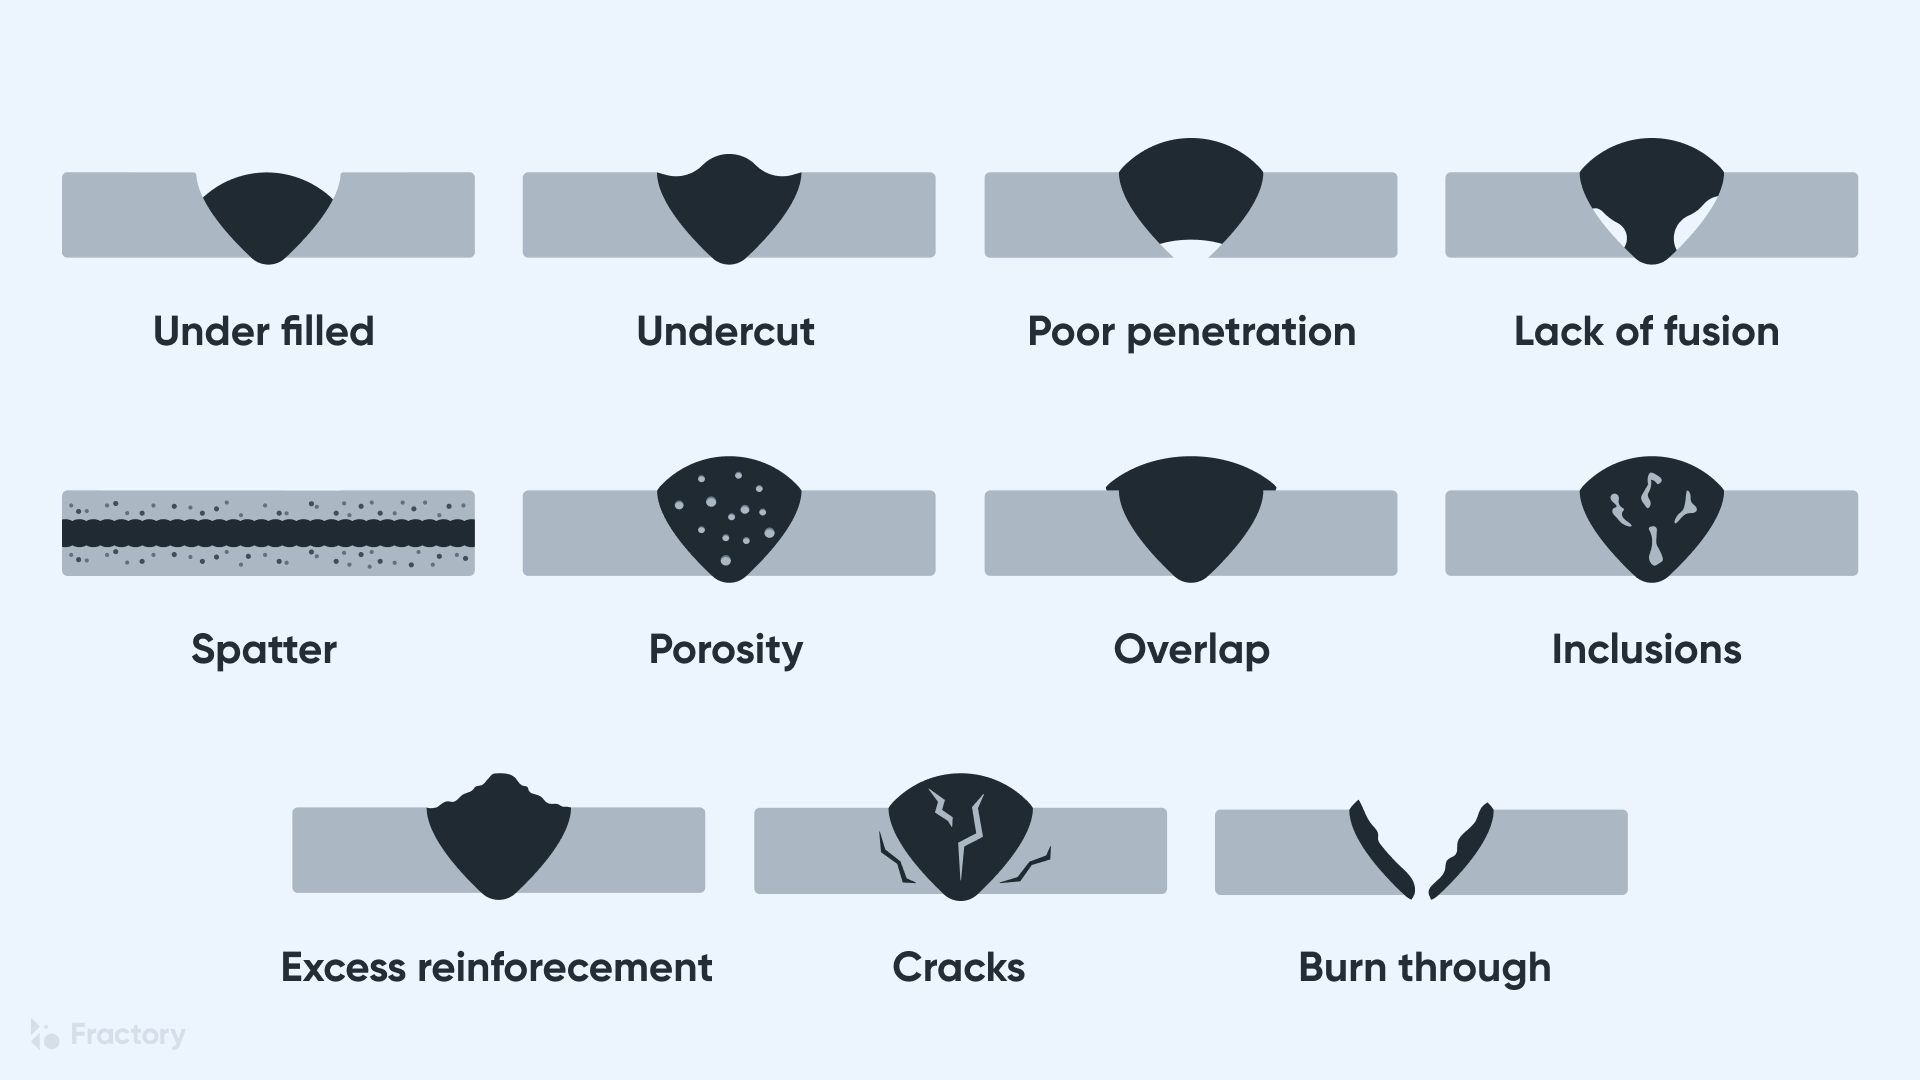
Thin sheet metal presents the biggest challenge for T joint welding. The horizontal base conducts heat away rapidly, while the vertical piece’s edge concentrates arc heat in a small area—creating perfect conditions for burn-through.
Prevent this by using the lowest amperage that provides adequate penetration, moving steadily without pausing, and considering a copper backing bar beneath the horizontal piece to conduct additional heat away. For extremely thin materials below 18 gauge, significantly reduce wire speed or electrode size while increasing travel speed proportionally.
Eliminate Lack of Fusion and Penetration Issues
When the weld fails to bond properly with one or both surfaces, the joint lacks strength despite appearing adequate. This problem typically stems from insufficient heat, contamination, or improper angle. Cold welds—those sitting on the surface without penetrating—often result from moving too fast, using too small an electrode, or pointing the torch away from the joint corner.
If you consistently experience fusion problems despite proper technique, increase amperage or voltage by 10-15% and verify your gas flow rate. Re-clean the joint area if problems persist, as contamination can cause fusion issues even with adequate heat.
Stop Undercutting Along Joint Edges
Undercut appears as a groove melted into the base metal along the edge of your weld bead, weakening the joint by reducing cross-sectional material. This defect results from excessive heat concentrated at the edge, improper angle, or excessive arc length.
Prevent undercut by reducing amperage slightly and ensuring your angle distributes heat evenly between both surfaces. Maintaining proper arc length—keeping the electrode or torch close to the work without touching—prevents the arc from digging into the edges and creating this common defect.
Verify Weld Quality and Maintain Safety
Completing the weld marks only the beginning of ensuring structural integrity. Proper inspection confirms your work meets requirements while safety protocols protect you throughout the process.
Conduct Thorough Visual Inspection
Before mechanical testing, perform a detailed visual inspection. A sound T joint weld shows uniform bead width, smooth transitions at the ends, and complete fusion at the edges. The weld crown should be slightly convex without crater cracks, excessive spatter, or visible porosity.
Examine the toe of the weld—the junction between weld metal and base metal—looking for gaps, sharp angles, or lack of fusion. Run your gloved fingertip along the toe to feel for undercut or irregularities that visual inspection might miss.
Prioritize Essential Safety Measures
Always wear appropriate PPE when welding T joints: a welding helmet with correct shade lens (typically shade 8-12), process-specific gloves, and flame-resistant clothing covering all exposed skin. Steel-toed leather boots provide essential foot protection—synthetic materials can melt and cause severe burns.
Ensure proper ventilation to carry fumes away from your breathing zone. Never weld in confined spaces without adequate ventilation and monitoring, especially when working with galvanized steel or painted surfaces that produce toxic fumes requiring enhanced protection.
Summary
Mastering T joint welding requires understanding your process, preparing materials properly, and applying consistent technique. The critical 45-degree angle pointing into the joint corner, combined with controlled travel speed and adequate heat input, produces the complete penetration that structural welds demand. By avoiding common mistakes like burn-through, lack of fusion, and undercut, and verifying quality through proper inspection, you ensure your T joint welds deliver the strength your projects require.
Practice on scrap material before tackling critical work, and adjust parameters for different material thicknesses. Each joint presents unique challenges, but the fundamental principles of clean metal, proper fit-up, correct angle, consistent speed, and adequate penetration build the skills that make you a proficient welder capable of producing T joints that meet any standard.
Leave a Reply