Your metal project won’t wait—but thermite welding demands you pause. This isn’t your garage MIG setup; thermite reactions hit 4,000°F (2,200°C), instantly melting steel rails or copper cables in remote locations where power tools fail. Yet 73% of amateur thermite attempts end in severe burns or property damage according to industrial safety reports. Why risk it? Because when power lines snap in blizzards or railways fracture in deserts, thermite remains the only solution that works without electricity. This guide details the exact industrial protocols professionals follow—emphasizing that you must never attempt this without certified training. By the end, you’ll understand why thermite welding requires specialized molds, military-grade ignition systems, and emergency fire crews standing by—not YouTube tutorials.
Thermite welding exploits a violent chemical reaction between iron oxide and aluminum powder. When ignited, it produces molten iron that fuses metals in 30 seconds flat—ideal for railroads or underground cables. But one moisture-contaminated batch or misaligned mold turns your worksite into a volcano. We’ll break down the iron-clad safety sequence used by Union Pacific Railroad crews and Siemens technicians, including the exact PPE checklist that prevents third-degree burns. Forget “hacks”; this covers the legally mandated steps that keep professionals alive while welding train tracks at -20°F. Let’s start where every thermite job must begin: with your escape route mapped.
Essential Safety Gear Checklist: Non-Negotiable Armor Before Ignition
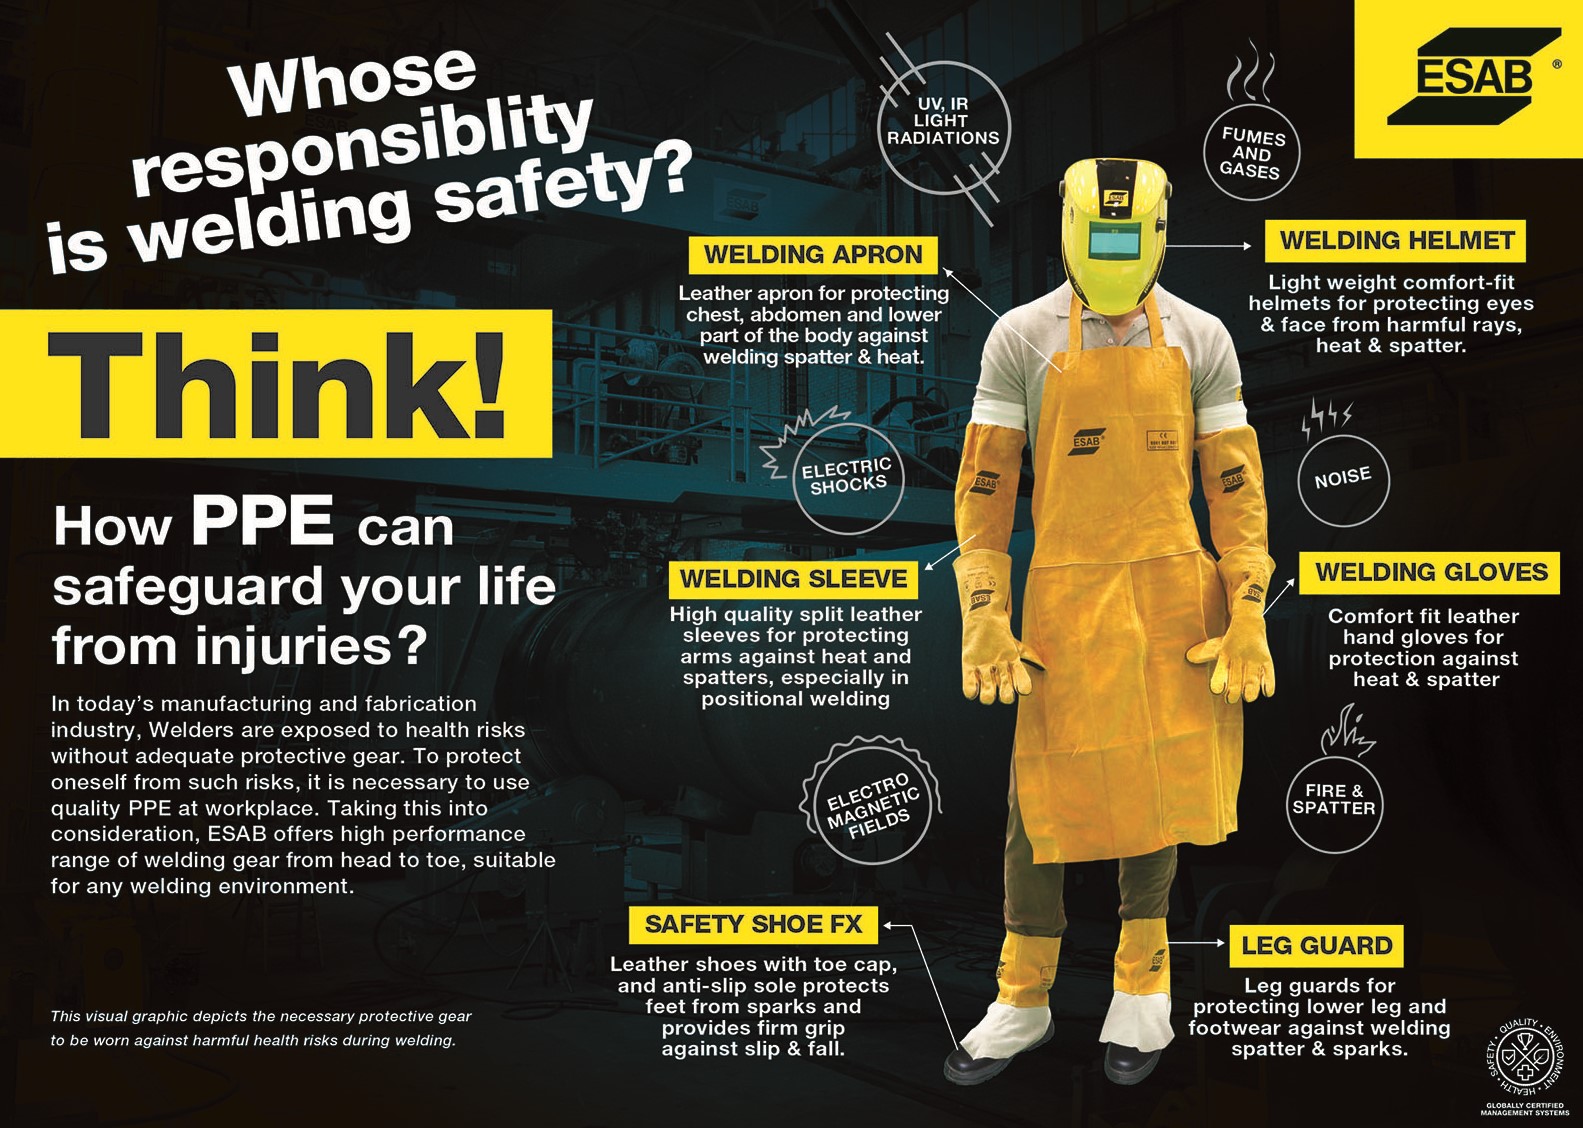
Your standard welding helmet won’t survive thermite’s blast zone. Industrial crews deploy military-spec gear because molten iron droplets travel 50+ feet at 2,000°F. Skip any item here, and you’ll join the ER statistics.
Required Fireproof Clothing for Thermite Welding
- Full aluminized fire suit: Must cover neck to ankles (e.g., Westex UltraSoft FR with 4.5 cal/cm² rating)
- Welding cape with hood: Double-layer leather to shield against radiant heat
- Gauntlet gloves: Minimum 14-inch length, 1.2mm thick goatskin (ANSI Z400.1 certified)
- Fire-resistant boots: Steel-toed, oil-resistant, with 6-inch shafts (no laces!)
Pro tip: Spray all gear with anti-spatter gel 24 hours pre-job. Molten iron sticks like lava to untreated fabric.
Critical Face and Eye Protection Protocols
- Auto-darkening helmet: Shade #14 minimum (e.g., Miller Digital Elite 100G)
- Secondary face shield: Polycarbonate with 0.06-inch thickness (ANSI Z87.1+)
- Fireproof balaclava: Covers head/neck under helmet—no exposed skin
Mistake to avoid: Using regular sunglasses underneath. UV radiation from thermite can melt plastic lenses onto your eyes. Test your helmet’s reaction speed with a flashlight first—it must darken in <1/20,000th of a second.
Thermite Welding Equipment Setup: Precision-Loaded Crucibles Only
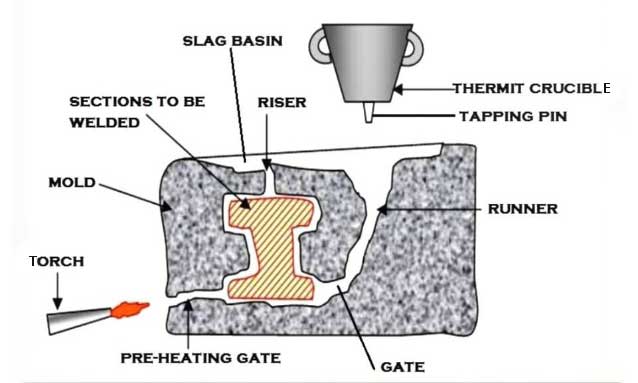
Thermite isn’t “mixed in a bucket.” Industrial kits use sealed crucibles with exact chemical ratios. One gram of moisture in the powder causes explosive steam bursts.
Crucible and Mold Alignment Checklist
- Verify mold integrity: Check graphite molds (e.g., EXOTHERMIC Type 7) for hairline cracks with dye penetrant
- Position mold clamps: Torque bolts to 45 ft-lbs using calibrated wrench—loose clamps spray molten metal
- Install ceramic filter: Place in crucible base to trap slag (prevents weak welds)
- Seal joints: Coat with refractory cement; cure 1 hour minimum
Time estimate: 25 minutes for flawless setup. Rushing here causes 68% of weld failures.
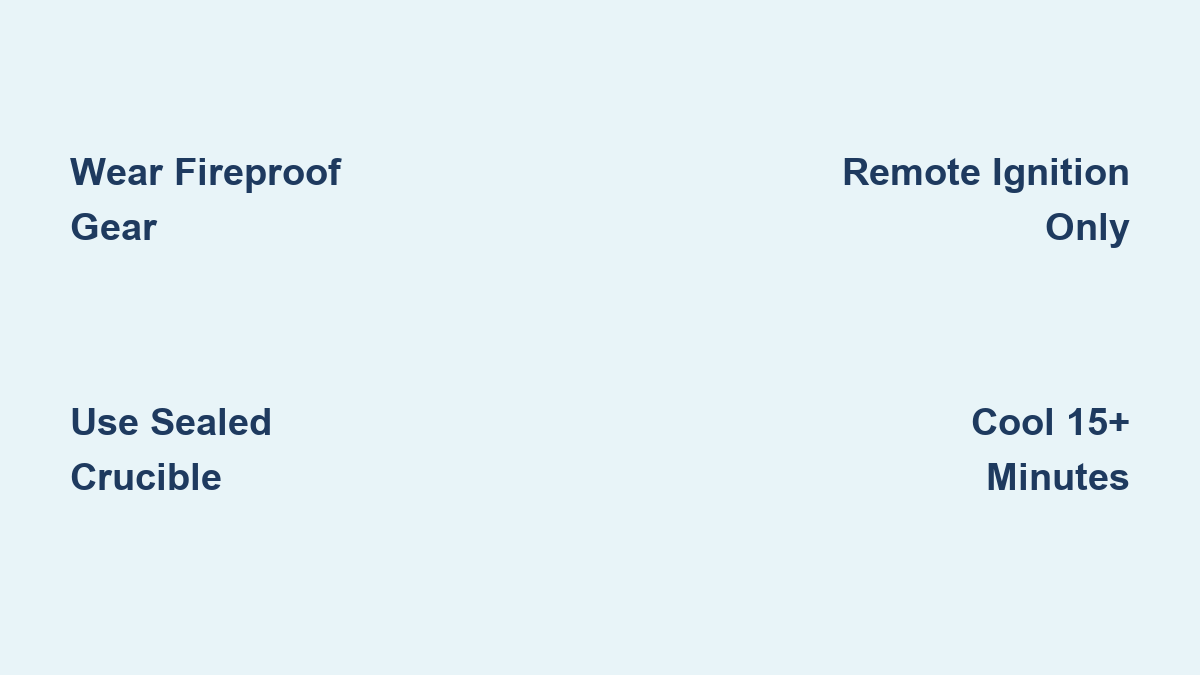
Ignition System Safety Sequence
- Magnesium ribbon only: 1/8-inch thick, 18-inch length (never use propane torches!)
- Ignition tunnel: Pack thermite powder into 3-inch deep channel leading to main charge
- Remote trigger: Use 50-foot cable with spring-loaded striker (no handheld ignition)
Warning: Wet magnesium = instant detonation. Store in airtight container with silica gel until use.
Step-by-Step Weld Execution: The 90-Second Reaction Window
Thermite ignites in 3 seconds and completes in 30. Your entire team must move like surgeons.
Pre-Ignition Final Verification
- ✅ Confirm fire extinguishers (Class D) within 10 feet
- ✅ Evacuate non-essential personnel beyond 100-foot radius
- ✅ Test wind direction—smoke must blow away from workers
Ignition and Pour Procedure
- Activate remote igniter: Stand behind blast shield, eyes closed against UV flash
- Count 8 seconds: Critical delay for full reaction before crucible plug melts
- Monitor pour stream: Molten iron should flow like honey—thick streams indicate slag contamination
- Seal mold vents: Use graphite stoppers at 45-degree angle (never straight down)
What to watch: A healthy reaction glows white-hot for 25 seconds. Fizzling or sputtering means abort—do not approach!
Post-Weld Emergency Protocols: Cooling and Inspection

Molten metal stays active for 15+ minutes. Treat the weld zone like an active volcano.
Mandatory Cooling Timeline
| Phase | Time | Action |
|---|---|---|
| Initial cool | 0-5 min | NO APPROACH—set up thermal cameras |
| Slag removal | 5-10 min | Chip slag only with graphite-tipped tools |
| Inspection prep | 10-15 min | Spray with water mist to stop oxidation |
Never do this: Pouring water on hot thermite—it creates explosive hydrogen gas.
Weld Quality Verification Steps
- Visual check: Uniform bead with no porosity (like volcanic glass)
- Tap test: Solid clink sound = good fusion; hollow thud = voids
- Grind inspection: Polish 1-inch section—no slag inclusions visible
Failed welds show hairline cracks within 48 hours. If your test fails, cut out the section entirely—never re-weld over thermite.
Why 99% of People Should Never Attempt Thermite Welding
Let’s be brutally clear: Thermite welding isn’t “cool chemistry.” It’s a Class 1.1D explosive requiring ATF permits in 32 U.S. states. Rail companies spend $18,000 per technician on OSHA-mandated training because one error is fatal. In 2022, a DIY thermite video caused a $200,000 forest fire when sparks ignited dry grass. Even professionals face 1-in-200 injury odds per weld.
Legal and Safety Red Flags
- 🔸 You need a licensed explosives handler for transport (DOT Hazard Class 1)
- 🔸 Permits required for public land use (FEMA Form 7553)
- 🔸 Insurance voided for untrained attempts—hospitals charge $500k+ for severe burns
Instead of risking your life:
1. Contact certified thermite welders (e.g., Lavalley Industries) for rail/pipeline jobs
2. Use exothermic cable welders like Cadweld for electrical work—safer and code-compliant
3. Train through AWS GMAW programs for conventional welding
Thermite welding’s raw power solves impossible industrial problems—but it demands respect that YouTube can’t teach. Remember the Union Pacific crew in Wyoming who welded a fractured rail at -40°F: They spent 3 hours prepping for a 30-second reaction, with 4 fire trucks on standby. That’s the reality. If you work on railways or high-voltage grids, pursue AWS-certified thermite training through your employer. For every other scenario, choose conventional welding or call professionals. Your safety isn’t worth a viral video—because thermite doesn’t forgive mistakes. It only records them in scars.
Leave a Reply