A flickering display, a lens that won’t clear after welding, or sluggish darkening—these aren’t signs your auto-darkening welding helmet is broken. More often than not, the culprit is a dying battery. Changing battery in welding helmet is a quick, inexpensive fix that can restore full function in minutes and save you from replacing a $200+ piece of safety gear. Whether you’re using a premium Miller, 3M Speedglas, Lincoln, Viking 3350, or a budget Harbor Freight model, this guide walks you through every step—from identifying the correct battery to modifying hard-to-service designs for easier maintenance.
Most welders assume solar panels recharge the battery, but that’s a myth. The small panels on your helmet only detect arc light—they don’t charge the battery. That means when the CR2450, CR2032, or AAA cells inside wear out, performance drops fast. This guide cuts through the confusion, gives you model-specific instructions, and shows you how to avoid common pitfalls like incorrect polarity, damaged contacts, or cracked housings. You’ll also learn how to upgrade soldered systems for tool-free battery swaps and extend your helmet’s lifespan by years.
Find Your Helmet’s Battery Type
Using the wrong battery can cause poor performance or even damage your helmet’s electronics. Always verify the correct type before buying replacements.
Common 3V Lithium Coin Cells
The CR2450 is the most widely used battery across high-end helmets like Miller Digital Performance, Lincoln Electric, and Viking 3350. It delivers 3 volts and fits into a spring-loaded tray, making replacement simple. The CR2032 is smaller and found in select 3M Speedglas 9100XXi models. Never substitute one for the other—they differ in size and capacity.
✅ Pro Tip: Check the label inside the battery compartment or consult your manual. Look for printed specs like “3V CR2450” near the battery holder.
Alkaline AAA Batteries (Speedglas 9002)
Some helmets, like the Speedglas 9002, use two AAA alkaline batteries (3V total). While easy to replace, alkaline cells degrade faster under heat and vibration. Avoid rechargeable NiMH AAAs—they output only 1.2V per cell (2.4V total), which may not provide enough voltage for consistent lens response.
Soldered and Specialized Power Systems
Budget helmets such as the Harbor Freight Chicago Electric #91214 use a CR2335 lithium cell that’s soldered directly to the circuit board. These require desoldering and modification for future access. The 3M Adflo PAPR system uses a 4.8V Li-ion rechargeable pack—replace the entire unit when it fails.
❗ Critical: Never assume battery compatibility. Using a CR2032 in a CR2450 slot may result in poor contact and intermittent operation.
Locate the Battery Compartment by Model
Access varies drastically between brands. Knowing where to look prevents unnecessary disassembly and damage.
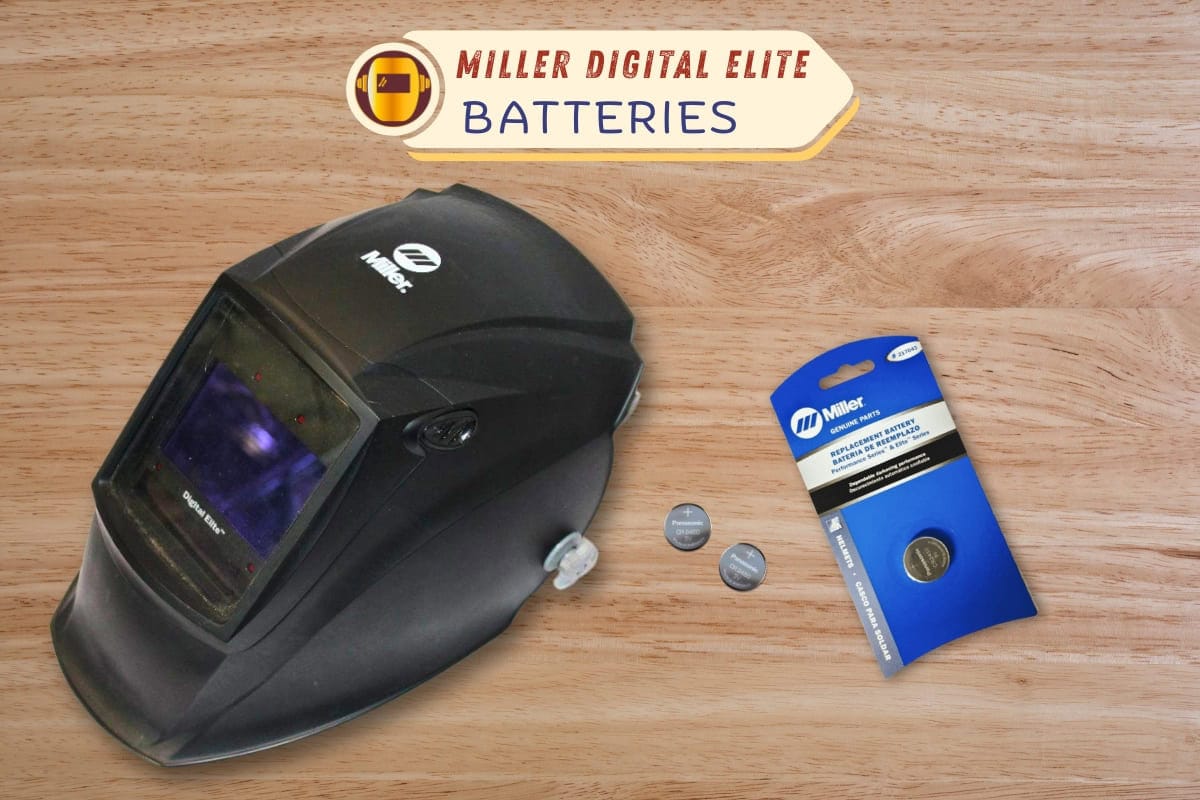
Miller Digital Performance Helmets
- Location: Bottom of the lens assembly
- Access: Remove front lens cover, extract lens and gasket, then slide out the battery tray
- Battery: Two CR2450 cells, positive side up
- Time: Under 2 minutes
Viking 3350
- Location: Upper rear housing
- Access: Flip helmet over, release two clips, remove grind mode button plug
- Battery: Single CR2450, clicks into place
- Tip: Ensure clips snap back securely—loose covers can let dust into sensors
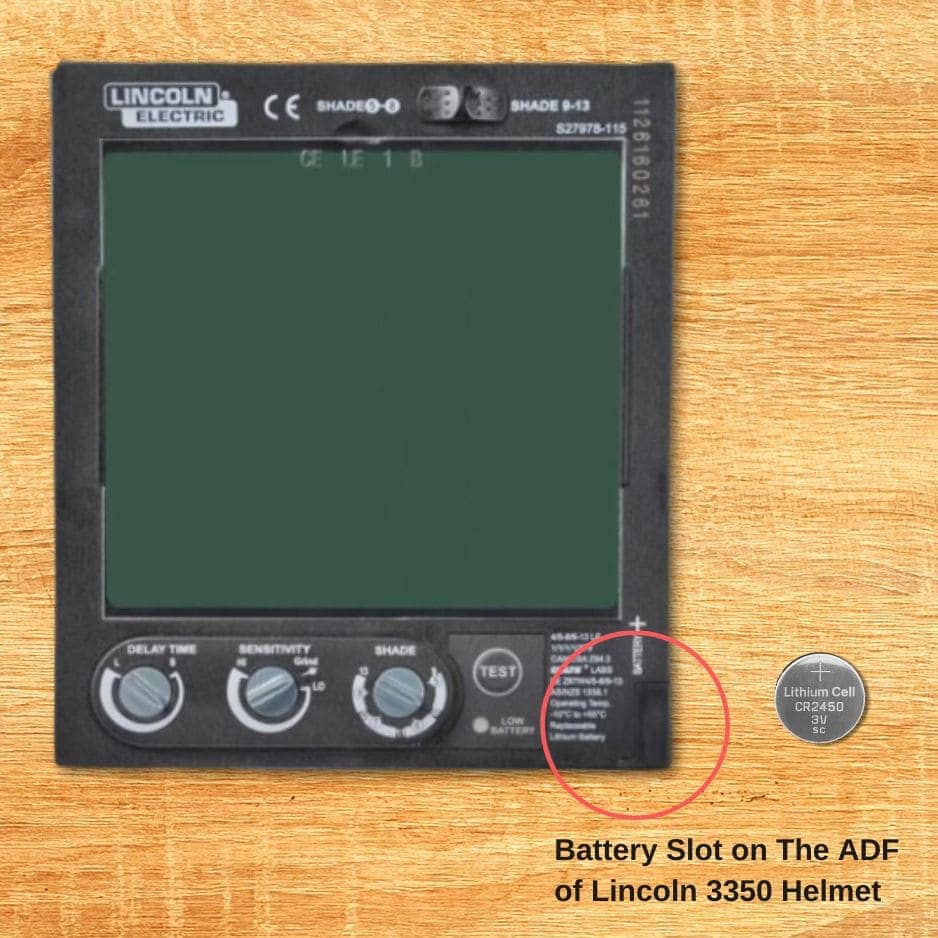
Lincoln Helmets
- Location: Bottom of the cartridge
- Access: Press side tabs to open shell, expose internal tray
- Battery: One or two CR2450 cells
- Replacement Speed: Takes less than a minute
Speedglas Access Methods
| Model | Access Method |
|---|---|
| G5-01 | Slide cover on headband in arrow direction |
| 9100XXi | Remove front cover with flathead tool, pry open holder |
| 9002 | Unscrew side cover with Phillips driver |
| Adflo | Press release button, slide Li-ion pack down |
Harbor Freight #91214 (Soldered Battery)
- Challenge: Case is glued shut; battery soldered to board
- Access: Pry open at cord entry point, separate clamshell housing
- Battery: CR2335, requires modification for reusable access
✅ Upgrade Insight: Installing a CR232 battery tray wired in series allows tool-free future replacements.
Open the Helmet Without Damaging It
Forcing open a sealed case can crack plastic and compromise safety. Use the right tools and technique.
Recommended Tools
- Plastic pry tools or guitar picks prevent scratches
- Small flathead screwdriver for clips
- Phillips #1 screwdriver for screw-fastened models
- Hairdryer to soften adhesive on glued cases
Avoid These Mistakes
- Don’t force clips—apply even pressure on both sides
- Work on a clean surface to avoid losing screws or small parts
- Label screws if multiple types are used
For adhesive-sealed models like Harbor Freight helmets, gently warm the seam with a hairdryer before prying. Reapply double-sided tape or 3M VHB tape when reassembling.
⚠️ Warning: Never use excessive force. A cracked housing may require full helmet replacement for safety compliance.
Remove and Replace the Battery
Follow these steps to ensure correct installation and avoid damaging internal components.
For Tray-Loaded Models (Most Common)
- Power off the helmet
- Slide out the old battery tray
- Remove battery—note orientation (positive side usually up)
- Clean contacts with a dry cloth or isopropyl alcohol
- Insert new battery with correct polarity
- Reinsert tray and secure cover
✅ Success Check: Lens darkens instantly under light and clears fully when light stops.
For Soldered Models (Harbor Freight, 500 Series)
- Desolder old battery using a low-heat iron
- Extend leads with insulated wire if original tabs are short
- Use wire wrapping instead of resoldering to avoid PCB damage
- Insulate connections with heat shrink tubing
- Route wires through a small notch in housing
- Secure battery with double-sided tape
💡 Pro Tip: Install a CR232 battery tray wired in series for 6V output—future replacements take seconds.
Install a Battery Tray on Harbor Freight Helmets
Modify your helmet to eliminate soldering on future changes.
Step-by-Step Upgrade
- Desolder old CR2335 battery from PCB
- Solder red wire to positive, black to negative
- Route wires through a cut channel
- Connect to CR232 tray wired in series (6V)
- Snap in CR2450 or CR2032 (ensure correct polarity)
- Secure tray with strong double-sided tape
- Reassemble housing, ensuring switch remains accessible
✅ Test Result: Output of 6.18V confirms stable power delivery
⚠️ Critical: Set the on/off switch to “on” before testing—many models rely on solar activation only when powered.
Clean and Inspect Electrical Contacts
Corroded or dirty contacts mimic battery failure symptoms.
What to Check
- Corrosion: White or green residue
- Oxidation: Dull metal surfaces
- Debris: Dust, metal shavings, moisture
Cleaning Process
- Remove battery
- Wipe contacts with microfiber cloth
- For buildup, use isopropyl alcohol and cotton swab
- Let dry completely before reinserting battery
✅ Prevention Tip: Apply a tiny drop of electrical contact cleaner to reduce future oxidation.
Test Helmet Functionality After Replacement
Never assume it works—test thoroughly before welding.
Functional Test Steps
- Power on helmet
- Shine bright light (flashlight or phone screen) at sensors
- Observe:
– Lens darkens instantly
– Returns to clear state when light stops
– No blinking lights or error indicators
Advanced Check (If Applicable)
- Adjust shade settings
- Test grind mode
- Verify digital display clarity
✅ Success Criteria: Immediate response, smooth transition, no lag or flickering
Troubleshoot Common Post-Replacement Issues

Even with a new battery, problems can occur.
| Issue | Cause | Fix |
|---|---|---|
| Helmet won’t power on | Incorrect polarity | Flip battery—positive side up |
| Intermittent operation | Dirty or loose contacts | Clean terminals, reseat battery |
| Short battery life | Off-brand or low-capacity cell | Use Panasonic CR2450 |
| Lens darkens but won’t clear | Weak power or PCB issue | Replace battery; if persists, consult technician |
❗ When to Stop: If issues continue after correct replacement, the lens or circuit board may be faulty—contact the manufacturer.
Extend Battery Life with Smart Habits
Maximize uptime and reduce replacements.
- Turn off when idle—some helmets draw parasitic current
- Store in cool, dry place—heat kills lithium cells
- Use high-quality batteries—Panasonic, Energizer, Duracell
- Replace proactively: Every 3–4 months (daily use), 12+ months (occasional)
💡 Pro Tip: Keep a spare CR2450 in your welding kit—swap it in seconds if performance drops.
Dispose of Batteries Safely and Comply with Safety Rules
Improper disposal risks environmental harm and safety violations.
Australian WHS Compliance
- PPE must be maintained in reliable condition
- Regular battery replacement ensures eye protection remains effective
- Failure to maintain may result in non-compliance during audits
Disposal Guidelines
- CR2450, CR2032: Recycle at battery bins (Bunnings, Officeworks, council facilities)
- Li-ion packs (Adflo): Take to e-waste collection points
- Never throw in household trash
✅ Best Practice: Store used batteries in a labeled container until disposal.
Recognize Early Signs of Battery Failure
Catch issues before they compromise safety.
Warning Signs
- Lens stays dark after arc
- Blinks twice, then unresponsive
- Low battery indicator lit
- Delayed or partial darkening
- Dim or flickering display
🛑 Safety Note: A helmet that fails to darken is more dangerous than one that won’t clear—replace the battery immediately.
Upgrade for Easier Future Maintenance
Future-proof your helmet with simple modifications.
- Add a battery tray for soldered models
- Replace weak screws with stronger machine screws
- Label modifications with battery type and install date
✅ Long-Term Benefit: Reduces downtime and extends helmet life by years.
Final Assembly and Calibration Check
Ensure everything works before welding.
Reassembly Steps
- Reinstall lens module into cradle
- Align shade knob to 13 (darkest) and fully clockwise
- Secure all covers and clips
- Reapply double-sided tape if used
- Test in sunlight with switch on
✅ Final Test: Lens should darken and clear smoothly with no delay.
Summary: Key Takeaways
Changing battery in welding helmet is a fast, essential maintenance task that restores performance and ensures safety.
- CR2450 is the most common battery—keep spares
- Solar panels do not charge batteries—they only detect arc light
- Soldered batteries (Harbor Freight) benefit from battery tray upgrades
- Always observe polarity—positive side up
- Clean contacts and test functionality after replacement
- Dispose of used batteries responsibly
Best Practices
- Replace batteries proactively
- Use high-quality cells
- Store helmet in moderate temperature
- Follow model-specific instructions
With proper care, even budget helmets can deliver years of safe, reliable service. A few minutes spent replacing a battery can save you $50–$300—and more importantly, protect your vision from hazardous welding exposure.